


ED/DF300 30” CCM330/430/530/630/830/1030 Nordic Style Lid Kit Installation Instructions
Publication Number: 620204732INS - 2 - © 2007, IMI Cornelius Inc.
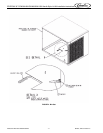
7. Install the wire form bracket, supplied with the bin stat kit (item 4), through the 5/8” diameter hole in
the bottom of the ice maker. Wrap the eye of the wireform over the stud near the hole to the end of
the wireform bracket and wrap the tube around the end of the bracket several times, insuring the
tube is secure.
NOTE: The bin stat must not interfere with the agitator rotation or in the path of ice falling from
the icemaker. If it interferes with the agitator or in the path of ice, bend the bracket out of the way.
8. For 22–inch wide Icemakers, locate the lid opening covers (2) item 11 as shown in Figure 1. Secure
the covers to the adapter lid by drilling .136 diameter holes into the lid. Use the covers as templates
to locate the mounting holes. Secure the covers with the # 10 sheet metal screws.
9. Locate the cleaning caution label (item 5) on the manual ice fill cover (item 4) as shown in Figure 1.
Place the manual fill cover in position over the flange on the lid assembly and the front access
hopper opening.
10. The unit is now ready for operation.
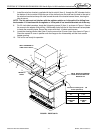
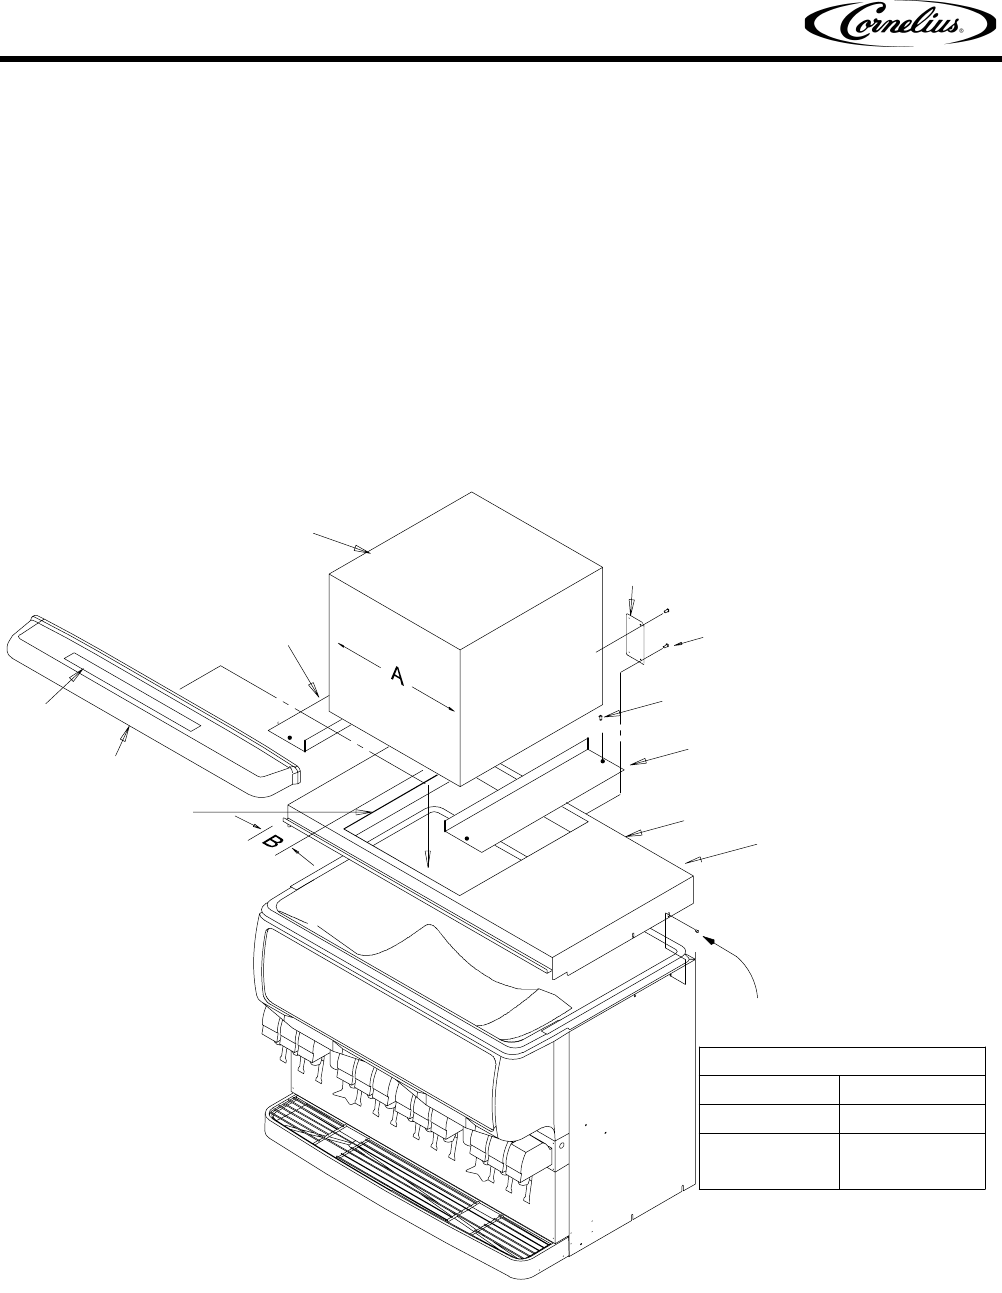
FIGURE 1. ED/DF300 Kit
SEAL ICE MAKER TO
ITEM 1 WITH ITEM 3
REFER TO
STEP 4
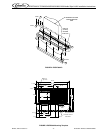
“B”
LOCATING
DIM.
ICEMAKER LOCATION
30”
22”
“A”
ICEMAKER
SIZE
7-1/4”
11-1/4
”
1
3
4
5
2
Use the four existing 8-32 3/8
screws (P/N 70171)
7
7
11
NOTE: BACK OF ICEMAKER
MUST BE FLUSH WITH THE
BACK OF LID
11