Installation Instructions for DF/ED250PRO Field Kit
Publication Number: 620919569 - 2 - © 2002, IMI Cornelius Inc.
age panel to the cabinet. The panel can now be pulled down to provide access for routing the
pressure switch wires. Secure the wiring with the plastic cable ties provided in the kit to avoid
“pinching” (cutting) the wire insulation when the panels are assembled to the cabinet.
7.Connect electrical power to the unit. Before opening the water and CO2 supply valves to
the beverage system, verify that the CO2 indicator light is on. The indicator light should go off
when the CO2 supply valve is opened.
8.Check for proper operation of the ice portion control system and the beverage system.
Refer to the operation instructional label located on the upper front panel and the owners
manual. The unit is now ready for operation.
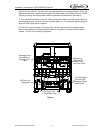
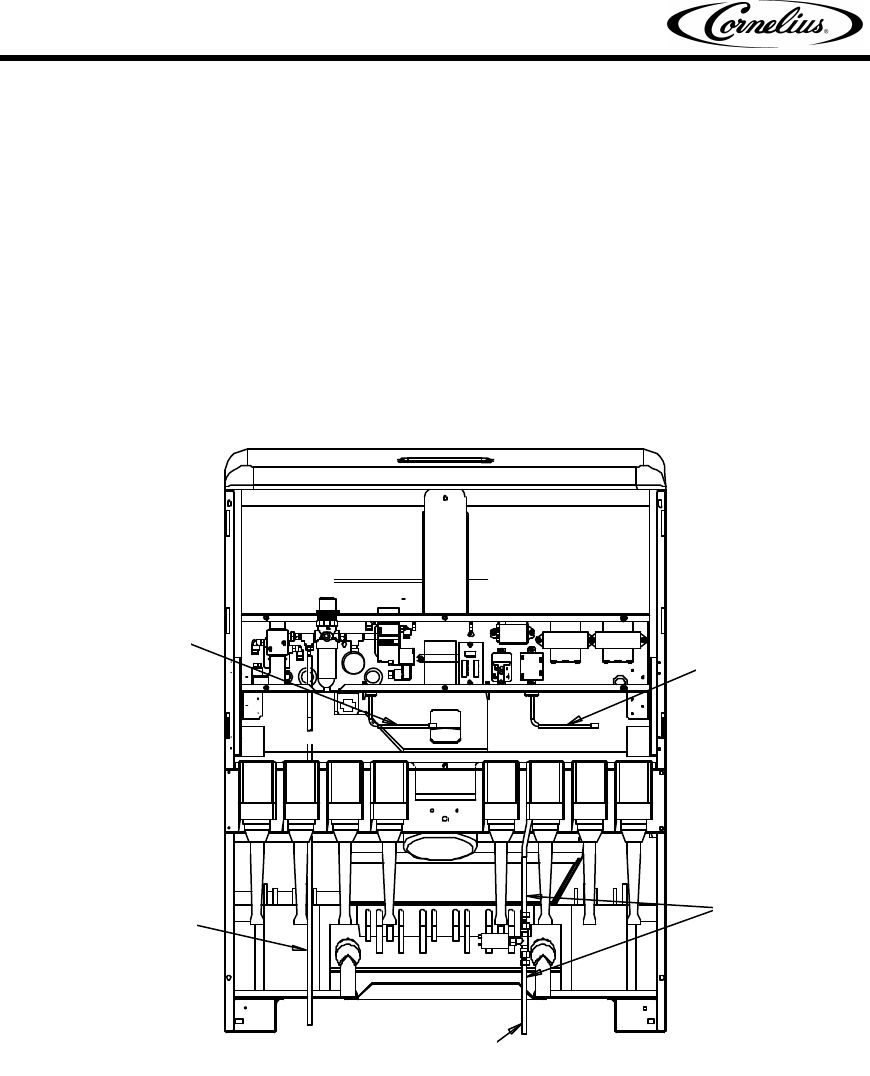
BEVERAGE VALVE & AUTO/MANUAL
HARNESS FROM E-BOX
MANUAL ICE
DISPENSE PB
SWITCH CORD
ASY FROM E-BOX
CO2 INLET
LINE TO REGULATOR
CO2 SUPPLY
LINE TO
CARBONATOR TANK
CUT CO2 SUPPLY
LINE. SEE CO2 PRESSURE SWITCH
INSTALL DETAIL
Manual Ice
Dispense PB
Switch Cord
Asy From E-Box
Cut CO2 Supply
Line See CO2
Pressure Switch
Install Detail
CO2 Supply Line
To Carbonator Tank
CO2 Inlet Line
To Regulator
Beverage Valve
& Auto/Manual
Harness From
E-Box
Figure 1.


