12
To light on the grill burner press in the bottom marked by the
symbol
1
, press deeply and turn the oven knob counter clock
wise till to the position (grill).
It is necessary to hold pressed in the knob for about 4
seconds in order to activate the flame failure device.
In case of lack of electricity light the oven or grill manuall, following
the instruction of “the oven knob paragraph”.
Oven light button (O)
This is marked by the symbol
8
and switchs on the light inside
the oven so that you can control the cooking without opening the
door.
Timer Knob (P)
In order to use the timer, it must be wound by turning the
"P" knob almost one complete turn in the clockwise direc-
tion . Then, turning it back , set the desired time by
lining up the number for the minutes with the mark on the
control panel.
Practical Advice on Using the Burners
To use the burners as efficiently as possible, some basic
guidelines should be followed:
• Use cookware that is the right size for each burner (see
table) in order to prevent the flame from spreading be-
yond the bottom of the cookware.
• Only use cookware with flat bottoms.
• As soon as the boiling point is reached, turn the knob to
the lowest setting.
• Always use lids with pots and pans.
Bruciatore ø Diametro recipienti (cm)
Rapido (R) 24 – 26
Semi Rapido (S) 16 – 20
Ausiliario (A) 10 – 14
N.B.: On models equipped with a reduction grid, the grid
should only be used with the auxiliary burner when
cookware with a diameter of less than 12 cm is used.
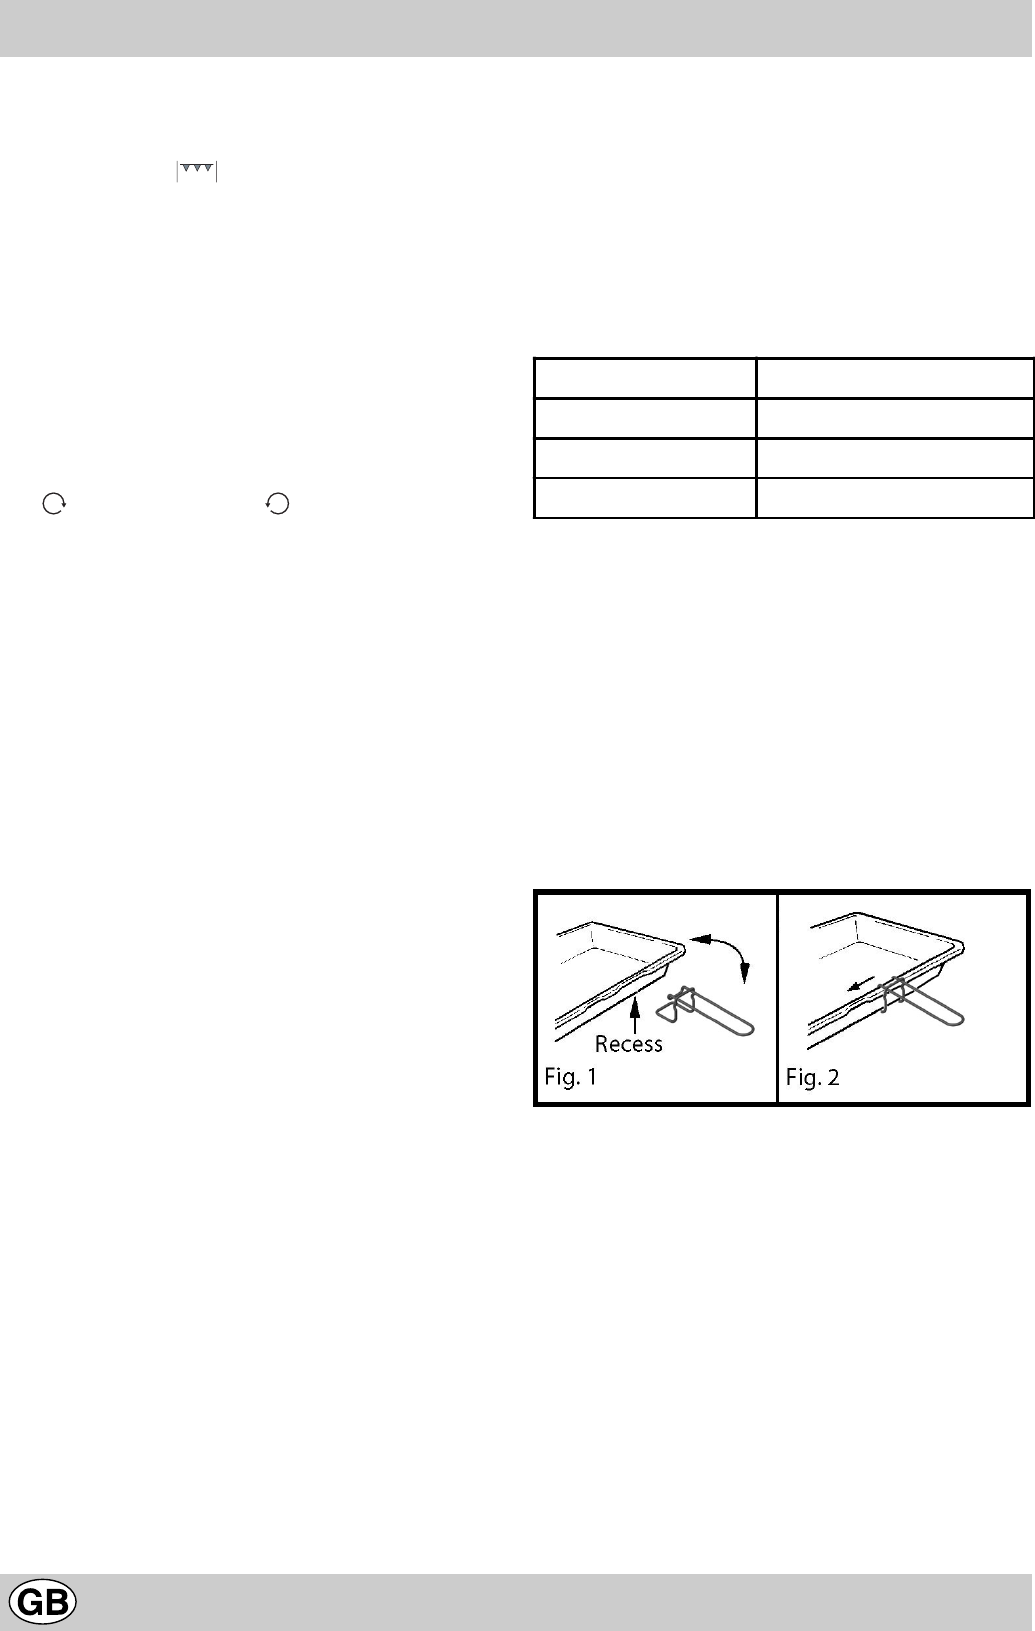
Using the grill pan kit
Position the handle on the grill pan so that it fits into the
small recess (fig. 1), tilt it upwards and slide it towards the
centre (fig. 2).
The food must be placed on the rack in the grill pan.
Position the grill pan on top of the oven rack. The best
results are achieved by placing the oven rack on the
uppermost shelves. Pouring a little water into the grill pan
will make the collection of grease particles more efficient
and prevent the formation of smoke.


