


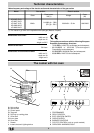

7
The different functions of the cooker
The various functions included in the cooker are selected
by operating the control devices located on the cooker
control panel. The cooker is equipped, with a mechanical
automatic programmer. Before operating the oven or the
grill, ensure that the symbol coincides with the pointer
on dial 4.
Attention: before using the oven and grill for the first time,
turn the oven on for approximately one half hour. Make
sure that the oven is empty, the thermostat on high, the
door open, and the room properly ventilated. The odor
which can be detected at times is due to the evaporation
off the substances used to protect the oven and the grill
during the period between the and installation of the
appliance.
Attention: Only use the bottom shelf of the oven when
using the rotisserie to cook (where present). For all other
types of cooking, never use the bottom shelf and never
place anything on the bottom of the oven when it is in
operation because this could damage the enamel. Always
place your cookware (dishes, aluminium foil, etc. etc.) on
the grate provided with the appliance inserted especially
along the oven guides.
The oven knob (5)
This knob is used to select the different functions of the
oven and choose the right cooking temperature for the
food to be prepared in the oven among the temperatures
shown on the knob (from 70°C to 250°C). By turning the
knob clockwise the oven lamp lights up and the forced
ventilation inside the oven comes on; when knob is set at
symbol foods are quickly defrozen with no alteration
of their protein content; when the knob is turned further,
the heating elements comes on and you may choose,
among the full range of values shown, the most ideal tem-
perature for the food you are cooking. To do so, match the
desired temperature value shown on the panel.
70 150 200 250
This temperature is reached automatically and kept
constant by the knob-controlled thermostat. The fan oven,
which reduces preheating time by an average of 40%,
permits energy saving of 30% in the preheating phase.
Maximum economy is obtained, however, when
cooking at the same time on several schelves (up to
3) greater amounts of food of the same type or even
different types of food whit no mixing of flavours and
smell.
Grill position G
Turning the oven knob till to this position, the oven light
turns on, so does the infra-red ray grill. The rather high
and direct temperature of the grill permits browning the
outside of meats immediately thus keeping in the juices
and assuring tenderness.
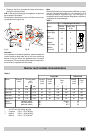
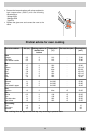
Use of the grill
The table shows the temperatures, cooking times and
positions recommended for obtaining the best cooking
results. The variable temperature control (2) will provide
varyng grill temperature when rotated from “6” to “1” and
may be adjusted to vary the level of heat at any time during
the grilling operation. Position 1 corresponds to minimum
power, position 6 corresponds to maximum power. On 0
position the grill does not operate.
To operate the grill follow the procedure outlined below
• Turn the oven control knob (5) clockwise until the grilling
symbol is G. The element is now on.
• The variable grill control can now be operated to select
the required heat.
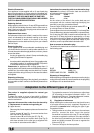
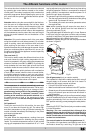
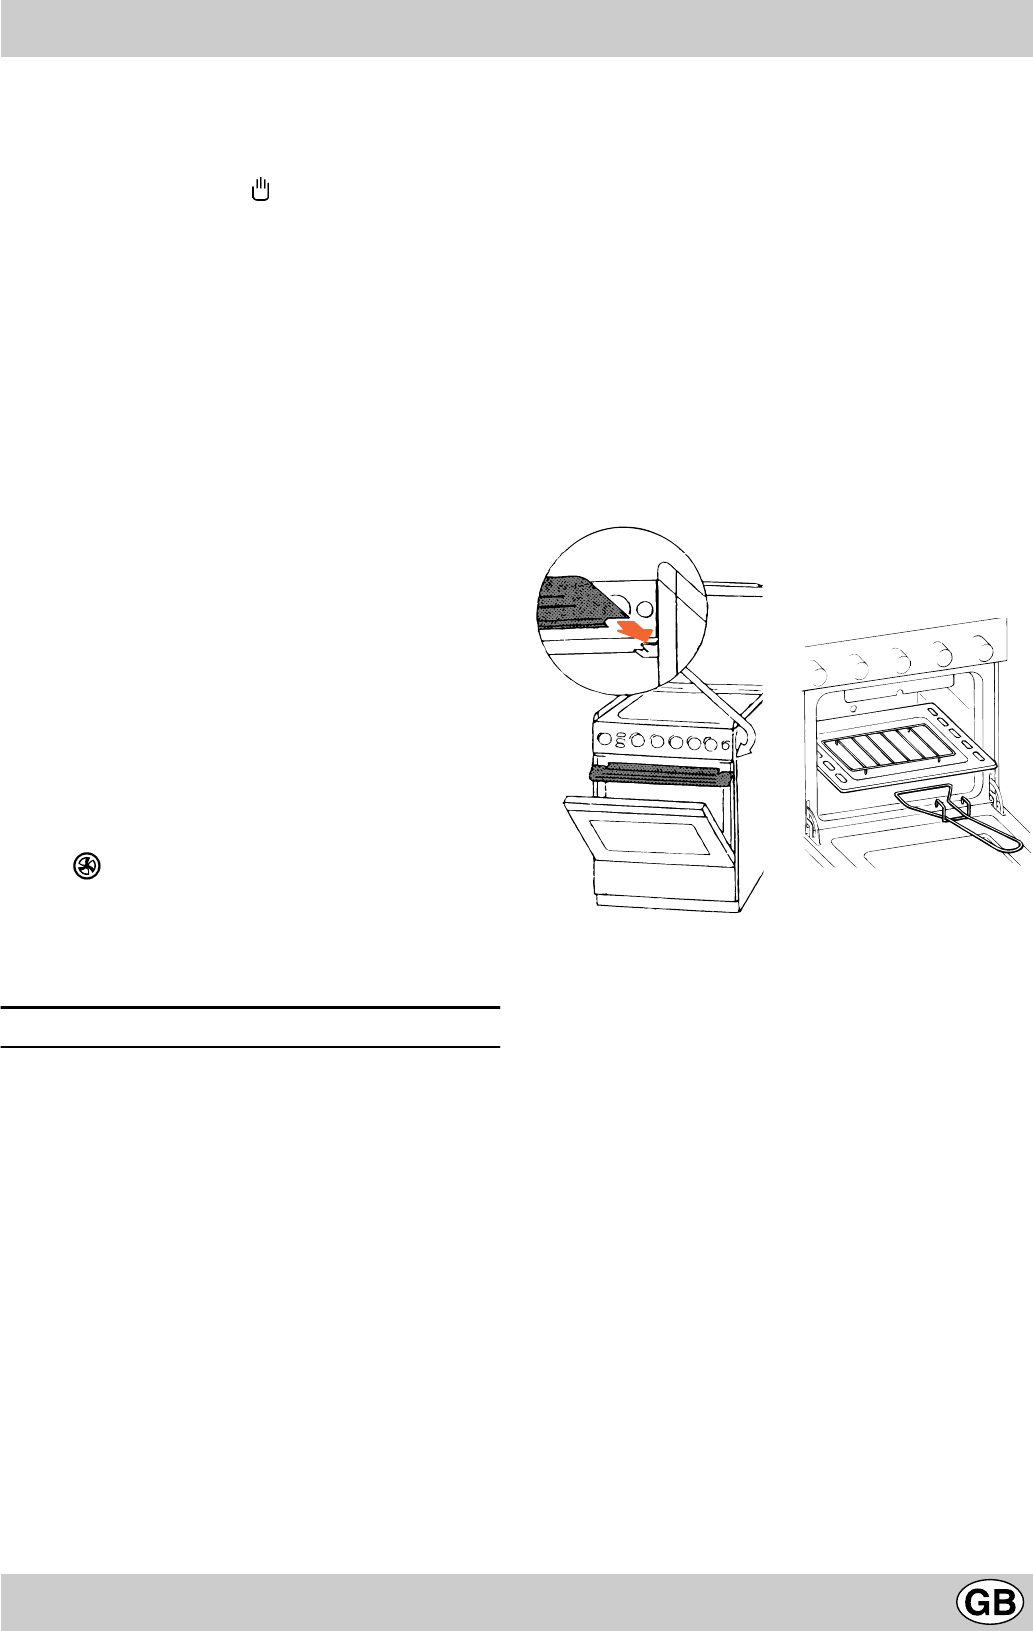
Note: whilst operating the grill ensure the oven door is
ajar in the vertical position and the heat deflector is
correctly positioned (Fig. A).
The guard plate gets hot when the gril is in use. Remove
it with care, using an oven glove or similar, and put it away
carefully in safe place. The guard plate must be removed
before attempting to fully close the oven door.
Caution: to operate the grill Pan use the proper handles
as shown in figure B.
Fig. A Fig. B
Cut-off gas control (only on certain models)
The hotplate lid is fitted with a safety device which cuts off
the gas supply to all burners when the lid is closed. To
restore the gas supply proceed as follows:
• Lift up the lid to the vertical position.
• Make sure that all burner knobs are in the OFF position.
• Rotate the cut-off knob anticlockwise to the ON position:
the cut-off valve will open and the knob will remain in
the ON position.
Warning: the gas supply will shut off automatically when
the lid is closed and the cut-off knob will return to the OFF
position automatically. Don’t turn the cut-off knob to the
OFF position manually, you may damage the safety device.
Hob
Check that CUT-OFF Gas Control (only on certain models)
is in the ON position.
Warning: You are reminded that although this
appliance has a gas shut off device for when the lid is
lowered, residual heat of the burners could demage
the lid. Therefore do not lower the lid until the cooking
surface has cooled down.
The control knobs for the cook-top gas burners (6)
The position of the gas burner controlled by each one of
the knobs is shown by a solid ring. To light one of the