4
• With this (fan assisted)mode heat is transmitted to
the food through pre-heated air made to circulate inside
the oven by a fan. The oven heats up very quickly so the
food to be cooked may be put into the oven as soon as it
is switched on. Cooking is also possible simultaneously
on two shelves.
• The “fast defrosting“ function uses no heating
elements, just the oven light and the fan.
• Grill operation: a high heat output is used for grilling, so
that the surface of the food is immediately browned; this
is particularly indicated for meats which should remain
tender on the inside. To grill, turn the selector knob "G"
to one of these positions: (grill), (maxigrill),
(maxigrill + fan)
During grilling, do not set the thermostat knob to above
200 °C and keep the oven door closed.
Oven light
The oven light comes on automatically when the selector
knob is turned to any of its positions.
Indicator light "S"
(figure a on page 2) It indicates that the oven is heating up.
When the light goes out, the required temperature has been
reached inside the oven.
When the light alternately comes on and goes out, it means
that the thermostat is working properly to maintain the oven
temperature.
Minute minder "T"
This is a buzzer timer situated on the control panel and is
suitable for timing up to a max. of 60 minutes.
Turn the knob with the symbol until the pointer is aligned
with the required time. When the set time has elapsed, a
buzzer sounds (it does not turn the oven off).
It is advisable to turn the knob to 60 and then back to the
time required, even if this is less than 60 minutes.
See pages 5-6 for the cooking times and temperatures
required for different foods.
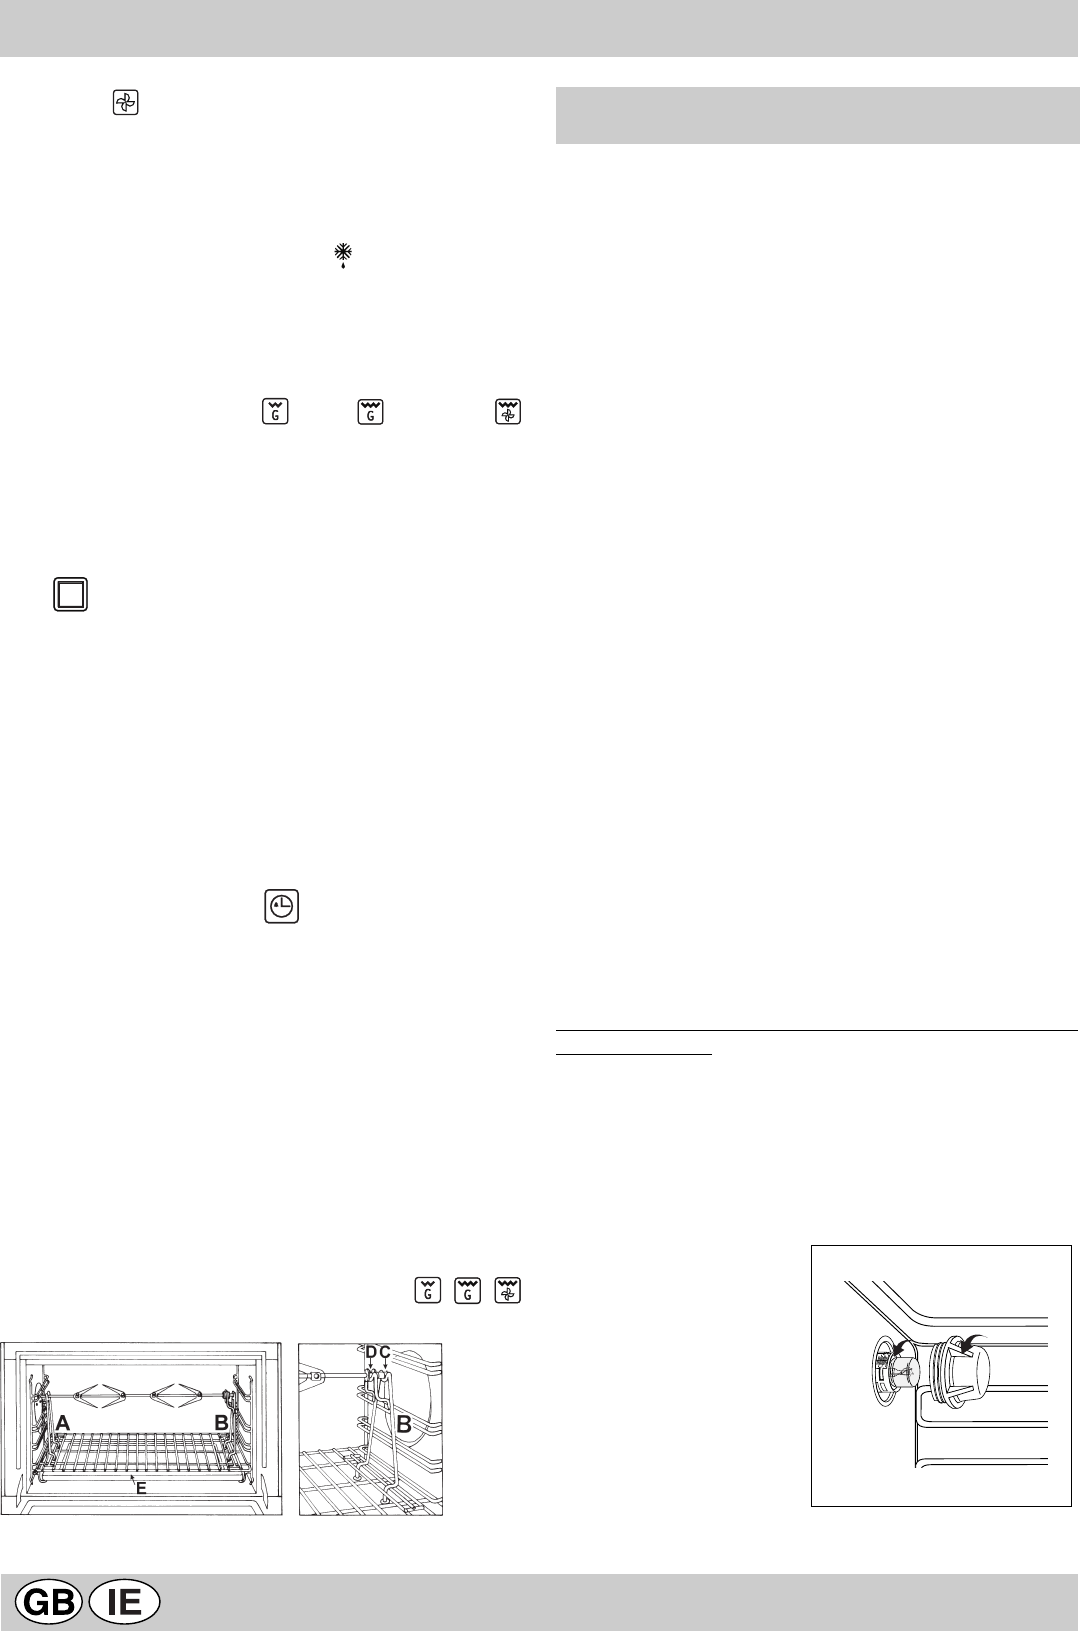
Spit - Rotisserie
Insert the meat to be cooked along the length of the spit
rod, securing it with the special adjustable forks (fig. 2).
Introduce the supports “A” and “B” (fig. 3) into the holes in
the drip tray “E”, rest the rod groove on the seat “C” and
insert the oven rack into the lowest guide of the oven; now
insert the spit rod into the relative hole, moving the groove
forward into seat “D” . Start the rotisserie by turning the
selector knob to one of the following positions:
fig.2
fig.3
CLEANING AND MAINTENANCE
To ensure a long life cycle for the appliance, it is essential
to carry out a thorough general clean frequently, taking into
account that:
The appliance should be disconnected from the mains
supply before starting cleaning operations.
Avoid cleaning appliance parts when they are still warm.
The enamelled, chromed or glass parts must be washed
with warm water without using abrasive powders or
corrosive substances which could ruin them.
The inside of the oven should be cleaned every time it is
used with hot water and detergent; rinse and dry
thoroughly.
The steel parts and especially the areas with the screen-
printed symbols should not be cleaned with diluents or
abrasive detergents. It is advisable to use only a a damp
cloth with tepid water and washing up liquid. After cleaning,
the surfaces should be rinsed thoroughly with water and
then dried well.
Avoid leaving acidy liquids (vinegar, lemon juice,
aggressive detergents, etc.) on enamelled or varnished
parts.
The removable parts of the burners on the hob should be
washed frequently with warm water and soap, making sure
to remove any caked-on substances. Check that the gas
outlet slits are not clogged. Dry the burners carefully
before using them again.
Clean the end part of the automatic glow plug ignitors of
the hob frequently.
Greasing the taps
As time passes, a tap may lock or become difficult to turn.
In this case it will be necessary to clean inside and replace
the grease. This procedure must be performed by a
technician authorized by the manufacturer.
Changing the oven lightbulb
Make sure that the appliance is disconnected from the
electricity supply.
Unscrew the glass protective cover from inside the oven,
unscrew the lightbulb and replace it with an identical one
suitable for high temperatures (300°C) and with the following
characteristics:
- Voltage 230 V
- Wattage 15 W
- Type E 14.


