


6
IE
GB
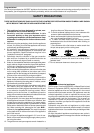
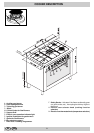
CLEANING AND MAINTENANCE
Disconnect your appliance from the electricity supply before
carrying out any cleaning or maintenance operations on it.
To extend the life of your oven, it must be cleaned fre-
quently, keeping in mind that:
• The enamelled parts and the self-cleaning panels (where
present) should be washed with warm water without using
any abrasive powders or corrosive substances which
could damage them irreparably;
• The inside of the oven should be cleaned immediately
after use with warm soapy water; the soap should be
rinsed off and the interior dried thoroughly;
• Stainless steel may become marked if it comes into con-
tact with very hard water or harsh detergents (containing
phosphorous) for long periods of time. After cleaning, rinse
and dry thoroughly. It is also recommended that any re-
maining drops of water be dried;
• Never line the oven bottom with aluminium foil, as the
consequent accumulation of heat could compromise the
cooking and even damage the enamel coating.
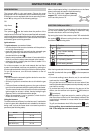
Replacing the Oven Lamp
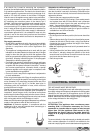
• Disconnect the oven from the power supply by means of
the omnipolar switch used to connect the appliance to
the electrical mains; or unplug the appliance if the plug is
accessible;
• Remove the glass cover of the lamp-holder;
• Remove the lamp and replace with a lamp resistant to
high temperatures (300°C) with the following
characteristics:
- Voltage: 230/240 V
- Power: 15W
- Type E14
• Replace the glass cover and
reconnect the oven to the mains
power supply.
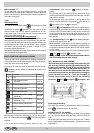
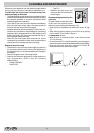
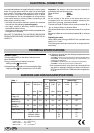
Disassembling/assembling the
oven door
To make it easier to clean the inside
of your oven, the oven door can be
removed, by proceeding as follows (fig. 3-4):
• Open the door completely and raise the 2 levers "B" (fig.
3);
• Now, shutting the door slightly, you can lift it out by pulling
out the hooks "A" as shown in figure 4.
To reassemble the door:
• With the door in a vertical position, insert the two hooks
"A" into the slots;
• Ensure that seat "D" is hooked perfectly onto the edge of
the slot (move the oven door backwards and forward slightly);
• Keep the oven door open fully, unhook the 2 levers "B"
downwards and then shut the door again.
fig 3
fig 4