11
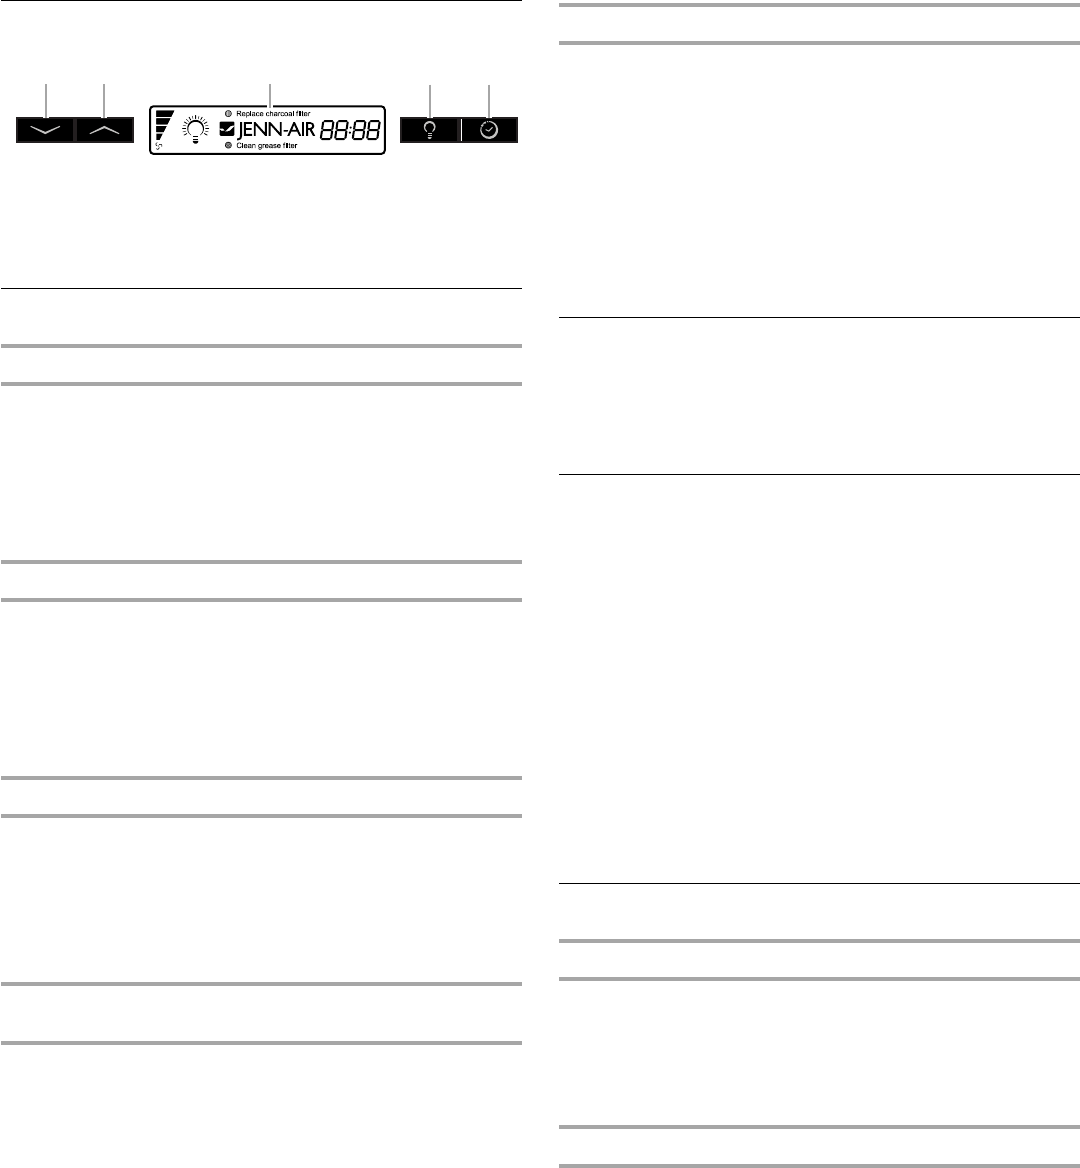
Range Hood Controls
Display
Grease Filter Saturation Alarm
After 30 hours of fan function, the display will show “Clean
Grease Filter” when the fan is active. When this icon shows in the
display, the installed grease filters should be washed. See
“Range Hood Care” section.
■ To reset the grease filter saturation alarm, press and hold the
POWER INCREASE button for 5 seconds. The “Clean Grease
Filter” icon will no longer be displayed.
Charcoal Filter Saturation Alarm
After 120 hours of fan function, the display will show “Replace
Charcoal Filter” when the fan is active. When this icon shows in
the display, the charcoal filters should be replaced. See “Range
Hood Care” section.
■ To reset the charcoal filter saturation alarm, press and hold
the POWER DECREASE button for 5 seconds. The “Replace
Charcoal Filter” icon will no longer be displayed.
Audible Signal Activation and Deactivation
The audible signals can be activated or deactivated by pressing
the “LIGHT” button for 5 seconds.
■ If the audible signal is activated, a tone will sound, and “Snd”
symbol will appear in the display for 3 seconds.
■ If the audible signal is deactivated, the “Snd” symbol will
appear on the display for 3 seconds.
Charcoal Filter (Recirculation Accessory) Inclusion and
Exclusion
When the charcoal filter is in use (recirculating mode), press and
hold the POWER DECREASE and POWER INCREASE buttons at
the same time for 5 seconds. “Able” will appear in the display for
3 seconds.
If the charcoal filter is not used (vented mode), press and hold the
POWER DECREASE and POWER INCREASE buttons at the
same time for 5 seconds. “None” will appear in the display for
3 seconds.
■ When the charcoal filter has been excluded, the charcoal filter
alarm is disabled.
■ The inclusion or exclusion of the charcoal filter must be
selected while the lights and the fan motor are Off.
Heat Sensor
The control is equipped with a heat sensor that will turn on the
blower to the highest speed if excessive heat occurs around the
control area.
■ If the blower is On or Off, the blower will automatically set to
the highest speed. “Auto” will appear in the display to
indicate that the heat sensor has detected excessive heat.
■ When the blower is operating due to excessive heat detected
by the heat sensor, the blower speed can not be decreased.
■ When the temperature level on the hood drops to normal, the
blower will return to its setting before the excessive heat was
sensed.
Light
To operate the light:
1. Press the Light button to turn the light on to high.
2. Press the Light button again to turn the light to low.
3. Press the Light button a third time to turn the light off.
Timer
The timer can be set from 1 to 60 minutes. The default timer
setting is 10 minutes.
To use the timer:
1. Press the Timer button to enter the timer mode. After
5 seconds the default time will be automatically selected.
2. Press the POWER DECREASE and POWER INCREASE
buttons while the display is flashing (5 seconds) to adjust to
the desired time. Pressing the timer button again or waiting
5 seconds after selecting the desired time will start the timer
countdown.
3. The timer can be canceled at any time by pressing the Timer
button again.
NOTE: During the timer setup, the Power Decrease and Power
Increase buttons are dedicated to the timer. After the timer starts,
the Power Decrease and Power Increase buttons can be used for
other functions.
Fan Speed Buttons
Power Increase/On
This button is used to turn the fan On or increase the fan speed.
■ The fan will turn On if the Power Increase button is pressed
and the hood was Off.
■ An audible tone will sound when the fan reaches its highest
speed.
Power Decrease/Off
■ This button is used to turn the fan Off or to decrease the fan
speed.
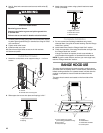
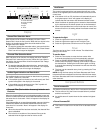
A.Power decrease
B.Power increase
C.Display
D.Light
E. Timer
A
B
C
D
E


