


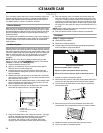
9
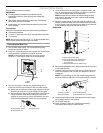
9. Pull the ice maker forward to access the top and sides of the
door.
10. Remove the gaskets from the interior door panel and set
aside.
11. Using the factory drilled holes as a guide, use a scribe and
mark the drilling locations on the overlay panel.
12. Drill eight ¹⁄₈" x ¹⁄₂" (3.18 mm x 12.7 mm) deep holes into the
overlay panel.
NOTE: Do not drill deeper than ¹⁄₂" (12.7 mm).
13. Use eight #8 x ¹⁄₂" pan-head wood screws to attach the panel
to the door.
14. Attach a handle if necessary.
15. Replace the gaskets on the inner door panel.
16. Move the ice maker back into place under the counter.
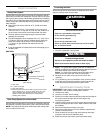
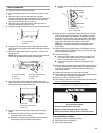
Option 1 - Without Hinge-Side Spacer
Option 2 - With Hinge-Side Spacer
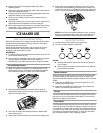
Ice Maker Door
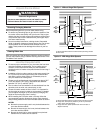
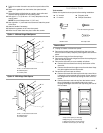
Tools needed:
Gather the required tools and parts before starting installation.
Remove Door
1. Unplug ice maker or disconnect power.
2. Remove the handle screws and handle from the top of the
door (on some models). Keep the parts together and set them
aside.
3. Remove the hinge pin from the top hinge.
4. Remove the door from the hinges and screw the top hinge pin
back into the top hinge.
5. Remove the door skin (on some models) as follows:
■ Remove the two screws from the top and bottom of the
door skin.
■ Remove the skin and the edge covers from the door. Keep
the parts together and set them aside.
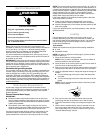
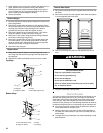
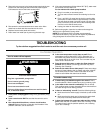
6. Reverse the door end caps as follows:
■ Remove the screw and end cap from the top corner. Move
it diagonally to the opposite side's bottom corner, keeping
the straight side of the end cap facing the front of the ice
maker.
■ Remove the screw and end cap from the bottom corner.
Move it diagonally to the opposite side's top corner,
keeping the straight side of the end cap facing the front of
the ice maker.
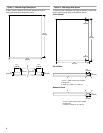
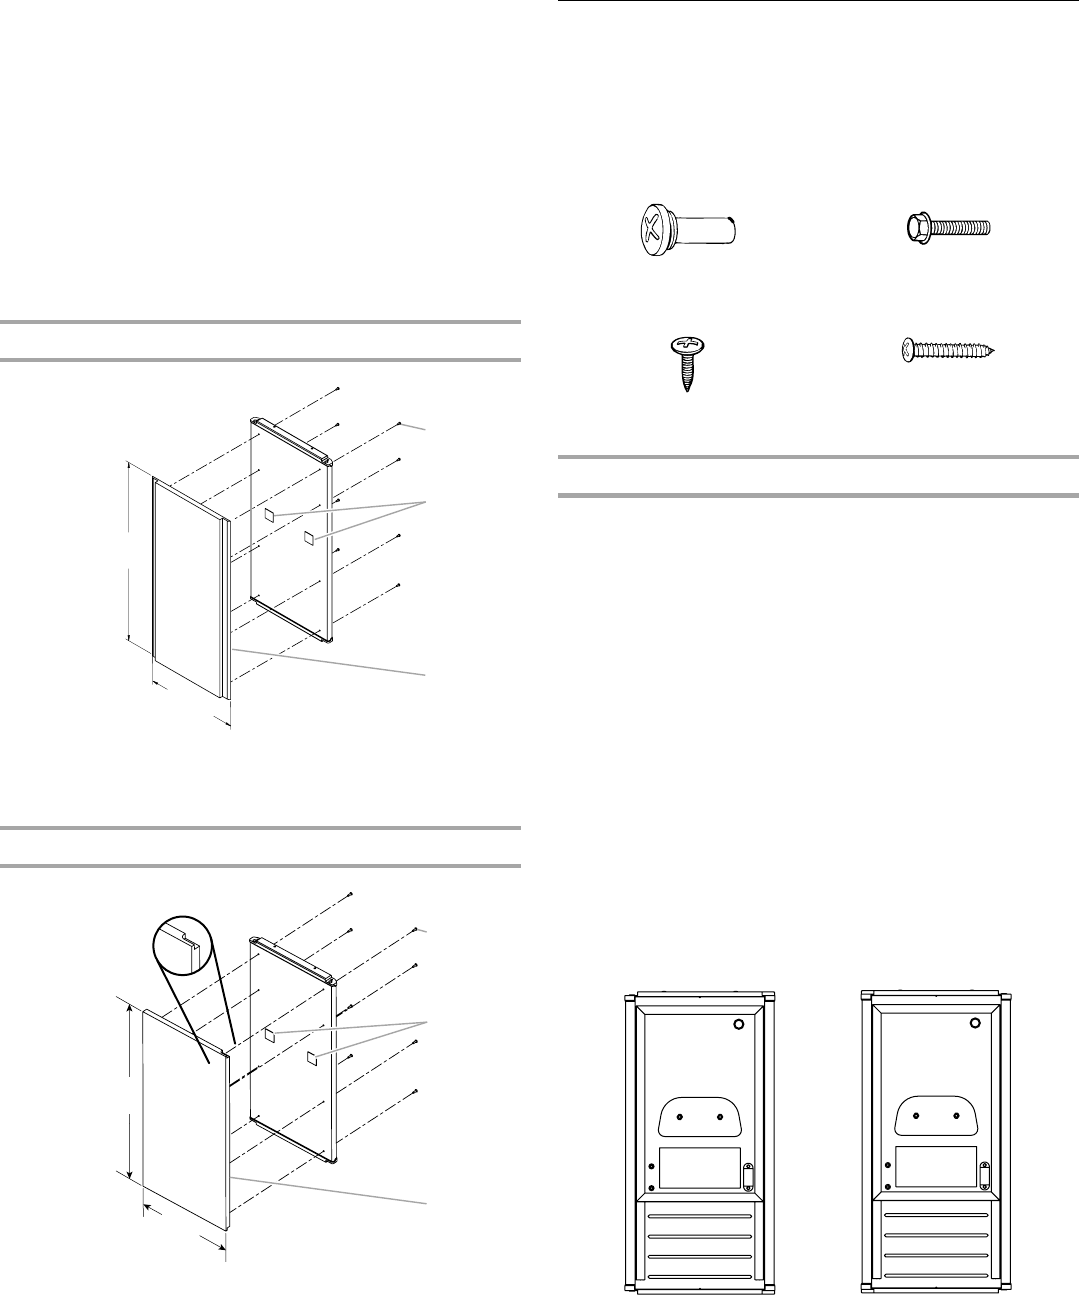
A. #8 x
¹⁄₂
" Pan-head wood screw
B. Adhesive pads
C. Custom panel
A. #8 x
¹⁄₂
" Pan-head wood screw
B. Adhesive pads
C. Custom panel
A
C
B
14³³⁄₆₄"
(36.9 cm)
29
³¹⁄₆₄"
(73.0 cm)
29¹⁄₂"
(74.9 cm)
14⁵⁄₈"
(37.1 cm)
A
C
B
■ ⁵⁄₁₆" wrench ■ Flat putty knife
■ ¹⁄₄" wrench ■ Phillips screwdriver
Hinge pin
⁵⁄₁₆" Hex-head hinge screw
Handle screw End cap screw
A. Top corner open (no end cap)
B.Beginning top corner end cap
C. Beginning bottom corner end cap
D. Bottom corner open (no end cap)
A
B
D
C
C
D
B
A