


6
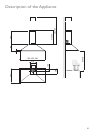
Fitting the Wall Brackets
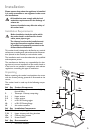
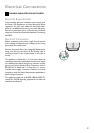
• Draw a vertical line on the supporting wall up to the ceiling,
or as high as practical, at the centre of the area in which
the hood will be installed.
• Draw a horizontal line at 650 mm above the hob for instal-
lation without the back panel, or at height H (H=height of
the visible part of the panel) for installation with the back
panel.
• Place bracket 7.2.1 on the wall as shown about 1-2 mm
from the ceiling or upper limit aligning the centre (notch)
with the vertical reference line.
• Mark the wall at the centres of the holes in the bracket.
• Place bracket 7.2.1 on the wall as shown at X mm below
the first bracket (X = height of the upper chimney sec-
tion supplied), aligning the centre (notch) with the vertical
line.
• Mark the wall at the centres of the holes in the bracket.
• Place bracket 7.1 as shown 95 mm from the vertical ref-
erence line and 210 mm above the horizontal reference
line.
• Mark the centres of the holes in the bracket.
• Repeat this operation on the other side.
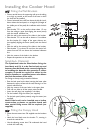
Splashback (Optional)
The Splashback must be fitted before fixing the
hood body and, if it is to be fixed at both top and
bottom, must be fitted at the correct height prior
to installing the bases. As this operation is rather
complex, it should be carried out either by the
kitchen installer or a qualified person who knows
the final dimensions of the units.
For fixing at the top only, proceed as follows:
• Rest the back panel on the base, inserting the lower plate
between the upper surface and the wall, centring it on the
vertical reference line.
• Mark the centres of the two holes in the upper plate.
• Drill ø 8 mm holes at all the centre points marked.
• Insert the wall plugs (not supplied) in the holes.
• Fix the brackets using the screws (not supplied).
• Fix the back panel (where present) using the screws (not
supplied).
Note: If the hood is to be installed onto a hollow
construction or plaster or partition board wall
then special fixing screws will be required (not
supplied).
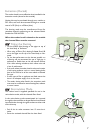
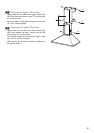
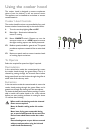
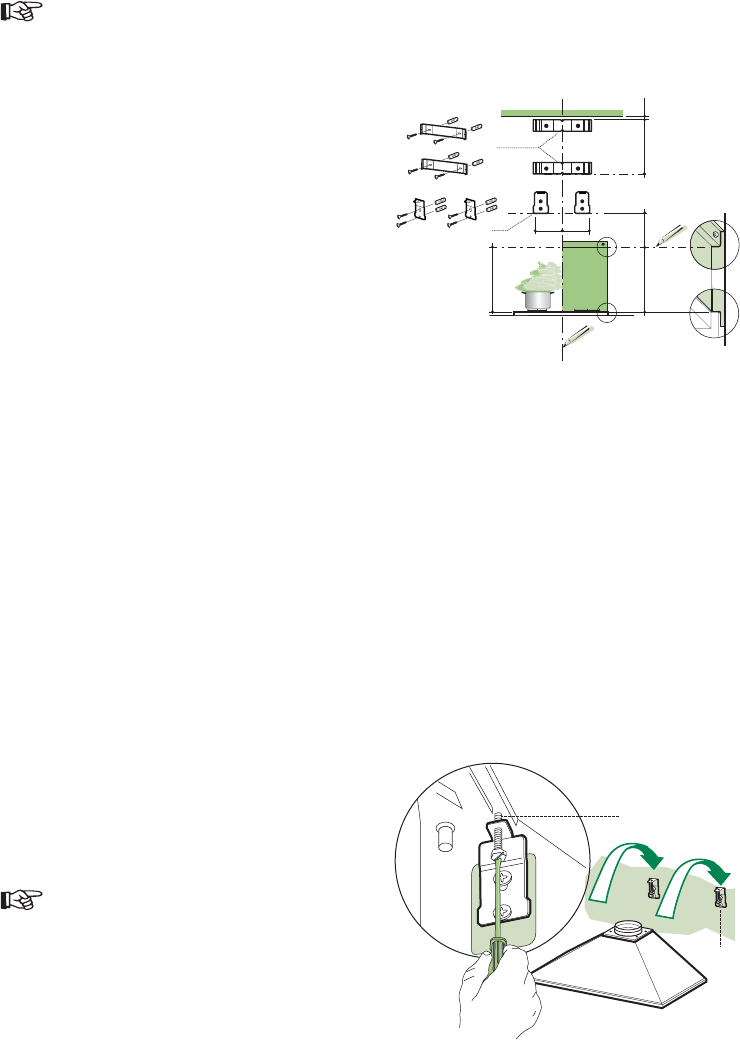
Fitting the Canopy Hood
• Screw the two screws item 12d supplied onto the brackets
7.1.
• Hook the hood body onto the bracket 7.1, centring it
around the vertical line.
• Use the adjusting screws item 12d underneath the hood
to level the hood body
H
X
1÷2
650 min.
7.2.1
7.1
95
95
210
7.1
12.d
Installing the Cooker Hood