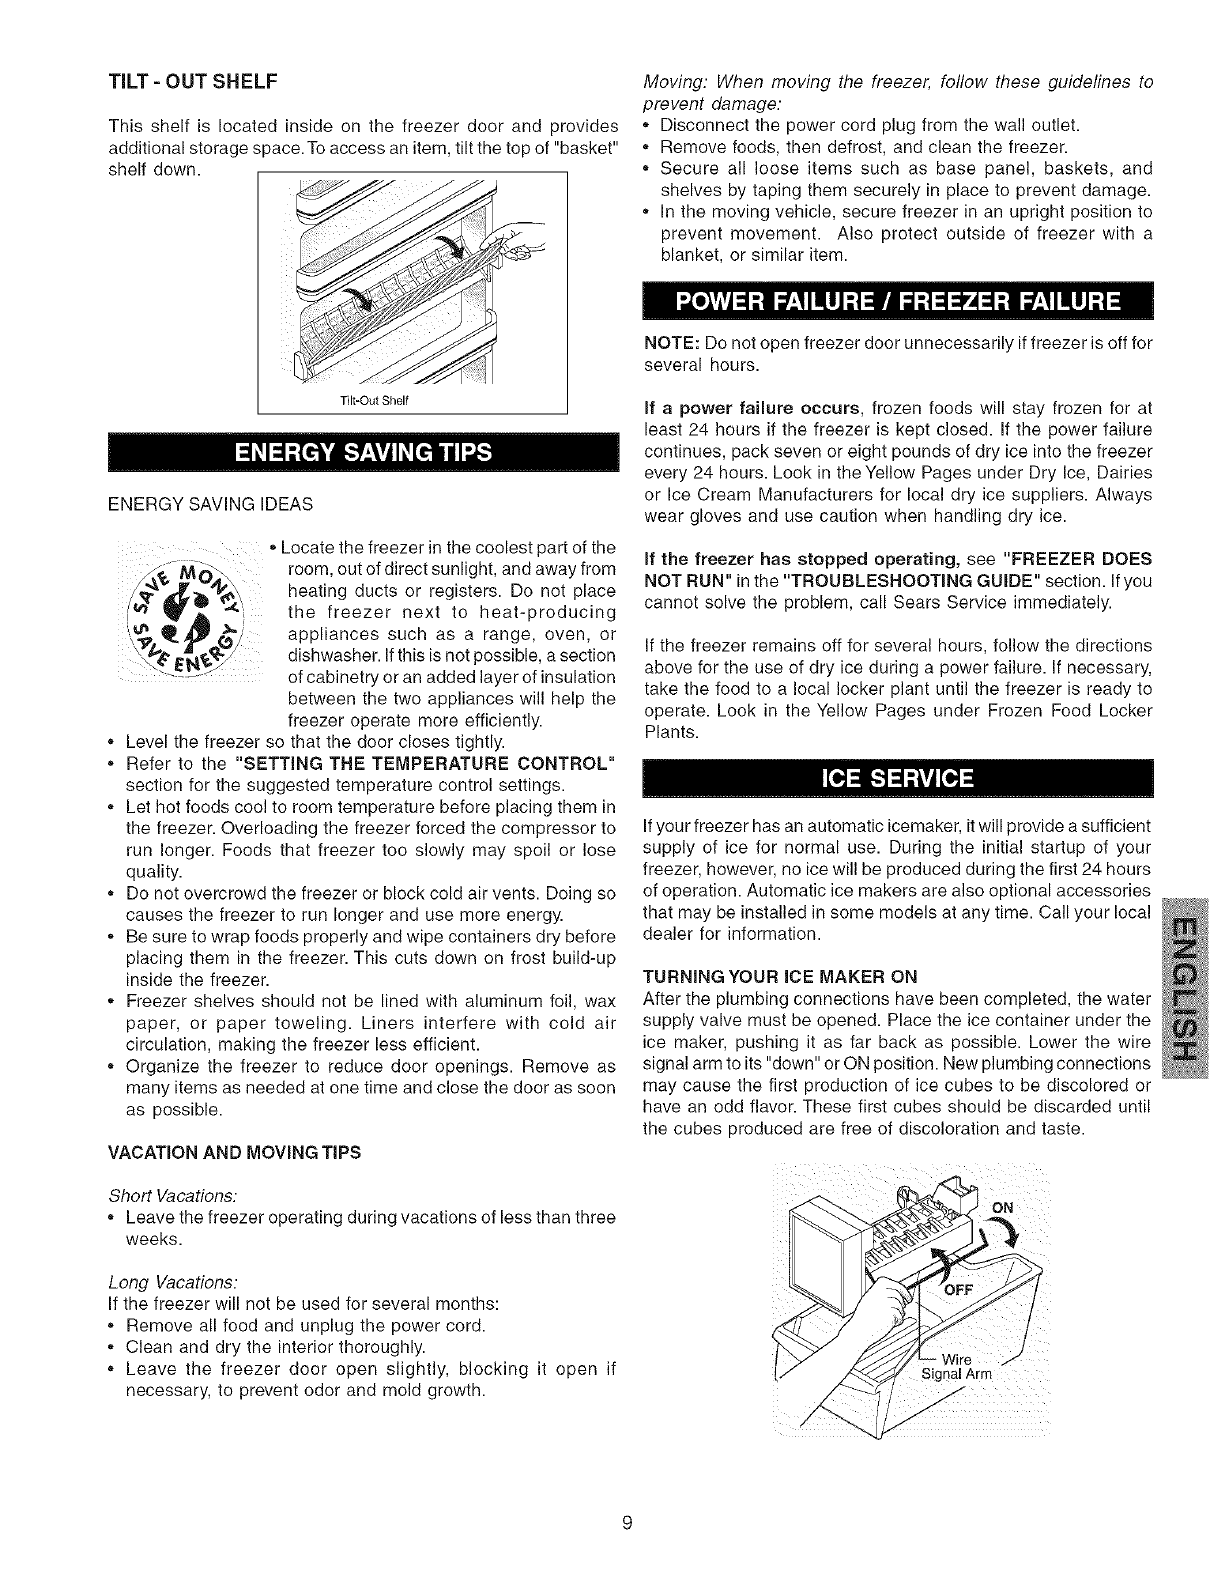
TiLT - OUT SHELF
This shelf is located inside on the freezer door and provides
additional storage space. To access an item, tilt the top of "basket"
shelf down.
Tilt-Out Shelf
ENERGYSAVlNGIDEAS
Locate the freezer in the coolest part of the
room, out of direct sunlight, and away from
heating ducts or registers. Do not place
the freezer next to heat-producing
appliances such as a range, oven, or
dishwasher. If this is not possible, a section
of cabinetry or an added layer of insulation
between the two appliances will help the
freezer operate more efficiently.
,, Level the freezer so that the door closes tightly.
,, Refer to the "SETTING THE TEMPERATURE CONTROL"
section for the suggested temperature control settings.
,, Let hot foods cool to room temperature before placing them in
the freezer. Overloading the freezer forced the compressor to
run longer. Foods that freezer too slowly may spoil or lose
quality.
,, Do not overcrowd the freezer or block cold air vents. Doing so
causes the freezer to run longer and use more energy.
,, Be sure to wrap foods properly and wipe containers dry before
placing them in the freezer. This cuts down on frost build-up
inside the freezer.
,, Freezer shelves should not be lined with aluminum foil, wax
paper, or paper toweling. Liners interfere with cold air
circulation, making the freezer less efficient.
,, Organize the freezer to reduce door openings. Remove as
many items as needed at one time and close the door as soon
as possible.
VACATION AND MOVING TIPS
Short Vacations:
,, Leave the freezer operating during vacations of less than three
weeks.
Long Vacations:
If the freezer will not be used for several months:
,, Remove all food and unplug the power cord.
,, Clean and dry the interior thoroughly.
,, Leave the freezer door open slightly, blocking it open if
necessary, to prevent odor and mold growth.
Moving: When moving the freezer, foflow these guidelines to
prevent damage:
,, Disconnect the power cord plug from the wall outlet.
,, Remove foods, then defrost, and clean the freezer.
,, Secure all loose items such as base panel, baskets, and
shelves by taping them securely in place to prevent damage.
,, In the moving vehicle, secure freezer in an upright position to
prevent movement. Also protect outside of freezer with a
blanket, or similar item.
NOTE: Do not open freezer door unnecessarily if freezer is off for
several hours.
If a power failure occurs, frozen foods will stay frozen for at
least 24 hours if the freezer is kept closed. If the power failure
continues, pack seven or eight pounds of dry ice into the freezer
every 24 hours. Look in the Yellow Pages under Dry Ice, Dairies
or Ice Cream Manufacturers for local dry ice suppliers. Always
wear gloves and use caution when handling dry ice.
if the freezer has stopped operating, see "FREEZER DOES
NOT RUN" in the "TROUBLESHOOTING GUIDE" section. If you
cannot solve the problem, call Sears Service immediately.
If the freezer remains off for several hours, follow the directions
above for the use of dry ice during a power failure. If necessary,
take the food to a local locker plant until the freezer is ready to
operate. Look in the Yellow Pages under Frozen Food Locker
Plants.
If your freezer has an automatic icemaker, it will provide a sufficient
supply of ice for normal use. During the initial startup of your
freezer, however, no ice will be produced during the first 24 hours
of operation. Automatic ice makers are also optional accessories
that may be installed in some models at any time. Call your local
dealer for information.
TURNING YOUR ICE MAKER ON
After the plumbing connections have been completed, the water
supply valve must be opened. Place the ice container under the
ice maker, pushing it as far back as possible. Lower the wire
signal arm to its "down" or ON position. New plumbing connections
may cause the first production of ice cubes to be discolored or
have an odd flavor. These first cubes should be discarded until
the cubes produced are free of discoloration and taste.
J
Wire ./
Signal Arm
J
/
