


9
Questions? Call The Kenmore Water Line 1-800-426-9345 or visit KenmoreWater.com
Maintenance
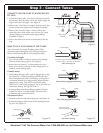
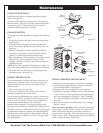
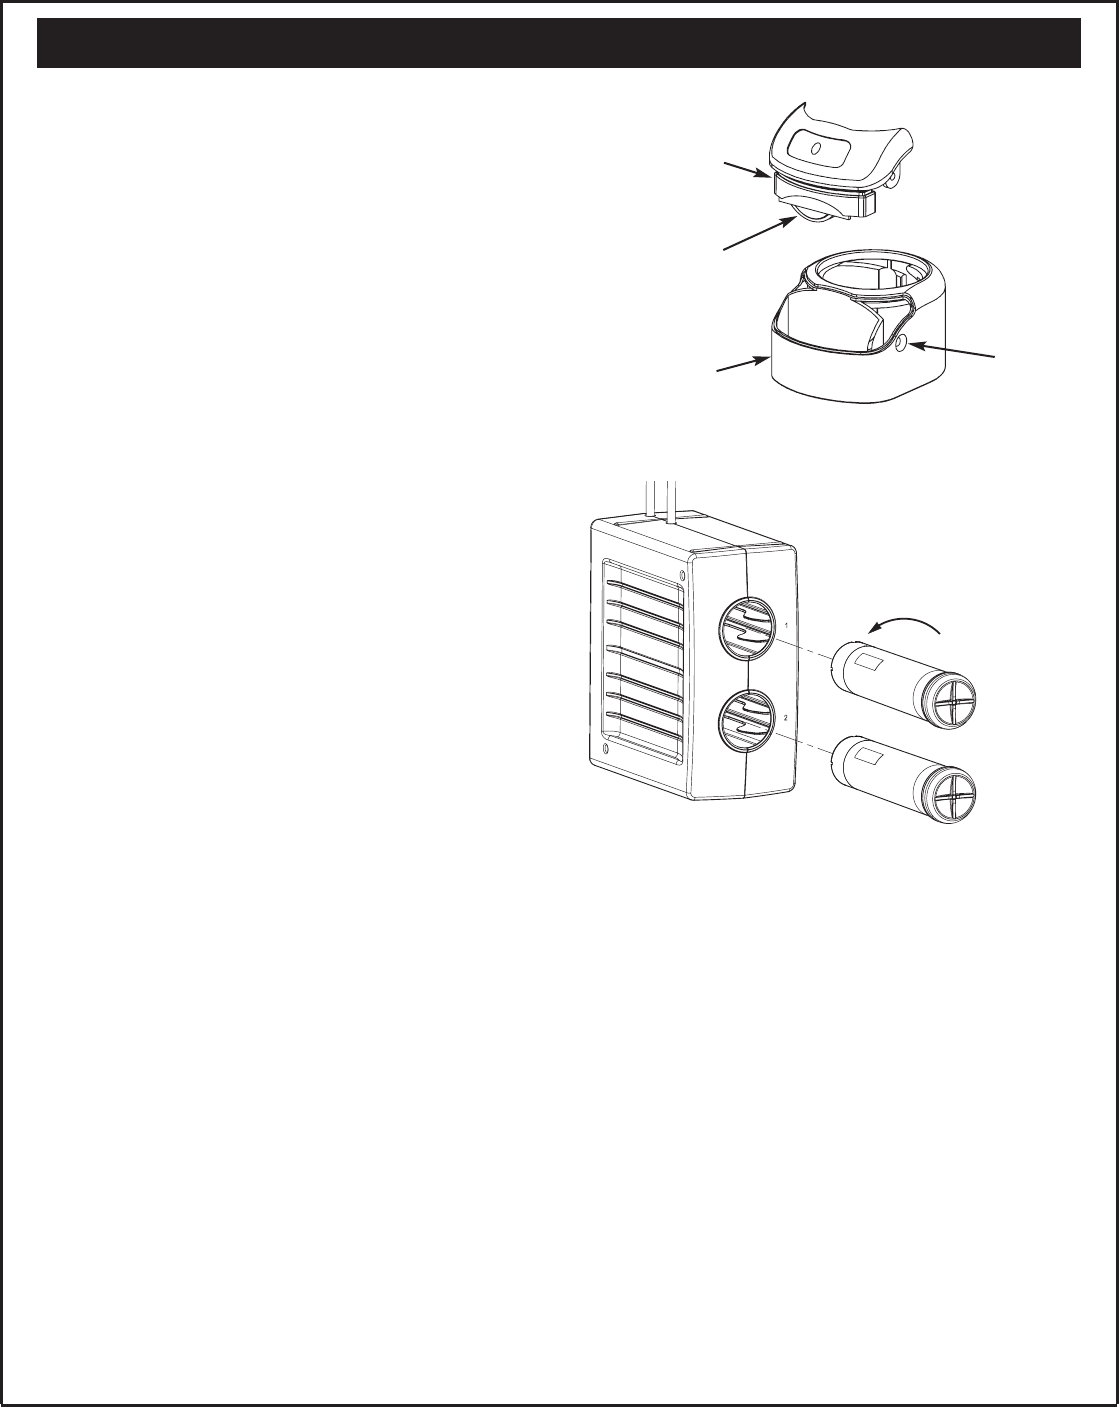
Figure 15
FAUCET ELECTRONICS
Inside the faucet base is a battery operated 6 month
timer. See Figure 14.
An amber LED indicator is also located in the front of
the faucet base. This LED will flash continuously after 6
months has passed. This indicates that it is time to
replace the battery and filter catridges.
CHANGE BATTERY
To change (or install) the battery, complete the following
steps.
1. Loosen the screw on the right side of the faucet base
See Figure 14.
2. Press the battery housing upwards from the front
faucet base until it releases from the faucet base. See
Figure 14.
3. Replace (or install) the battery (Maxell CR 2032 or
equivalent). Place battery into the holder with the
positive (+) side facing the back of the holder.
4. When the battery is first replaced it will flash six times
and turn off. This indicates the battery is fully
charged. After the six flashes, the timer enters the 6
month time cycle.
NOTE: If the LED repeatedly flashes just two times, it is
not a fully charged battery and will need to be replaced.
5. Re-install the timer housing and firmly tighten the
mounting screw. See Figure 14.
FILTER CARTRIDGE LIFE
It is recommended to replace the battery and filter car-
tridges every 6 months of use. There are several vari-
ables that determine how long a cartridge will last.
These include:
1. How much water you use, and
2. How much sediment, taste and/or odor, or other
unwanted substances, are in the water.
Use the following information as a guide. However no
matter which type of cartridge you are using, you will
know it is time to replace it when you first notice the
return of unwanted substances in your water.
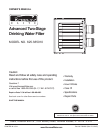
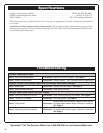
Kenmore Elite Advanced Two-Stage Drinking Water
Filter model 625.385010 with replacement element pack
42-34381 conforms to NSF/ANSI 42 and 53 for the specif-
ic performance claims as verified and substantiated by
test data. The rated capacity for this system is 280 gal-
lons (1060 liters) at a rated service flow of 0.5 gpm (gal-
lons per minute).
battery,
negative (-)
side facing
the front
battery
housing
faucet
base
screw
Figure 14
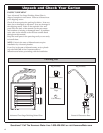
FILTER CARTRIDGE REPLACEMENT
Complete the following steps to replace the cartridges:
1. Turn filter cartridge to the left to remove cartridges
from the filter heads. See Figure 15.
2. Dispose of the old cartridges in a proper manner.
3. Install new cartridges, making sure to insert cartridge
1 and 2 into the correct opening (note the printing on
the cover designating “Cartridge 1” and “Cartridge
2”). Turn cartridges to the right to re-attach to the fil-
ter heads.
4. Remove and replace the timer battery. See “Change
Battery” above.
Taste and Odor Cartridges: Filter cartridges contain acti-
vated carbon, a black powder. When new, open the fil-
tered water faucet and allow fine carbon particles to
purge from the cartridge. Close the faucet when you no
longer see the “fines” (carbon particulates) in the filtered
water, or approximately 10 minutes.
Filter
Cartridge 1
Filter
Cartridge 2
Cover
Turn to the left
to remove