7
Installing
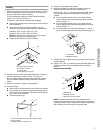
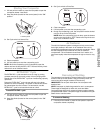
1. Measure the height of your kitchen cabinet opening. The top
of the compactor should be a minimum of
¹₈" (3 mm) from
the top of the kitchen cabinet opening.
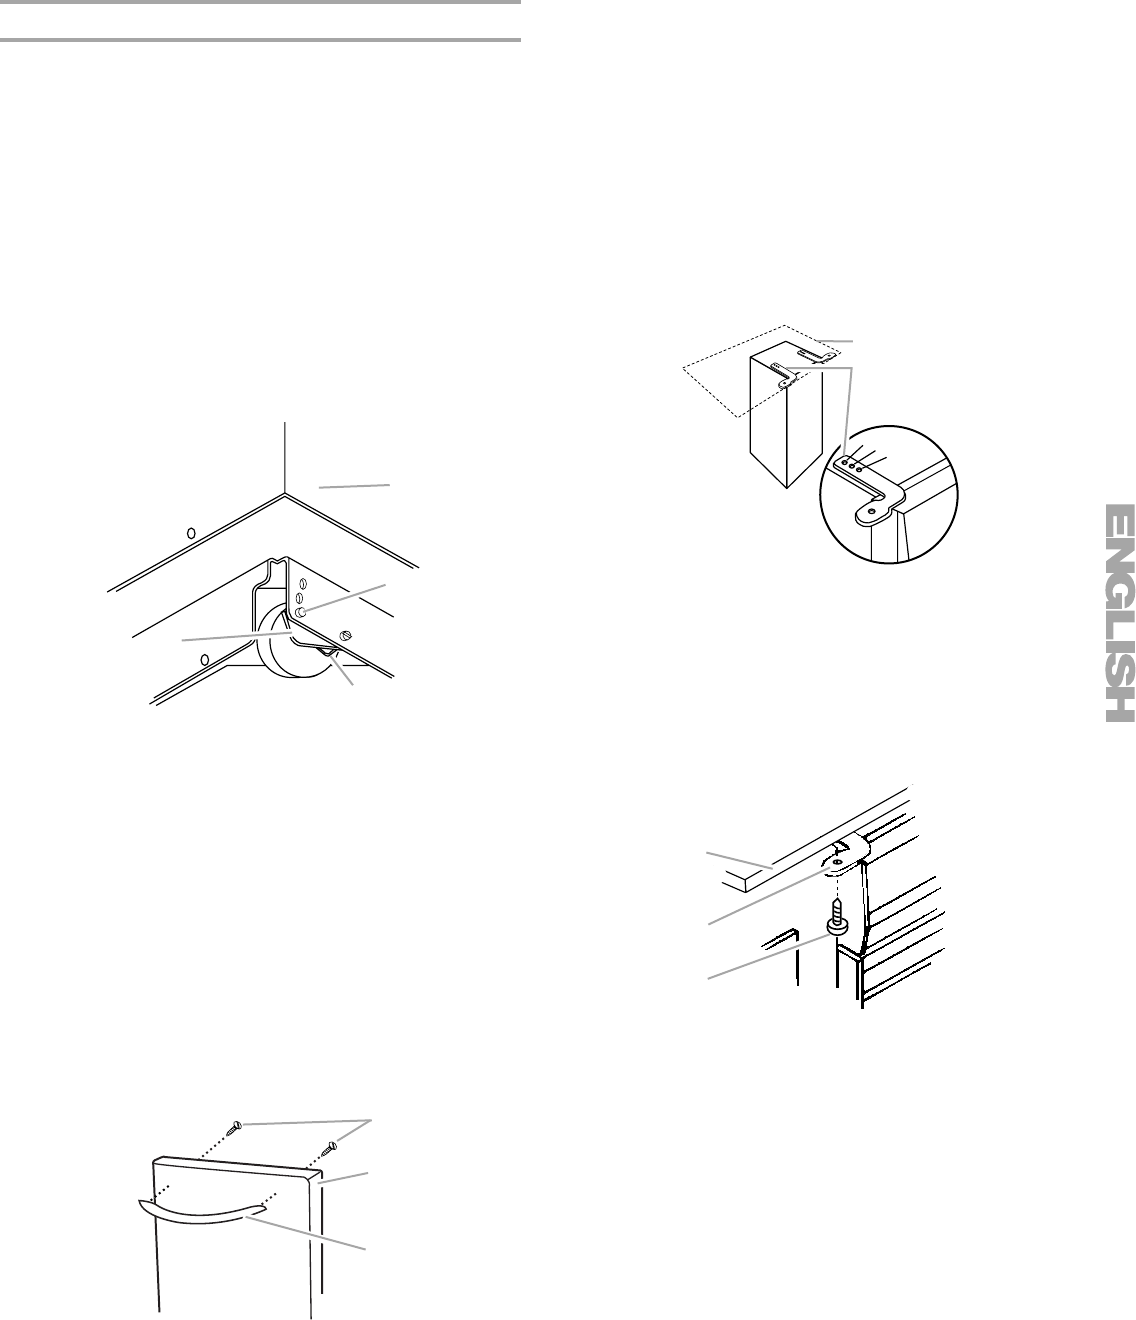
The rear wheels are preset for a kitchen cabinet opening
height of 34¹⁄₄" (87 cm) (position 1).
To adjust for other kitchen cabinet opening heights:
■ Loosen self-tapping screw just enough to clear stud from
hole in position 1.
■ Move the rear wheel and stud to position 2 or 3 as
needed for your kitchen cabinet opening measurement:
Position 2: 34¹⁄₄" to 34⁷⁄₁₆" (87 to 87.5 cm)
Position 3: 34⁷⁄₁₆" to 34⁵⁄₈" (87.5 to 88 cm)
NOTE: To level the unit in position 3, you may need to
add shims under the front leveling legs.
■ Tighten screw. Repeat for other rear wheel.
2. Use pliers to lower front leveling legs away from compactor
cabinet. Adjust legs so there will be a ¹⁄₈" (3 mm) to ¹₄"
(6.4 mm) space between the top of the compactor and the
top of the kitchen cabinet opening. Stand the compactor
upright.
3. Move the compactor close to its final position.
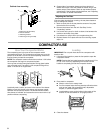
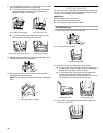
4. To install handle:
■ Insert screws into the holes from the inside of the drawer.
■ Place handle on the front of the drawer and align handle
screw holes with screw ends. (The handle should appear
as a “smile” when installed.)
■ Tighten screws snugly.
5. Plug into a grounded 3 prong outlet.
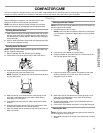
6. Determine whether you want the compactor cabinet or
drawer front flush with the kitchen cabinet face.
Using 2 - #8 - 18 x ⁵₁₆" mounting screws (provided), attach
the retaining brackets to the compactor cabinet top as
needed.
■ If the compactor cabinet face is to be flush with the
kitchen cabinet face, place retaining bracket mounting
screws through “1.”
■ If the compactor drawer front is to be flush with the
kitchen cabinet face, place retaining bracket mounting
screws through “3.”
■ If the compactor is to be midway between “1” and “3,”
place the retaining bracket mounting screws through “2.”
7. Slowly lift the front slightly and roll compactor into the kitchen
cabinet opening.
8. Using 2 - #8 - 18 x ¹₂" mounting screws (provided), fasten the
retaining brackets to the countertop with the mounting
screws.
Countertop mounting
NOTE: If retaining brackets cannot be attached to the
underside of countertop, attach mounting clips (provided) to
retaining brackets. Fasten compactor to kitchen cabinet face
with mounting screws through the mounting clips.
A. Wheel bracket assembly
B. Compactor cabinet
C. Locating stud
D. Self-tapping screw (pivot)
A. 2 screws inserted into holes from inside of drawer
B. Top of drawer
C. Handle installed on drawer front
B
1
2
3
C
D
A
A
C
B
A. Countertop
B. Retaining bracket
A. Countertop
B. Retaining bracket
C. Mounting screw (provided)
B
A
1
2
3
A
B
C


