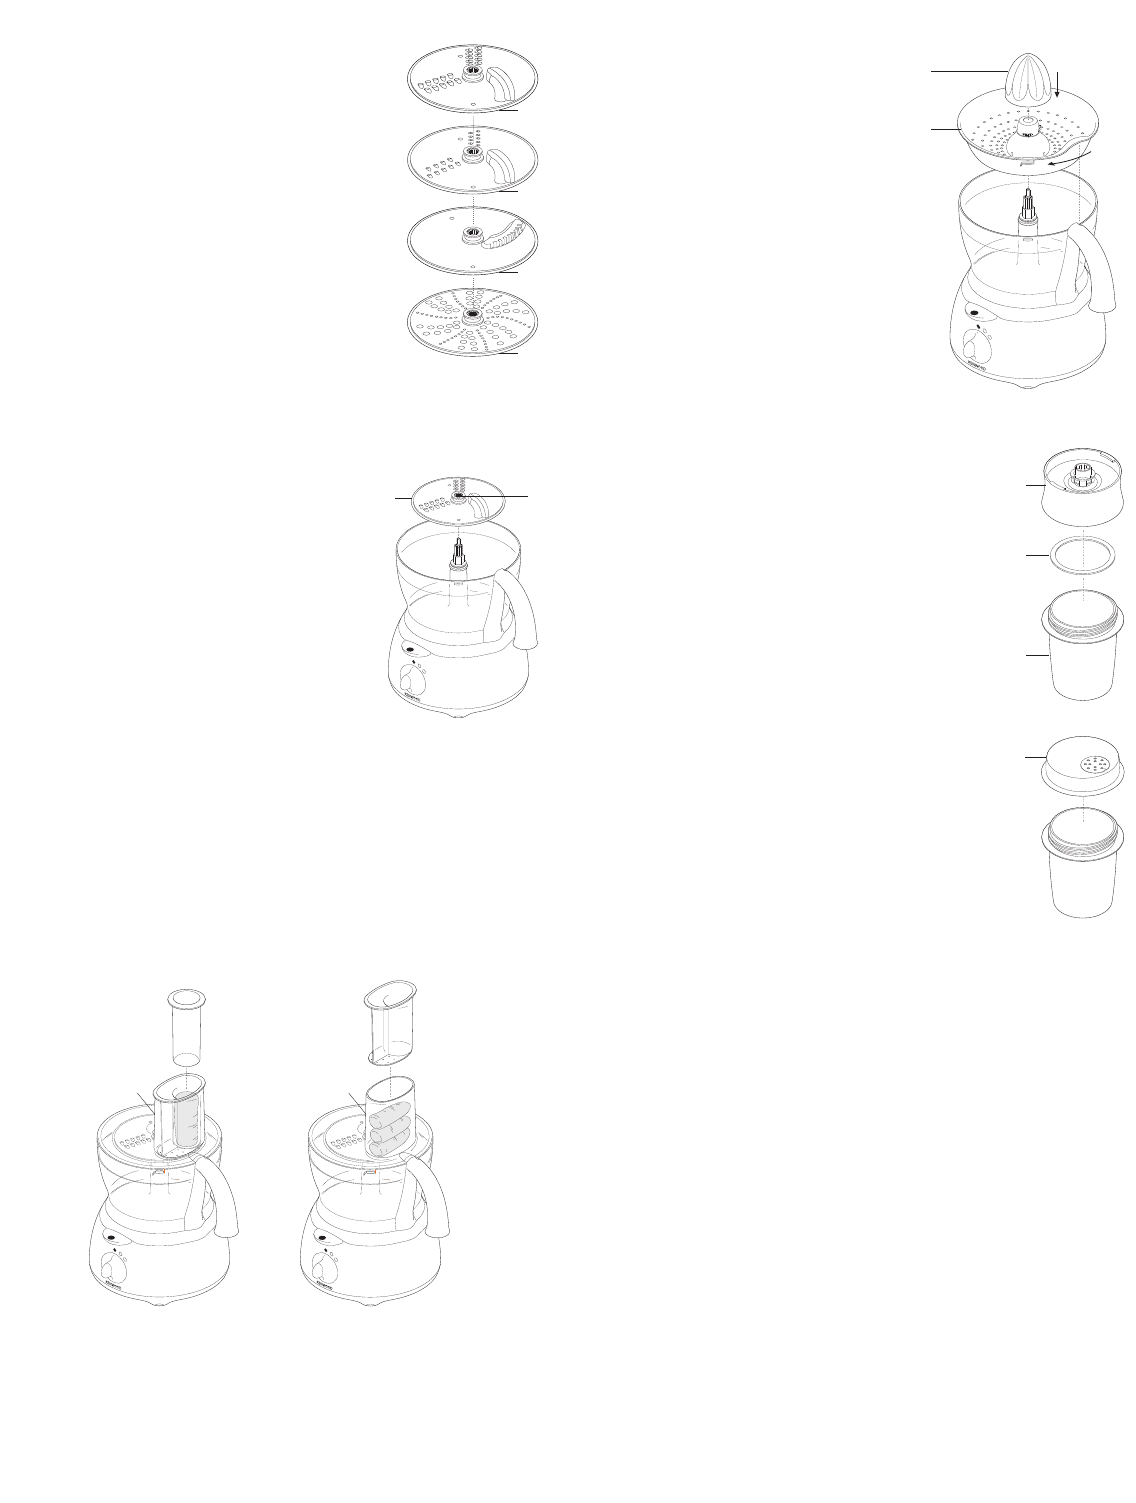
slicing/shredding discs
reversible slicing/shredding discs - thick ቶ,
t
hin k
U
se the shredding side for cheese, carrots, potatoes
and foods of a similar texture.
U
se the slicing side for cheese, carrots, potatoes,
c
abbage, cucumber, courgette, beetroot and onions.
fine (Julienne style) chipper disc k
U
se to cut: potatoes for Julienne style French fries; firm
i
ngredients for salads, garnishes, casseroles and stir
fries (eg carrot, swede, courgette, cucumber).
rasping disc k
G
rates Parmesan cheese and potatoes for German
potato dumplings.
safety
●
Never remove the lid until the cutting disc has
completely stopped.
●
H
andle the cutting discs with care - they are
extremely sharp
to use the cutting discs
1 Fit the drive shaft and bowl onto the power unit.
2
Holding by the centre grip , place the disc onto the
drive shaft with the appropriate side uppermost .
3 Fit the lid.
4 Choose which size feed tube you want to use. The
pusher contains a smaller feed tube for processing
individual items or thin ingredients.
To use the small feed tube - first put the large pusher
inside the feed tube.
To use the large feed tube - use both pushers
together.
5 Put the food in the feed tube.
6 Switch on and push down evenly with the pusher - never put your fingers
in the feed tube.
hints
●
Use fresh ingredients
●
Don’t cut food too small. Fill the width of the large feed tube fairly full. This
prevents the food from slipping sideways during processing. Alternatively use
the small feed tube.
●
When using the chipper disc, place ingredients horizontally.
●
When slicing or shredding: food placed upright comes out shorter than food
placed horizontally .
●
There will always be a small amount of waste on the plate or in the bowl after
processing.
4
2
1
0
P
2
1
0
P
2
1
0
P
k
d
k
e
k
d
k
f
k
g
k
f
k
g
k citrus press (if supplied)
U
se the citrus press to squeeze the juice
from citrus fruits (eg oranges, lemons,
l
imes and grapefruits).
ቢ
cone
ባ
sieve
to use the citrus press
1 Fit the drive shaft and bowl onto the power
u
nit.
2
Fit the sieve into the bowl - ensuring the
sieve handle is locked into position directly
over the bowl handle .
3
Place the cone over the drive shaft turning
until it drops all the way down .
4 Cut the fruit in half. Then switch on and
p
ress the fruit onto the cone.
●
The citrus press will not operate if
the sieve is not locked correctly.
k mill
Use the mill for milling herbs, nuts and coffee beans.
ቢ
blade unit
ባ sealing ring
ቤ jar
ብ sprinkler lid
safety
●
Never fit the blade unit to your machine without the jar fitted.
●
Never unscrew the jar while the multi-mill is fitted to your
machine.
●
Don’t touch the sharp blades. Keep the blade unit away
from children.
●
Never remove the multi-mill until the blades have completely
stopped.
important
●
To ensure long life of your mill, never run for longer than 30
seconds. Switch off as soon as you’ve got the right consistency.
●
Don’t process spices - they may damage the plastic.
●
The machine won’t work if the mill is fitted incorrectly.
●
Use for dry ingredients only.
to use your mill
1 Put your ingredients into the jar. Fill it no more than half full.
2 Fit the sealing ring into the blade unit.
3 Turn the blade unit upside down. Lower it into the jar, blades down.
4 Screw the blade unit onto the jar until it is finger tight.
5 Place the mill onto the power unit and turn to lock (see “to use your liquidiser”).
6 Switch on to maximum speed or use the pulse control.
7 After milling, you can replace the blade unit with the sprinkler lid and shake out
your food.
●
The sprinkler lid is not airtight.
hints
●
Herbs are best milled when clean and dry.
25
ባ
ቢ
ቤ
ብ
22
23
21
2
1
0
P
ቢ
ባ
k
h
k
i
k
e
24
k
h
k
i
k
20
k
2
1
k
22
k
23


