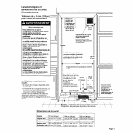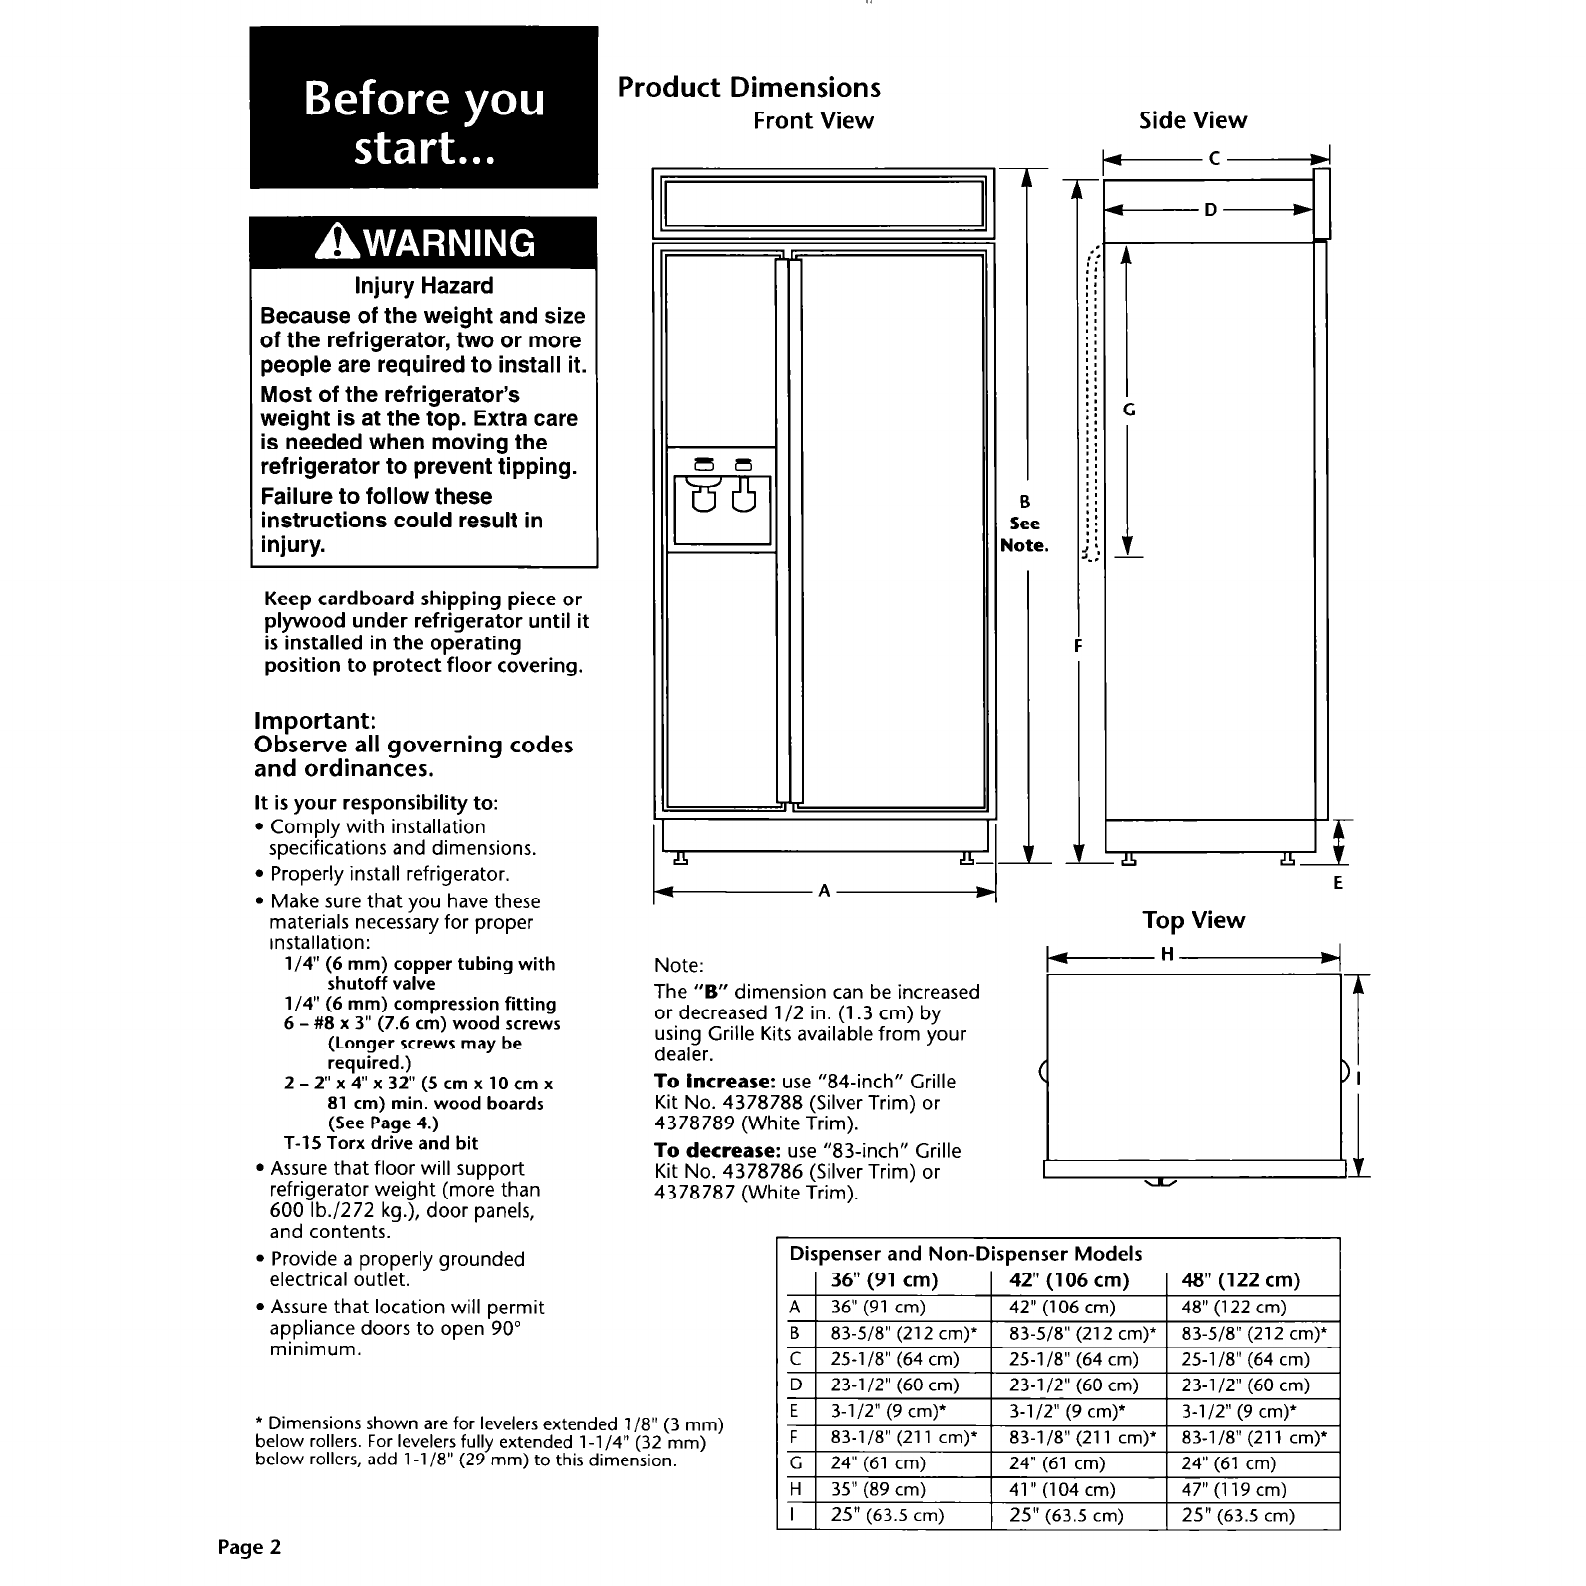
Product Dimensions
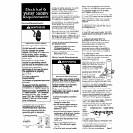
Injury Hazard
Because of the weight and size
of the refrigerator, two or more
people are required to install it.
Most of the refrigerator’s
weight is at the top. Extra care
is needed when moving the
refrigerator to prevent tipping.
Failure to follow these
instructions could result in
injury.
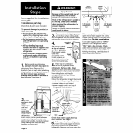
Keep cardboard shipping piece or
plywood under refrigerator until it
is installed in the operating
position to protect floor covering.
Important:
Observe all governing codes
and ordinances.
It is your responsibility to:
l
Comply with installation
specifications and dimensions.
l
Properly install refrigerator.
l
Make sure that you have these
materials necessary for proper
installation:
l/4” (6 mm) copper tubing with
shutoff valve
l/4” (6 mm) compression fitting
6 - #8 x 3” (7.6 cm) wood screws
(Longer screws may be
required.)
2 - 2” x 4” x 32” (5 cm x 10 cm x
81 cm) min. wood boards
(See Page 4.)
T-15 Torx drive and bit
l
Assure that floor will support
refrigerator weight (more than
600 lb./272 kg.), door panels,
and contents.
l
Provide a properly grounded
electrical outlet.
l
Assure that location will permit
appliance doors to open 90”
minimum.
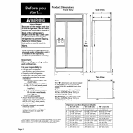
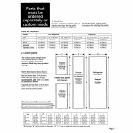
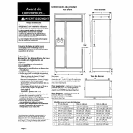
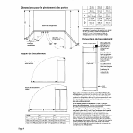
Front View
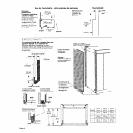
* Dimensions shown are for levelers extended l/8” (3 mm)
below rollers.
For levelers fully extended
l-l /4” (32 mm)
below rollers, add l-1 /8” (29 mm) to this dimension.
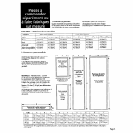
Note:
The
“B”
dimension can be increased
or decreased l/2 in. (1.3 cm) by
using Grille Kits available from your
dealer.
To increase:
use “84-inch” Grille
Kit No. 4378788 (Silver Trim) or
4378789 (White Trim).
To decrease:
use “83-inch” Grille
Kit No. 4378786 (Silver Trim) or
4378787 (White Trim).
-
‘:
::
::
: :
: :
::
: :
: :
::
::
::
I *
; :
; :
: :
: :
: :
: :
::
::
m:
:.:
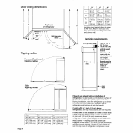
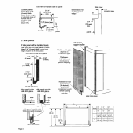
Side View
-c
-D-
-I2
t.!l
E
Top View
Dispenser and Non-Dispenser Models
~~
D
23-l /2” (60 cm) 23-l/2” (60 cm)
23-l/2” (60 cm)
E
3-l 12” (9 cm)*
3-l/2” (9 cm)*
3-l /2” (9 cm)*
Page 2


