


BLENDER SERVICE MANUAL
5
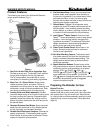
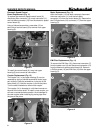
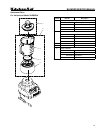
Blender Assembly
1. Put locking collar with blades pointing up on a sturdy
surface (Fig. 2).
Figure 2
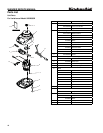
2. Put sealing ring (1), flat side down, around the
blades and into the groove within the locking
collar (2) (Fig. 3).
1
2
Figure 3
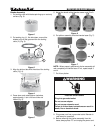
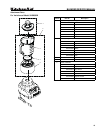
3. Align the pitcher tabs with the slots of the locking
collar (Fig. 4).
Figure 4
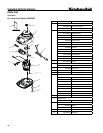
4. Press down and rotate pitcher clockwise,
approximately ¼ turn until two clicks are
heard (Fig. 5).
Figure 5
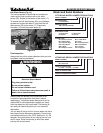
5. Adjust the length of the blender power cord (Fig.6).
Figure 6
6. Put pitcher assembly onto the blender base (Fig. 7).
Figure 7
NOTE: When properly positioned, pitcher assembly will
rest completely on blender base. If not, repeat steps 3
and 4.
7. Put lid on pitcher.
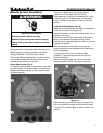
WARNING
Electrical Shock Hazard
Plug into grounded outlet.
Do not use an adapter.
Do not use an extension cord.
Failure to follow these instructions can result in
death, fi re or electrical shock.
8. Plug power cord into a grounded outlet. Blender is
now ready for operation.
9. Before removing the pitcher assembly from the
base, always press “O” and unplug the power cord.