


9
Install Anti-Tip Bracket
1. Choose the correct anti-tip bracket for your installation.
■ If the wall behind the range has no baseboard or has a
baseboard up to ³⁄₈" (0.95 cm) thick, use the shorter
1" (2.5 cm) anti-tip bracket.
■ If the wall behind the range has a baseboard thicker than
³⁄₈" (0.95 cm), use the longer 1¾" (4.4 cm) anti-tip bracket.
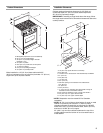
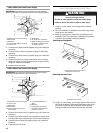
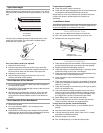
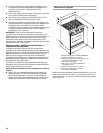
2. Locate a stud on the wall behind the range. Measure the
distance from top of rear brace to floor.
3. Add ⁵⁄₁₆" (0.79 cm) to the measurement from Step 2. This will
allow anti-tip bracket to slide over rear brace.
4. Using the final measurement from Step 3, measure from the
floor up and mark a horizontal line on the wall where a wall
stud is located.
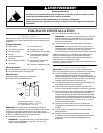
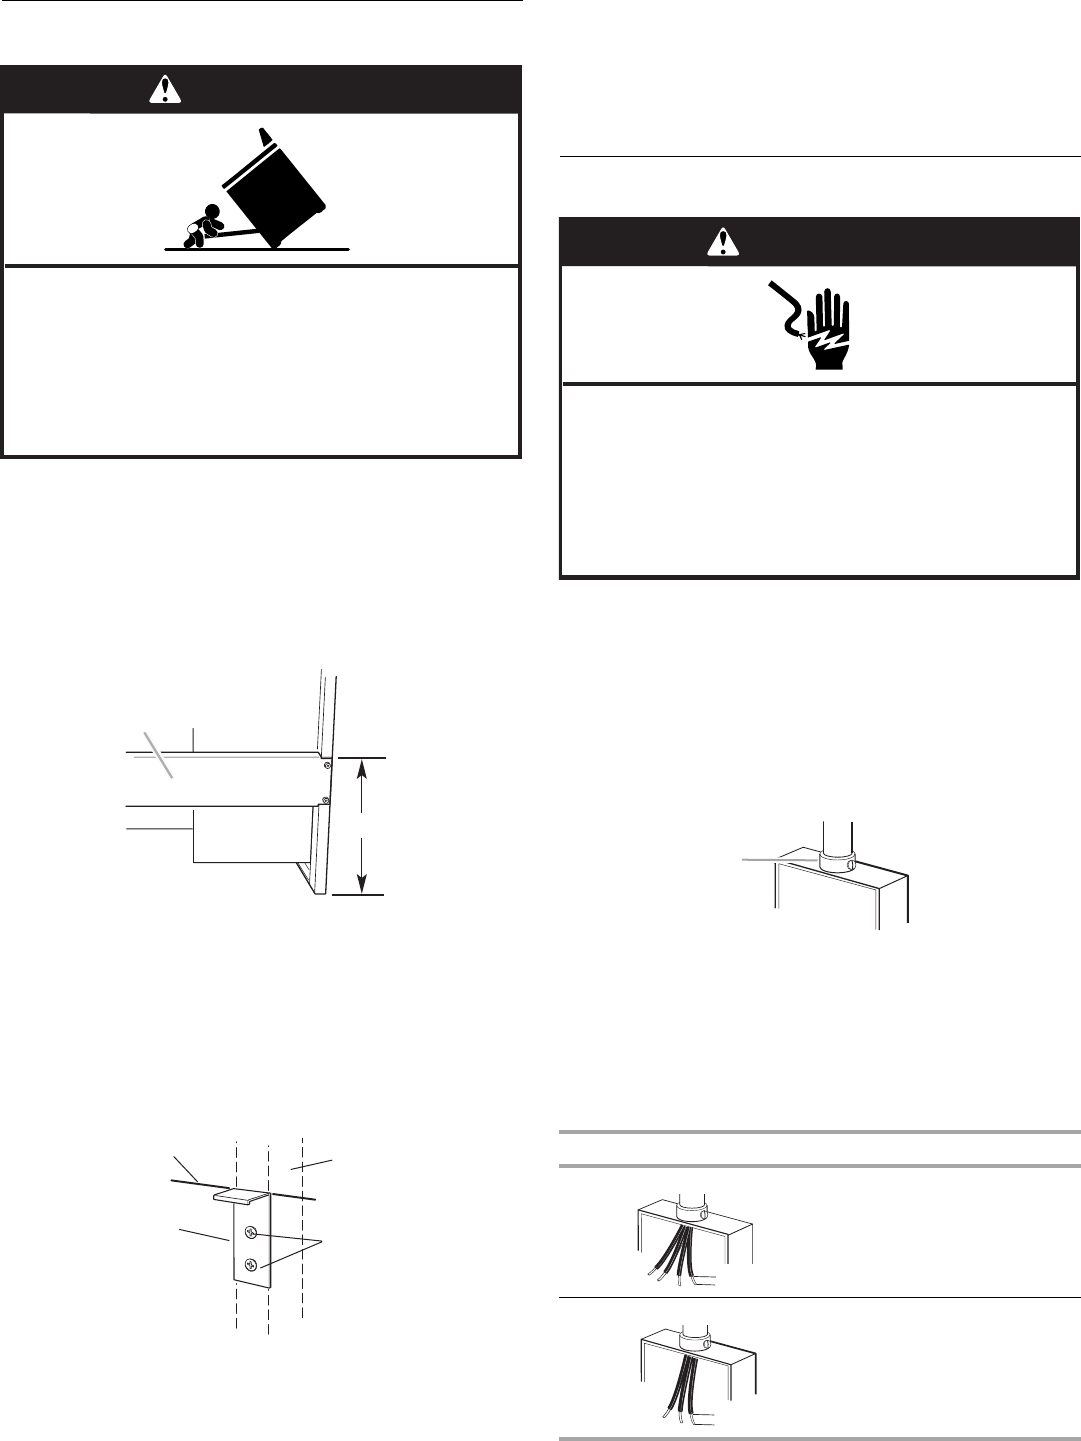
5. Position top of anti-tip bracket at line marked in Step 4 and
mark holes. Drill two ¹⁄₈" holes at the positions marked on the
wall. Use screws provided to fasten anti-tip bracket to wall.
Anti-tip bracket must be mounted securely to stud in wall
behind the range. Depending on thickness of the wall, longer
screws may be required. Longer screws are available from
your local hardware store.
Make Electrical Connection - U.S.A. Only
This range must be connected to a grounded, metallic permanent
wiring system or a ground connector should be connected to the
ground terminal or wire lead on the range.
This range is manufactured with a cabinet-connected, green (or
bare) ground wire. Connect the range cable to the junction box
through the UL listed or CSA approved conduit connector.
1. Disconnect power.
2. Remove junction box cover if present.
3. Install a UL listed or CSA approved conduit connector to the
junction box.
4. Route the flexible cable conduit from the range to the junction
box using a UL listed or CSA approved conduit connector.
5. Tighten screws on conduit connector.
6. See “Electrical Connection Options Chart” to complete
installation for your type of electrical connection.
Electrical Connection Options Chart
A.Rear brace
B. Top of rear brace to floor
C. Top of rear brace
D. Floor
A.Horizontal line marked from Step 4.
B.Wall stud
C. Mounting screws
D. Anti-tip bracket
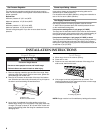
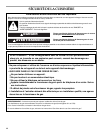
WARNING
Tip Over Hazard
A child or adult can tip the range and be killed.
Connect anti-tip bracket to wall behind range.
Reconnect the anti-tip bracket, if the range is moved.
Failure to follow these instructions can result in death
or serious burns to children and adults.
A
B
C
D
A
B
C
D
A. UL listed or CSA approved conduit connector
If your home has: Go to Section:
4-wire 4-Wire Cable from Home
Power Supply
3-wire 3-Wire Cable from Home
Power Supply
WARNING
Electrical Shock Hazard
Disconnect power before servicing.
Use 8 gauge solid copper wire.
Electrically ground range.
Failure to follow these instructions can result in death,
fire, or electrical shock.
A
½"
(1.3 cm)
½"
(1.3 cm
)