


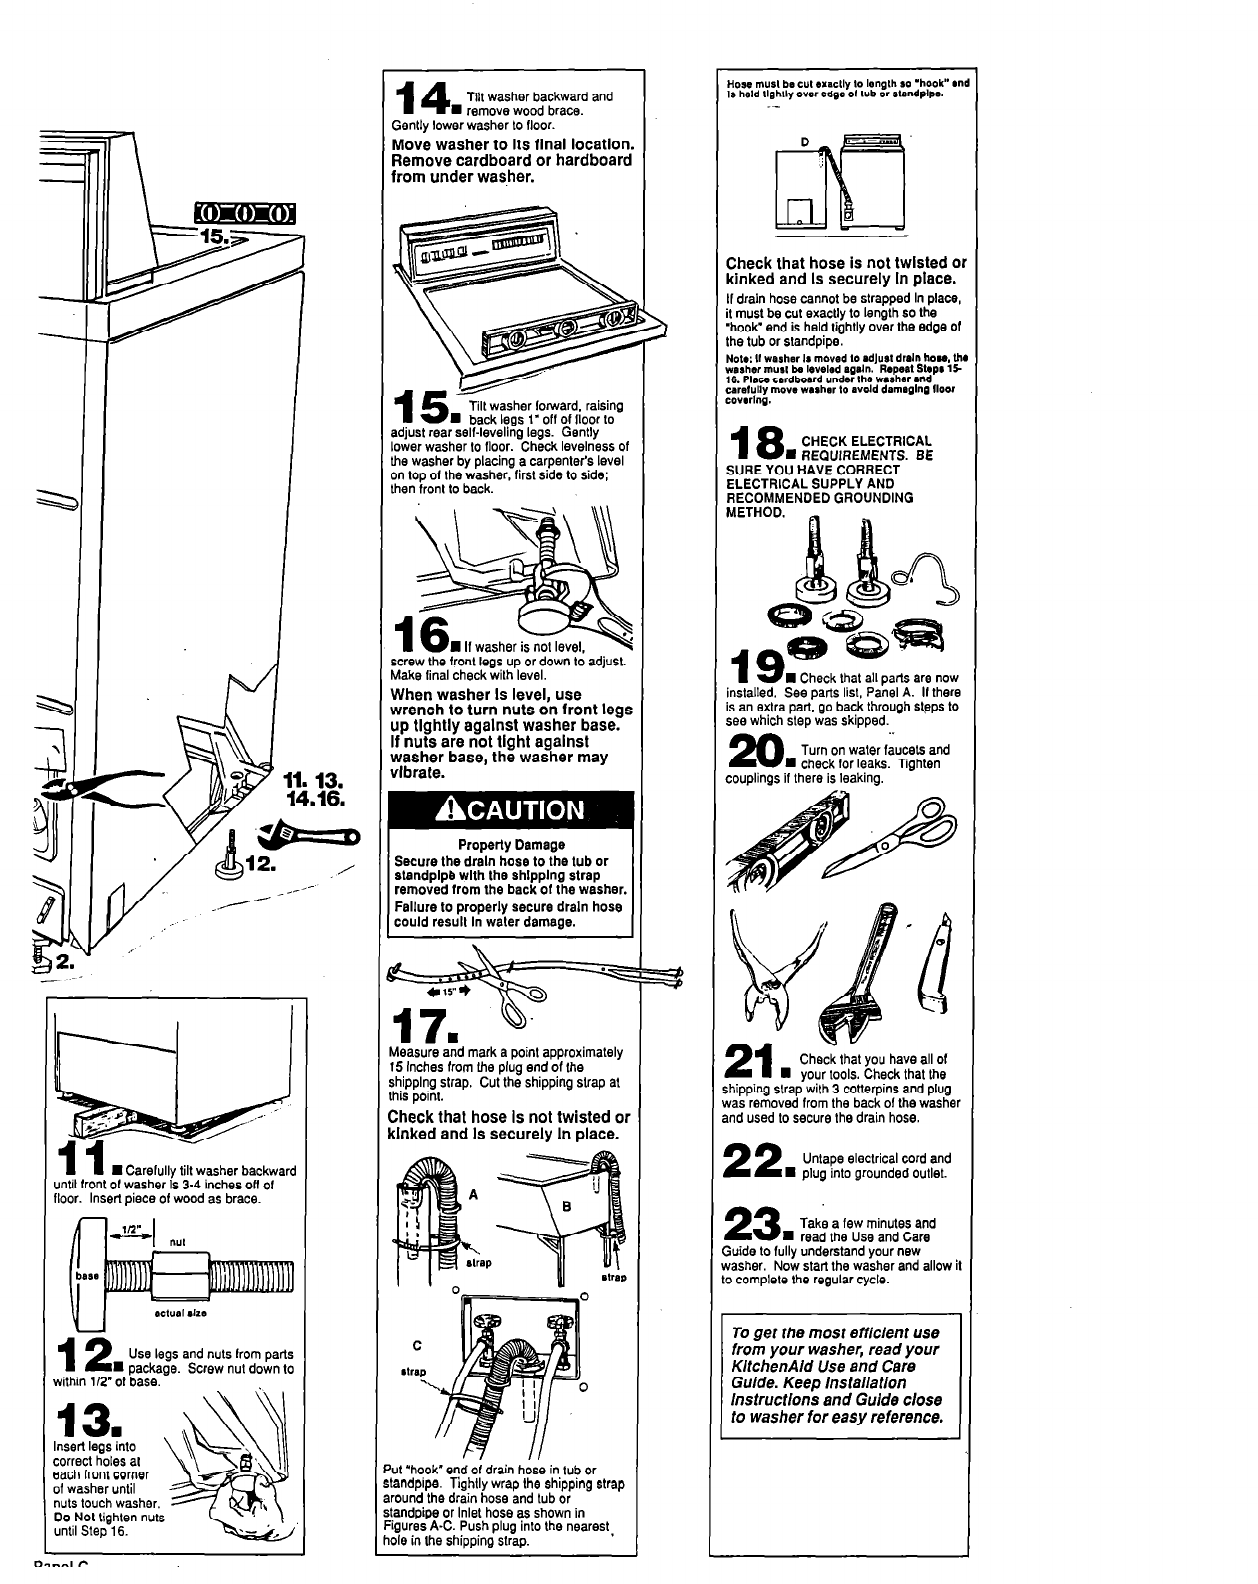
13.
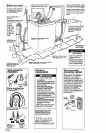
Insert legs into
correct holes al
sach lront corner
~1 washer until
nuts touch washer.
Do Nol tighten nuts
until Step 16.
,
Dl”c.1 P
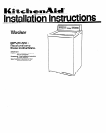
H Carelully tilt washer backward
until front 01 washer Is 3-4 inches ofi 01
Floor. Insert piece ot wood as brace.
i-P4 ““I
u
12
Use legs and 1~1s lrom parts
H package. Screw nul down 10
within l/2” of base.
14
Tilt washer backward and
fl remove wood brace.
Gently lower washer 10 floor.
Move washer to its final location
Remove cardboard or hardboard
from under was.her.
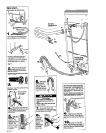
Tilt washer forward. ralsmg
n back legs 1” 00 or lloor lo
adjust rear seWleveling legs. Gently
lower washer 10 Ooor. Check levelness of
lhe washer by placing a carpenter’s level
3n top ol Ihe washer, first side to side;
Lhen front to back.
1
screw the front legs up or down adjust.
Make linal check wilh level.
When washer Is level, use
wrench to turn nuts on front legs
up tlghtly agalnst washer base.
If nuts are not tight agalnst
washer base, the washer may
vibrate.
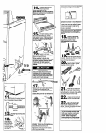
Properly Damage
Secure the drain hose to the tub or
slandplpb with the shlpplng strap
removed from the back of the washer.
Failure to properly secure drain hose
could result In waler damage.
deasure and mark a point approximalely
I5 Inches from the plug end of Ihe
ihipplng strap. Cut the shipping slrap at
his point.
Check that hose Is not twisted or
[Inked and Is securely In place.
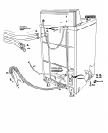
ut “hook” end ol drain hose in lub or
andpipe. Tighlly wrap Ihe shipping strap
,ound the drain hose and lub or
andpipe or Inlet hose as shown in
igures A-C. Push plug inlo Ihe nearest,
218 in Ihe shipping strap.
Check that hose is not twlsted
rinked and Is securely In place
I drain hose cannot be strapped In plac
I must be cut exaclly to length so the
hook’ end is held tightly over the edge
he tub or standpipe.
lot.: II washer Ia moved 10 adlust drain how,
msher mua, ba leveled agaIn. Rapeal sbp# ’
6.
PIIu)
cordboard under Ihe washer
l
?d
arslully move washer lo avold dsmaglnp lloa
OWl”&
18
CHECK ELECTRICAL
n REQUIREMENTS. BE
SURE YOU HAVE CORRECT
:LECTRICAL SUPPLY AND
3ECOMMENDED GROUNDING
W Check lhat all parts are no
nslalled. See parts list, Panel A. II the
s an extra part, go back through slpps I
ice which step was skipped.
20
.
Turn on waler faucets and
1 check Ior leaks. Tighten
Check that you have all or
n your lools. Check thal Ihe
hipping strap with 3 colierpins and plug
‘as removed from the back 01 the wash
nd used lo secure Ihe drain hose.
22
Unlape electrical cord ant
W plug into grounded outlet.
23
Take a few minutes and
n read the Use and Care
uide lo fully understand your new
asher. Now slarl the washer and allon
I complele the regular cycle.
To get the most efficient use
from your washer, read your
KitchenAid Use and Care
Guide. Keep lnstallatlon
Instructions and Guide close
to washer for easy reference.