


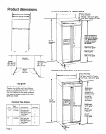
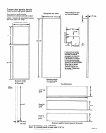
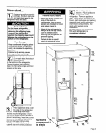
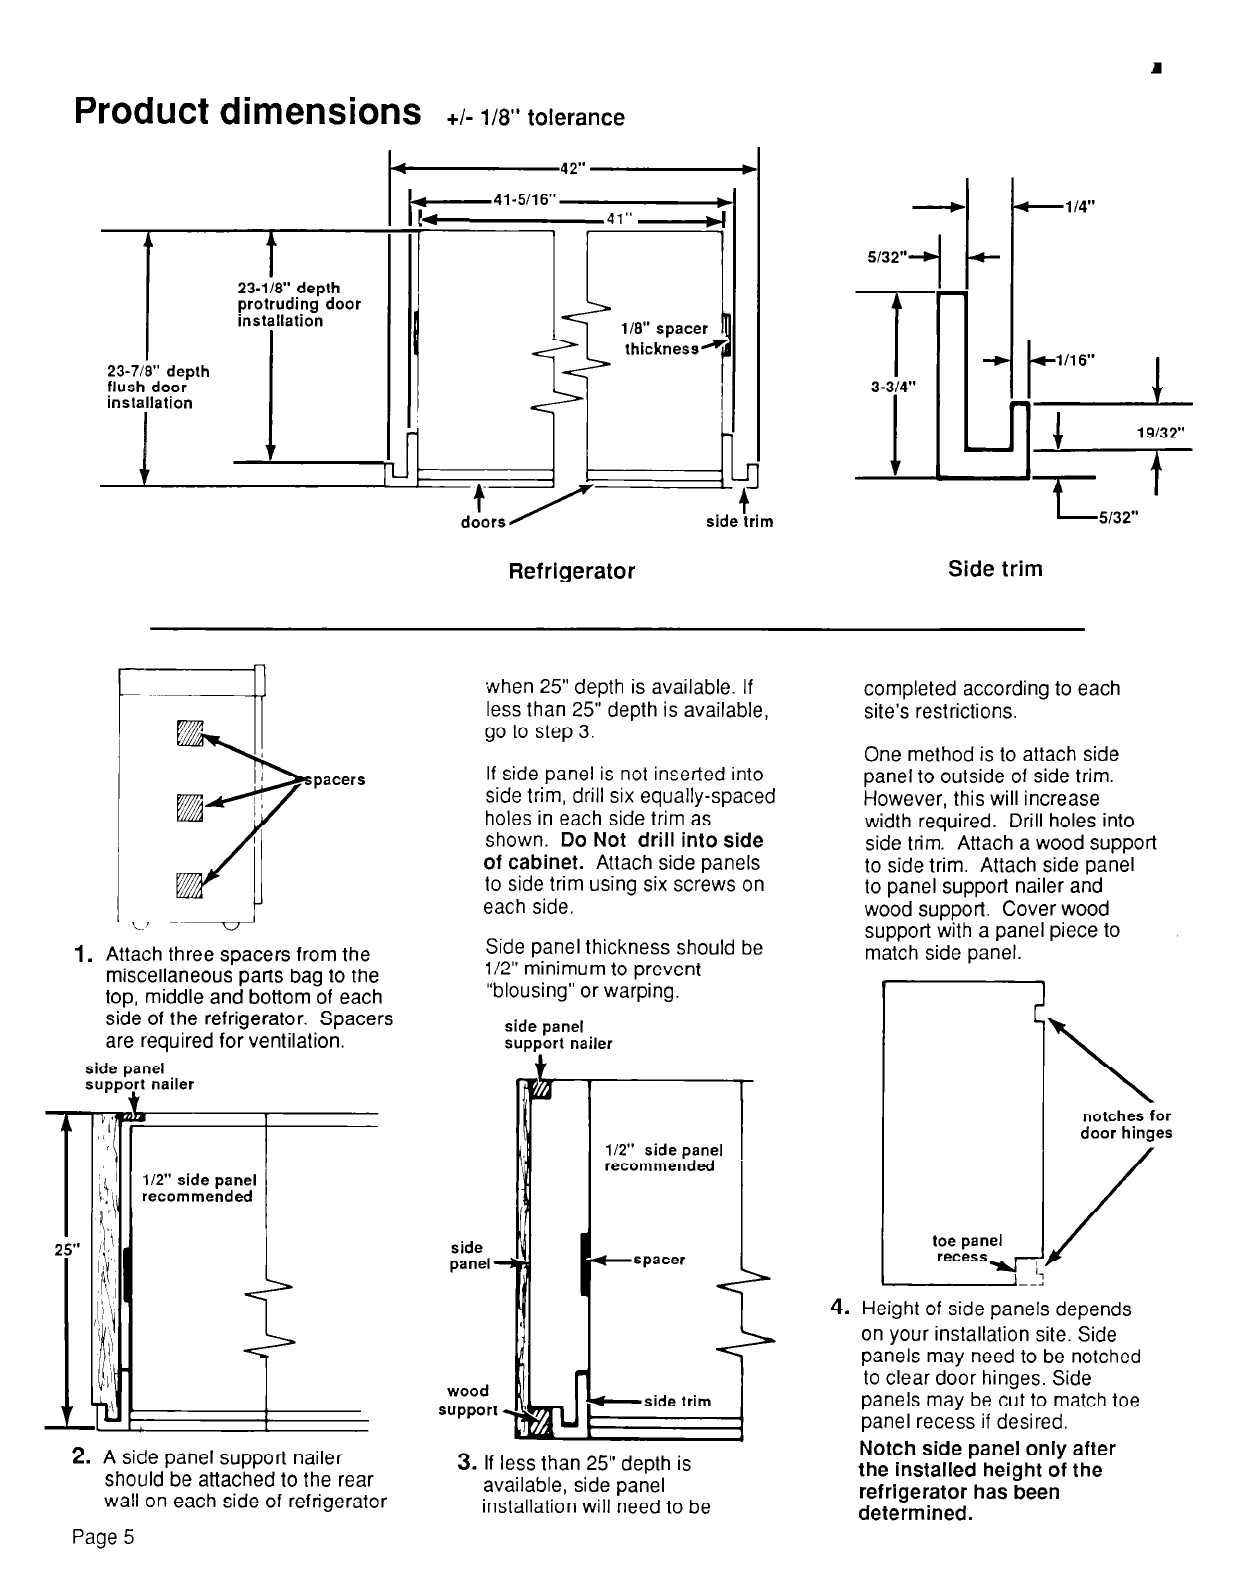
Product dimensions
+I- WY tolerance
b-42”
protruding door
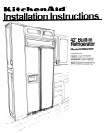
installation
Refrigerator
m
-5132”
Side trim
L -74
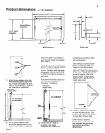
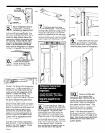
1.
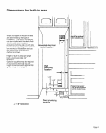
Attach three spacers from the
miscellaneous parts bag to the
top, middle and bottom of each
side of the refrigerator. Spacers
are required for ventilation.
side panel
support nailer
*
l/2” side panel
recommended
2. A side panel support nailer
should be attached to the rear
3. If less than 25” depth is
wall on each side of refrigerator
available, side panel
installation will need to be
Page 5
.&hen 25” depth is available. If
less than 25” depth is available,
go to step 3.
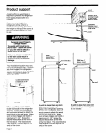
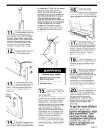
If side panel is not inserted into
side trim, drill six equally-spaced
holes in each side trim as
shown. Do
Not drill into side
of cabinet.
Attach side panels
to side trim using six screws on
each side.
Side panel thickness should be
l/2” minimum to prevent
“blousing” or warping.
side panel
support nailer
l/2” side panel
recommended
completed according to each
site’s restrictions.
One method is to attach side
panel to outside of side trim.
However, this will increase
width required. Drill holes into
side trim. Attach a wood support
to side trim. Attach side panel
to panel support nailer and
wood support. Cover wood
support with a panel piece to
match side panel.
toe panel
recess
w
notches for
door hinges
4. Height of side panels depends
on your installation site. Side
panels may need to be notched
to clear door hinges. Side
panels may be cut to match toe
panel recess if desired.
Notch side panel only after
the installed height of the
refrigerator has been
determined.