


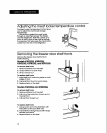
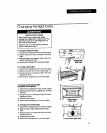

To change dispenser light:
I. Disconnect refrigerator from power supply.
2. Reach through front of dispenser area to
bulb.
3. Remove bulb and replace with a heavy-
duty tO-watt bulb.
4. Reconnect refrigerator to power supply.
IMPORTANT:Not all commercial appliance
bulbs will fit your refrigerator. Be sureto
replace a bulb with one of the same size and
shape.
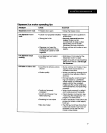
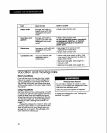
Understanding the sounds you may hear
Your new refrigerator may make different The following chart describes the kinds of
sounds than your previous one. Hard surfaces sounds that might be new to you and what
such as the ceiling, walls and cabinets causes them.
around the refrigerator can make these
sounds seem louder.
SOUNDS/OBSERVATIONS CAUSES
Hum or hlss The refrigerator's fan motor and movlng alr.
Clicking or snapping sounds The thermostat makes a definite click when the
refrigerator stopsrunning. Italso makes a sound
when the refrigerator starts.The defrost timer will click
when the defrost cycle startsand stops.
Runnlng sounds The hlgh-efflclency compressorand motor willrun
longer than older designs.
Trlckllngwater/water sounds During the defrost cycle, the refrigerator willnot be
running. The tricklingwater is the frost accumulation
on the freezer coil melting and running into the
defrost pan. When the refrigerator stopsrunning, you
may hear gurgling in the tubing for a few minutes.
Saving energy
• Open the doors as few times as possible.
Keep food organized so you do not have
to search for what you want. Get
everything you need out at one time. Close
the doors as soon as food Is removed.
• Make sure your refrigerator Is not next to a
heat source such as a range, water heater,
furnace, radiator or In direct sunlight.
• Set the refrigerator and freezer
temperatures to suit your needs-ice cream
should be firm and beverages should be as
cold as you like them. Avoid setting the
refrigerator and freezer temperatures
colder than necessary.
• Check the door gasket for a tight seal.
Level the cabinet to be sure of a good seal.
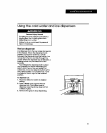
• Clean the condenser coils regularly.
2O