


16
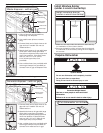
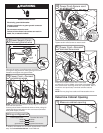
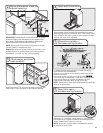
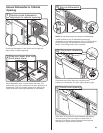
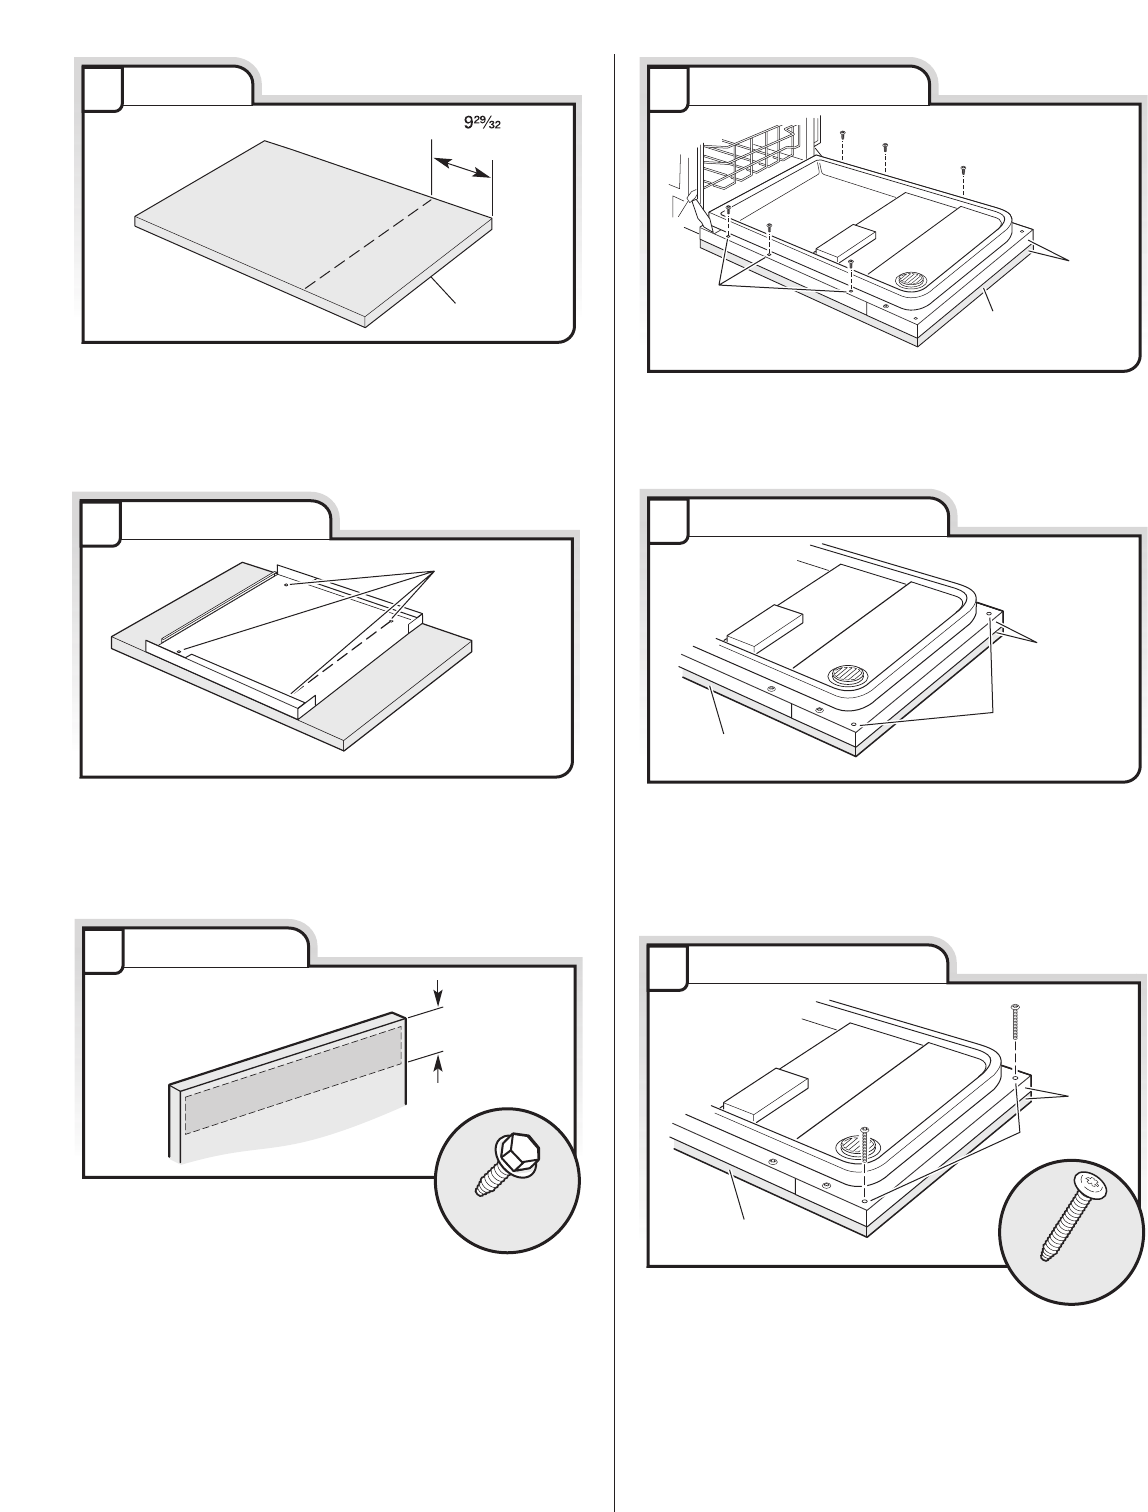
Install custom panel
8
Customer-supplied
panel
Align top
edges
Drill through
these holes
1³⁄₈” Screw
Install the two #8-18 x 1³⁄₈" screws from
the literature package in the top corners of the inner
panel. Tighten the six side screws reinstalled in Step 6.
6"
(15.2 mm)
Hex Head
Screw
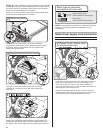
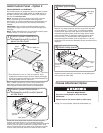
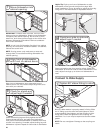
Attach handle
5
Attach outer panel to back of customer-supplied custom
panel with the four #10-16 x ³⁄₈" hex head screws supplied
in the literature package. Attach the handle. The handle
should be centered on the front of the customer-supplied
custom panel in the area shown.
IMPORTANT: Screw heads must be flush with back of
customer-supplied custom panel.
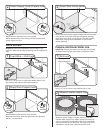
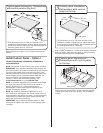
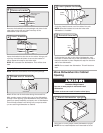
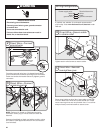
Attach body panel
6
Customer-supplied
panel
Align top
edges
Reinstall
3 screws
each side
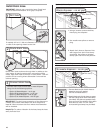
Install custom panel
7
Customer-supplied
panel
Align top
edges
Drill through
these holes
Attach the panel assembly to the door by reinstalling the
three screws on each side; do not tighten completely. This
reinstallation of the three screws will hold the panel
assembly in place on the door frame.
Align the top edge of the customer-supplied custom
panel with the top of the console.
Drill two ³⁄₃₂" pilot holes ¹⁄₂" (13 mm) deep, into the
customer-supplied custom panel, through the holes in the
top corners on the inner panel, as shown.
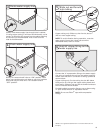
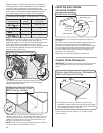
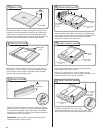
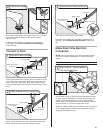
Mark line
3
(25.2 cm)
Top edge
Back
"
Measure 9²⁹⁄₃₂" (25.2 cm) from top edge and mark a line on
the back of customer-supplied custom panel. Position the
outer panel on the back of the customer-supplied custom
panel as shown, so that the top holes in the outer panel are
on the line, and both panels are centered side to side.
Mark pilot holes
4
Mark pilot
holes
Mark all four hole locations; remove outer panel. Drill ³⁄₃₂"
pilot holes ¹⁄₂" (13 mm) deep in customer-supplied custom
panel. Place the outer panel on the back of the customer-
supplied custom panel; align holes.