


ELECTRICAL INSTALLATION INSTRUCTIONS:
WARNING: DISCONNECT ELECTRICAL POWER SUPPLY Al
;E FUSE/
CIRCUIT BREAKER BOX BEFORE MAKING ELECTRICAL 0.3, :ECTIONS.
Follow the National Electrical Code and/or
your
local electrical code in all details.
In older houses with limited circuits, or if it appears the circuit is heavily loaded,
run 3 line directly to the maul fuse box.
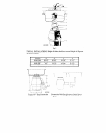
Models KWD-200. and
KWS-200
- 115 Volt, 60 Hertz.
1. Remove the electric31 access cover on the bearing bracket assembly.
2. Pull out the two le3ds provided.
3 Instill st3nd3rd strain relief connector (not furnished) into the threaded opening
in bs3ring bracket assembly.
4. Insert electrrcal power supply line into connector. Tighten connector.
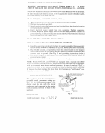
5. Connect electric31 power supply line to the two leads provided. Connect to
ground (See Fig. 3 and grounding instructions
below).
Press wires into electrical
access compartment and replace cover.
hiodels KWE-100, and KWI-100 - 115 Volt, 60 Hertz
Sreps 1, 7, and 3 3re the s3me as lllodels KWD-200, and KWS-200.
4. Install the operating control switch where it is easily accessible. Recommended:
On-Off switch suitable for operation of l/2 H.P. motor (Switch not furnished).
5. Run Hexible conduit, or equivalent, from the control switch to the disposer
motor leads located in the bearing bracket assembly. Insulate connections and
connect unit ta ground. (See Fig. 3 and grounding instructions below.)
6. Run power supply, in accordance with local codes, from control switch to
electric31 serviie panel.
7. Press \vrres into the electrical access compartment and replace cover.
IUOTE: hlod~ls KWE-300, and KU’I-200 are equipped with a manual reset (RED
SUTTOS) motor overload protector. hlodels KWD-200, and KWS-200 are equipped
wirh an 3utomatic reset motor overload protector. In case of overload ‘Trip”, a
minimum of three to live minutes cooling time must be allowed before resetting.
Ii disposer has been running for more than IO-15 minutes (a “well heated” con-
ditlon). reset time may be 20-25 minutes.
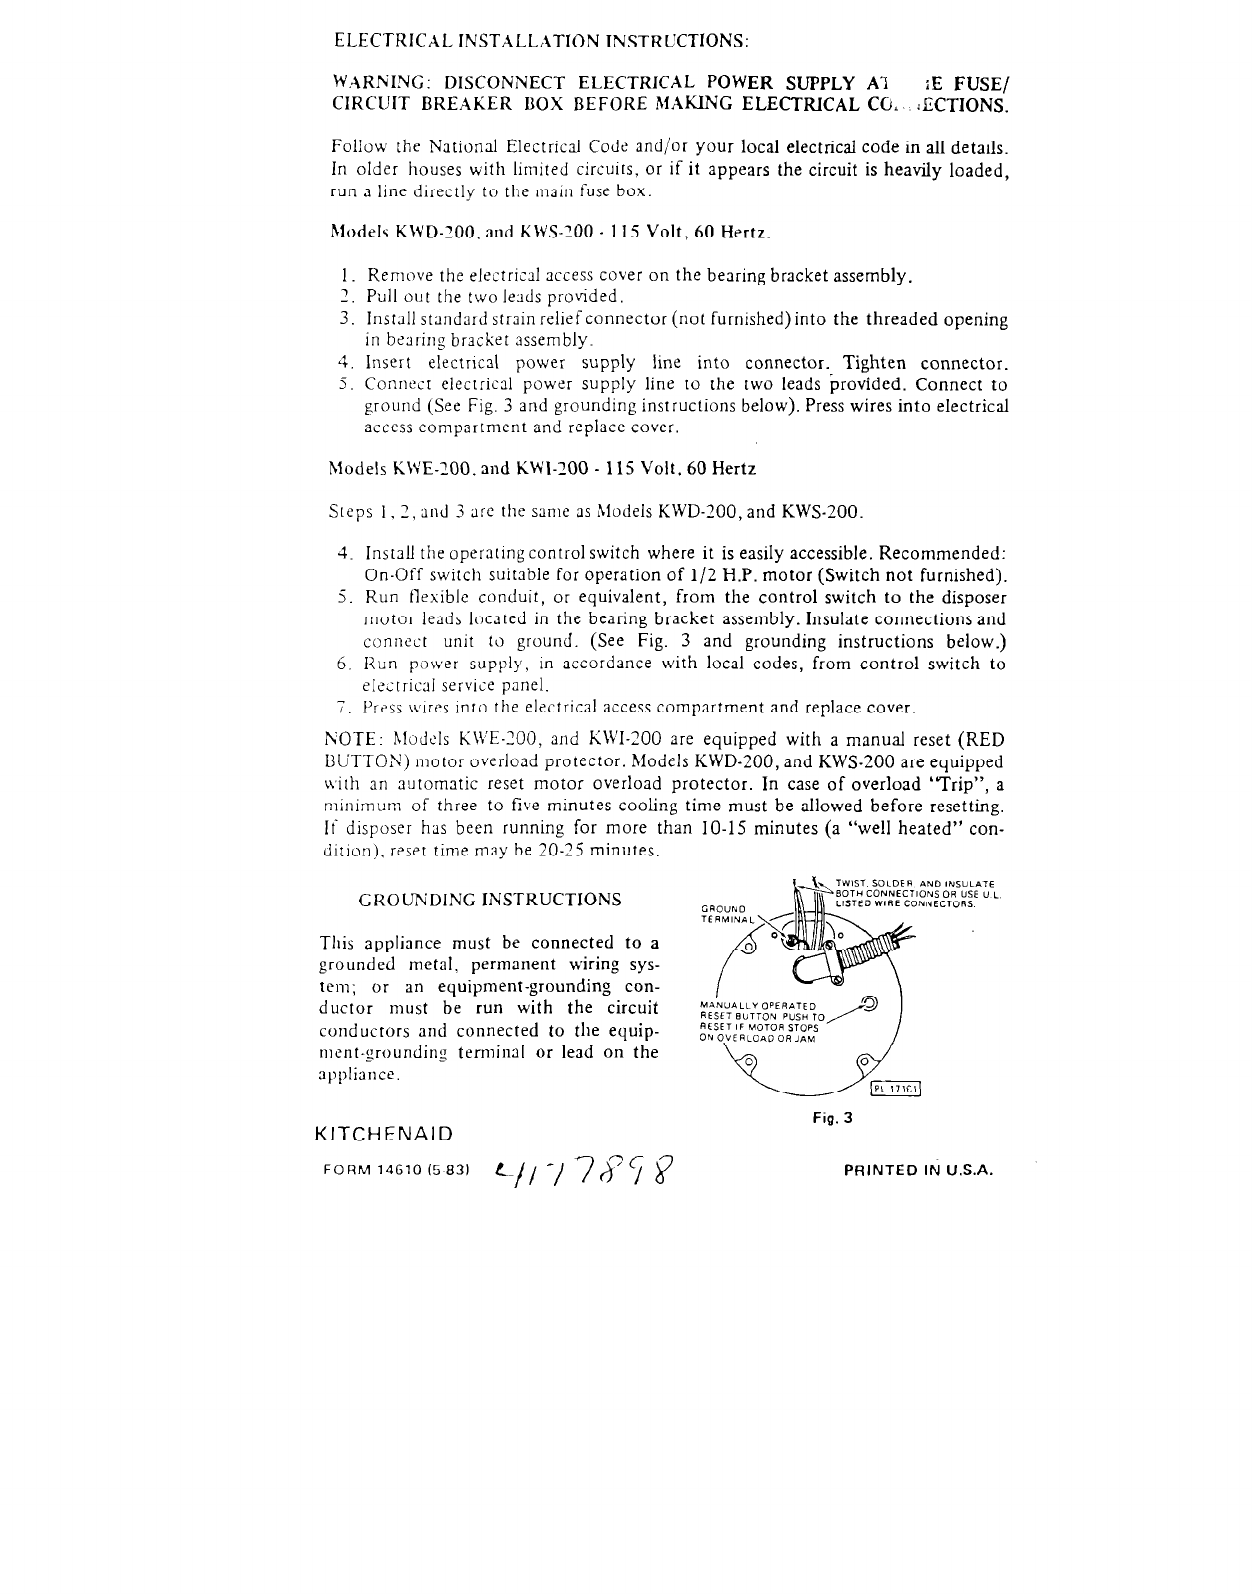
GROUNDING INSTRUCTIONS
This appliance must be connected to a
grounded metal, permanent wiring sys-
tem;
or
an equipment-grounding con-
ductor must be run with the circuit
conductors and connected to the equip-
ment-grounding terminal or lead on the
3ppli3nce.
KITCHENAID
FORM 14610 (5 831
=-/I -/
7P?
d
Fig. 3
PRINTED IN U.S.A.