


9
Complete Installation
1. Connect vent system to hood liner.
2. Seal joints with duct tape.
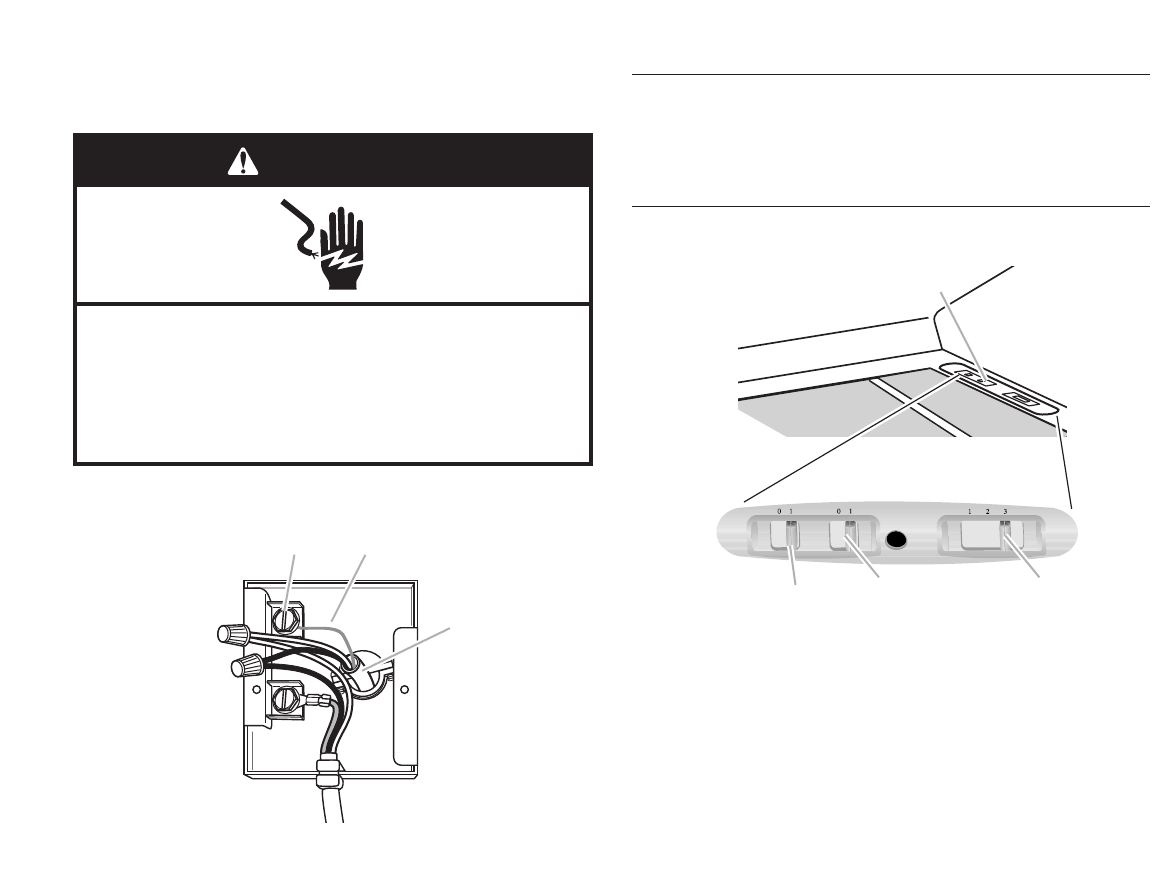
Check Operation
1. Check operation of the range hood by turning the power on.
2. Move the light switch to the “1” position. The light should
turn on.
3. Move the light switch to the “0” position. The light should
turn off.
4. Move the blower switch to the “1” position. The blower
should turn on.
5. Move the blower speed control switch to vary the blower
speed from low (left) to high (high).
6. Move the blower switch to the “0” position. The blower
should turn off.
7. If range hood does not operate, check that the circuit breaker
has not been tripped or the house fuse blown. Disconnect
power supply and check that the wiring is correct.
8. Reinstall filters. Place back edge of filter into channel at rear
of hood liner and push filter up while pushing tab back. When
filter is in place, release tab. Locking pin will hold filter in
place.
9. Repeat for other filter(s).
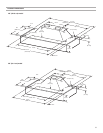
10. Install hood enclosure.
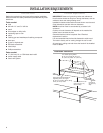
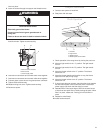
A. Controls
B. Light switch
C. Blower switch
D. Blower speed control switch
liner into place.
5. Insert the screws through the support and thread into the
hood liner holes. Tighten screws securely.
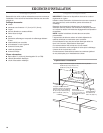
6. Use twist-on connectors and connect black wires together.
7. Use twist-on connectors and connect white wires together.
8. Connect green or bare wire to the ground screw connector.
9. Tighten strain relief securely.
10. Replace wiring box cover. Tighten screw securely.
11. Reconnect power.
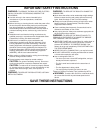
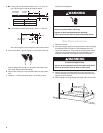
WARNING
Electrical Shock Hazard
Electrically ground the blower.
Connect ground wire to green ground screw in
wiring box.
Failure to do so can result in death or electrical shock.
C
A
B
A. Ground screw connector
B. Ground wire
C. Power supply cable
A
C
D
B