


8
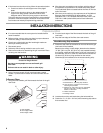
4. Run 3 wires, black, white and green, in ¹⁄₂" conduit from
service panel to terminal box. Use caulking to seal openings.
5. Use UL listed wire connectors and connect black wires (B)
together.
6. Use UL listed wire connectors and connect white wires (H)
together.
7. Connect green (or bare) ground wire from home power supply
to the unused green ground wire (A) in the terminal box.
8. Tighten strain relief screws.
9. Install terminal box cover.
10. Using the light bulb removal tool, check all light bulbs to
make sure they are secure in their sockets.
11. Reconnect power.
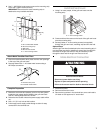
Install Duct Cover
(Optional Accessory)
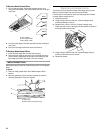
1. Use 4 - #10 sheet metal screws to assemble the duct cover
sides to duct cover front.
2. From inside the grill vent hood, attach duct cover to the top of
the grill vent hood using 8 - #10 sheet metal screws.
Reinstall Grease Filters
See “Metal Grease Filters” in “Grill Vent Hood Care” section.
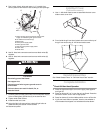
Complete Installation
Check Grill Vent Hood Operation
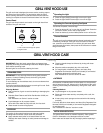
1. Press the light button (B) to turn on the light, press again to
turn light off.
2. Press fan button (A) “up” to turn fan on Low Speed. Press the
fan button “down” to turn fan to High Speed.
3. Press fan button (A) to the middle position to turn off the fan.
4. If grill vent hood does not operate, check to see whether a
circuit breaker has tripped or a household fuse has blown.
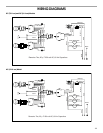
A.Green (or bare) ground wire from home power
supply connected to green ground screw
B.UL listed wire connectors (3)
C.Black wires
D. Home power supply cable
E.Green ground screw
F. Grill vent hood power supply cable
G.Strain relief
H.White wires
A
B
C
D
E
F
G
H
WARNING
Fire Hazard
Electrically ground the blower.
Use copper wire.
Connect ground wire to green ground screw in
terminal box.
Failure to do so can result in death, fire, or
electrical shock.