7
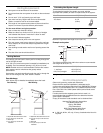
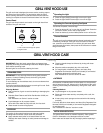
4. Use 2 - #10 Phillips head screws to secure the mounting strip
to the wall. Tighten screws securely.
IMPORTANT: Ensure that the wood mounting strip is
attached to every available wall stud.
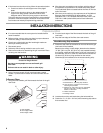
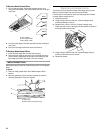
Attach Metal Transition Duct Piece
1. Place the metal transition duct piece over the vent openings
in the top of the grill vent hood.
2. Securely fasten with 4 - #10 sheet metal screws using a
#2 Phillips screwdriver.
Complete Preparation
1. Determine and make all necessary cuts for the vent system.
Install the vent system before installing the grill vent hood.
See the “Venting Requirements” section.
2. Determine the location where the power supply cable will be
run.
3. Drill a 1¹⁄₄" (3.2 cm) hole at this location.
4. Pull enough power supply cable through to allow for easy
connection to the terminal box.
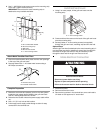
Install Grill Vent Hood
1. Using 2 or more people, lift the grill vent hood onto the
mounting strip.
2. Center and level the recess on the back of the grill vent hood
onto the mounting strip.
3. Securely fasten 4 - #10 mounting screws (not supplied)
through the grill vent hood, mounting strip and into the wall.
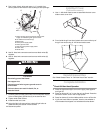
Optional Step:
After the grill vent hood is attached to the wood mounting strip, it
may be further secured by installing 2 screws into the wall from
the inside of the grill vent hood. It may be necessary to drill
through the back wall of the grill vent hood to do so.
Make Electrical Connection
1. Disconnect power.
2. Remove terminal box cover.
3. Remove the knockout in the terminal box cover and install a
UL listed or CSA approved ¹⁄₂"strain relief.
A.Non-combustible material
B. Wood mounting strip
C.Wall studs
D.Back of hood outline
E.2 - #10 mounting screws
A.Transition duct piece
B. #10 sheet metal screws
1½" (3.8 cm)
3½" (8.9 cm)
1½" (3.8 cm)
AA
B
C
D
E
A
B
A.4 - #10 mounting screws
A
WARNING
Electrical Shock Hazard
Disconnect power before servicing.
Replace all parts and panels before operating.
Failure to do so can result in death or electrical shock.


