


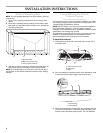
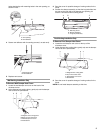
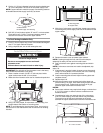

5
holes should align with mounting holes in the vent opening, as
shown in inset.
4. Secure vent deflector with 2 mounting screws (1 on each end).
5. Replace vent screen.
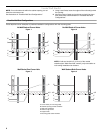
Wall Venting Installation Only
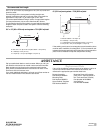
To Remove Wall Damper Vent Cover:
1. Locate the wall damper vent cover on the back of the
microwave oven.
2. Using diagonal wire cutting pliers, gently snip out the damper
vent cover at the perforations.
3. Save the cover for possible change of venting method in the
future.
4. Position the damper assembly so that the long tab slides into
the slot on the right side of the damper vent opening, as
shown. Then secure with mounting screw.
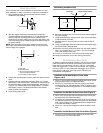
Roof Venting Installation Only
To Remove Roof Damper Vent Cover:
1. Locate the roof damper vent cover on the top of the
microwave oven.
2. Using diagonal wire cutting pliers, gently snip out the damper
vent cover at the perforations.
3. Save the cover for possible change of venting method in the
future.
NOTE: Do not install damper assembly at this time.
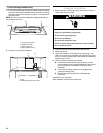
A. Vent opening
B. Vent deflector
A. Mounting screw
B.Vent deflector
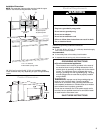
A. Diagonal wire cutting pliers
B. Back of microwave oven
C. Wall damper vent cover
D. Perforations
A B
A B
A B C D
A. Mounting screw
B. Damper assembly
C. Long tab (inside slot)
A. Diagonal wire cutting pliers
B. Top of microwave oven
C. Roof damper vent cover
D. Perforations
A B C
A B C
D