


17
CUSTOM PANEL INSTALLATION INSTRUCTIONS
Custom Drawer Panel
If you plan to install a custom wood panel, you will need to create
the panel yourself or consult a qualified cabinetmaker or
carpenter. See dimension drawings for panel specifications.
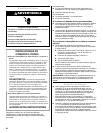
IMPORTANT:
■ The thickness of the custom panel must be ¹⁄₂" (1,3 cm) to ³⁄₄"
(1.9 cm).
■ Do not exceed the height dimension for the custom panel. A
panel that exceeds the height dimension may damage the
drawer dishwasher, cabinets or countertop.
■ The width of the custom panel may vary according to the
width of the cabinet opening.
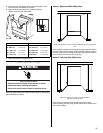
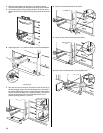
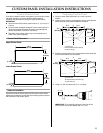
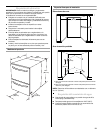
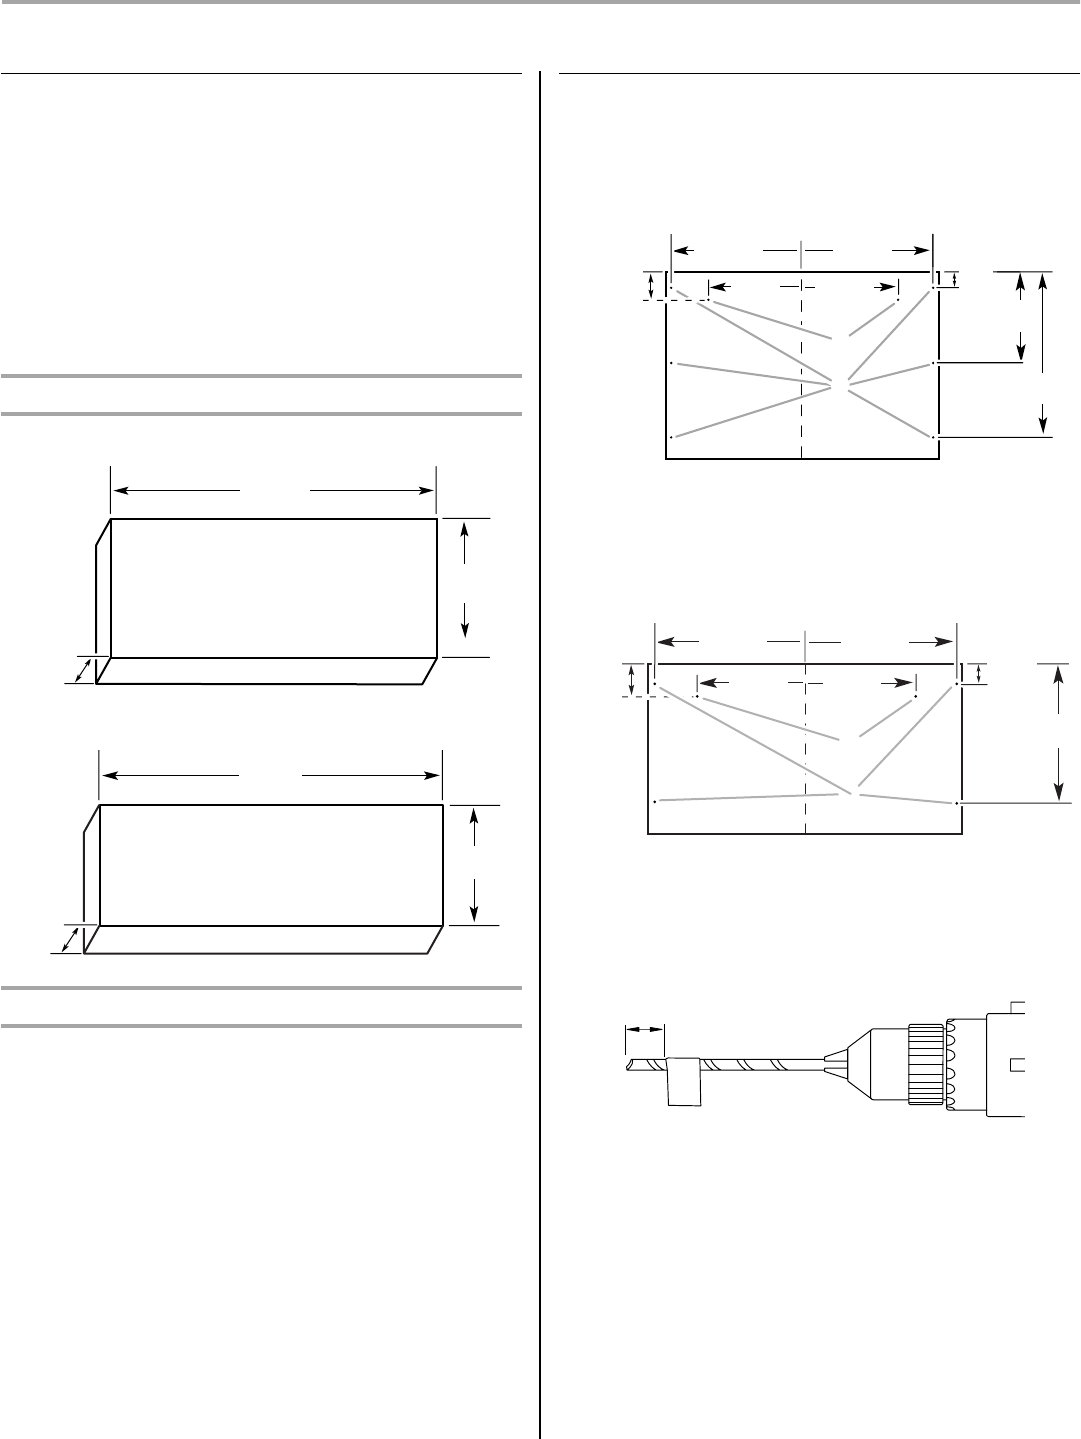
Custom Panel Dimensions
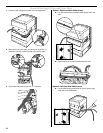
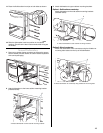
Upper Drawer Panel
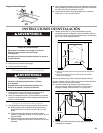
Lower Drawer Panel
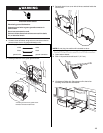
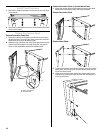
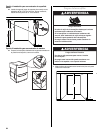
Hardware Installation
Center the hardware (left to right) onto the custom panel. When
installing the hardware, be sure that the mounting screws are flush
with the back of the custom panel.
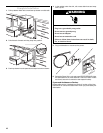
Preparing Custom Panel
1. Lay the custom panel face down on a clean, soft work
surface.
2. Using a pencil, mark the centerpoints for the 2 panel fastener
pilot holes and 6 pilot holes needed for the panel.
3. Mark the centerpoints for the 2 panel fastener pilot holes and
4 pilot holes need for the lower panel.
4. Using a ¹⁄₈" drill, drill each hole ³⁄₈" (1 cm) deep.
IMPORTANT: To avoid drilling through to the front of the
custom panel, do not drill deeper than ³⁄₈" (1 cm).
23⁷⁄₁₆"
(59.5 cm)
16¹⁄₄"
(41.3 cm)
³⁄₄"
(1.9 cm)
12³⁄₄"
(32.4 cm)
23⁷⁄₁₆"
(59.5 cm)
³⁄₄"
(1.9 cm)
A.Center line
B.Panel fastener pilot holes (2)
C.Pilot holes (6)
A.Center line
B.Panel fastener pilot holes (2)
C.Pilot holes (4)
(20.7 cm)
8¹⁄₈"
(20.7 cm)
8"
(20.2 cm)
(36.6 cm)
(28.5 cm)
11¹⁄₄"
(28.5 cm)
2¹⁄₂"
(6.3 cm)
11¹⁄₄"
8¹⁄₈"
14¹⁄₈"
B
C
A
1¹⁄₂"
(3.8 cm)
A
C
B
10¹⁄₂"
(26.7 cm)
(20.7 cm)
8¹⁄₈"
(20.7 cm)
8¹⁄₈"
(28.5 cm)
11¹⁄₄"
(28.5 cm)
11¹⁄₄"
1¹⁄₂"
(3.8 cm)
2¹⁄₂"
(6.3 cm)
³⁄₈" (1 cm)