10GB
12c
8a
8b
12f
24
12e
Cmd
12c
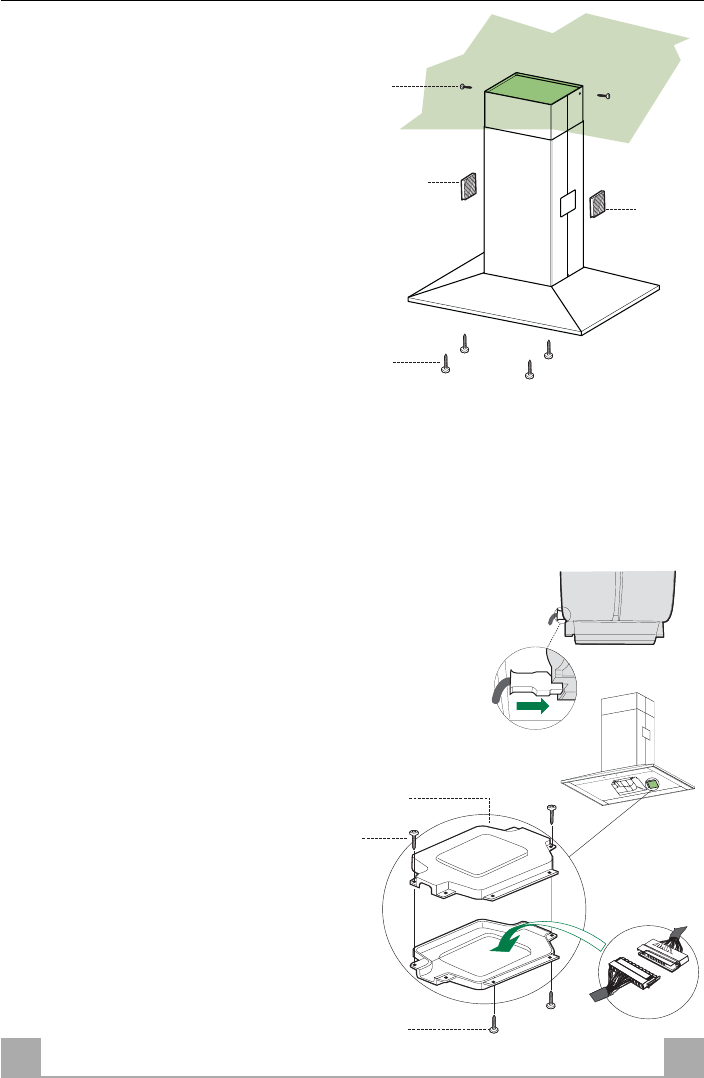
Flue assembly - Mounting the hood body
• Position the upper chimney section and fix the
upper part to the frame using the 2 screws 12c
(2,9 x 9,5) provided.
• Similarly, position the lower chimney section and
fix the lower part to the frame using the 2 screws
12c (2,9 x 9,5) provided.
Recirculation version
• Make sure that the outlet of the extension pieces
14.1 is horizontally and vertically aligned with
the chimney outlets.
• If this is not the case, remove the lower chimney
section and adjust the position by either revers-
ing the connection extension pieces 14.1, then
reassemble as described previously.
• Fit the directional grids 8a - 8b in their housings
making sure that the directional symbols are
towards the top. Also make sure that they are
correctly inserted in the connection extension
pieces 14.1.
Before fixing the hood body to the frame:
• Remove the grease filters from the hood body.
• Remove any activated charcoal filters.
• From below, use the 4 screws 12f (M6 x 10)
provided to fix the hood body to the frame.
ELECTRICAL CONNECTION
• Connect the hood to the mains through a two-
pole switch having a contact gap of at least 3
mm.
• Remove the grease filters (see paragraph
Maintenance) being sure that the connector of
the feeding cable is correctly inserted in the socket
placed on the side of the fan
• Connect the control connector Cmd.
• Place the connector in the junction box 24 and
close it using the 2 screws 12e (2,9 x 9,5)
provided.
• Fix the junction box to the hood body using the 2
screws 12c (2,9 x 6,5) provided.
• For the recirculation version, fit the activated
carbon odour filter.
• Replace the grease filters.


