


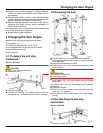
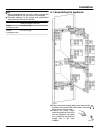
Ensure that both metal
edges are flush,
symbol //:
u
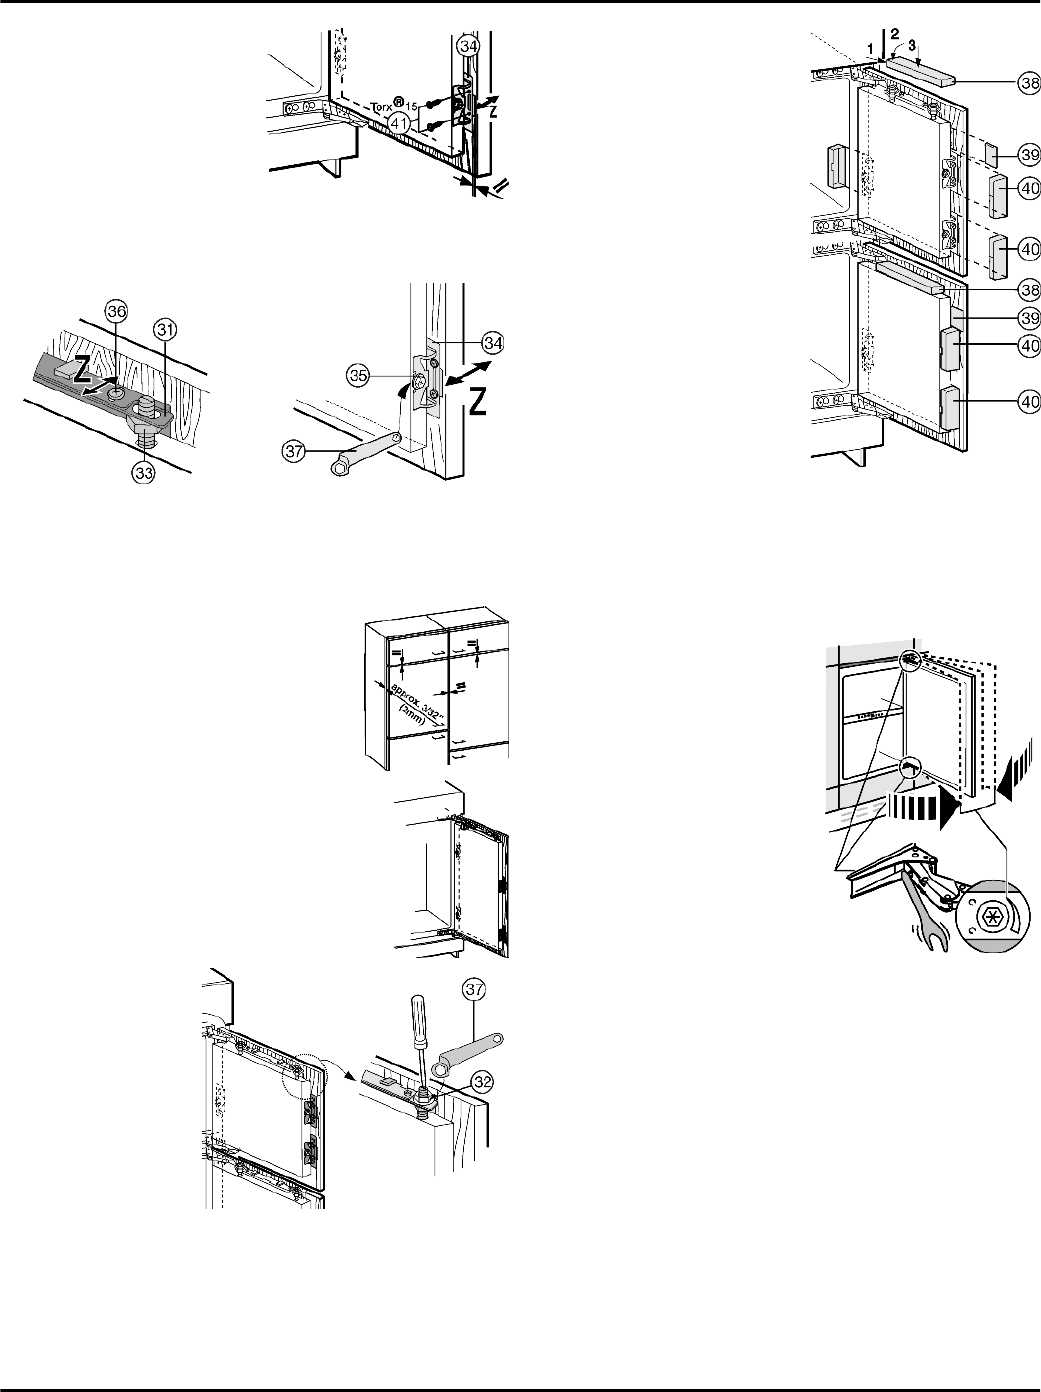
Drill pilot holes in the
door of the unit (you
could make a
preliminary hole with a
bradawl).
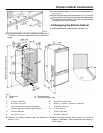
Fig. 25
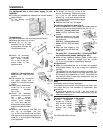
u
Fasten the appliance door to the unit door with screws
Fig. 25 (41)
through the mounting brackets
Fig. 25 (34)
.
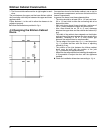
Fig. 26
u
To align the unit door in depth Z: Undo the screws
Fig. 26 (36)
at the top and the hex head screws
Fig. 26 (35)
at the bottom using the ring wrench
Fig. 26 (37)
supplied, then move the door.
u
Do not allow the knobs and sealing lips
to come into contact with the door -
important for function!
u
Set an air gap of 3/32 '' (2 mm) between
the door of the unit and the body of the
unit.
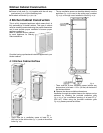
For large unit doors:
u
Fit a 3rd pair of mounting brackets
Fig. 26 (34)
.
u
Use the holes pre-drilled in the handle
area of the appliance door for this
purpose.
u
Check the fit of
the door and re-
adjust, if
necessary.
u
Tighten all
screws.
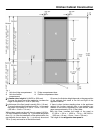
Fig. 27
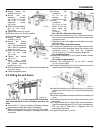
u
Tighten the locknuts
Fig. 27 (32)
with the ring wrench
Fig. 27 (37)
while bracing the adjusting bolts
Fig. 27 (33)
with a screwdriver.
u
Position the upper
covers
Fig. 28 (38)
and
snap into place.
u
Place the side covers
Fig. 28 (39)
in position,
slide to the limit and
then press until they
snap audibly into place.
u
Attach the covers
Fig. 28 (40)
to the side
and then draw them
forward with a
screwdriver, so that
they snap properly into
place.
Fig. 28
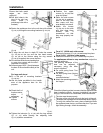
For a 24 '' (609.6 mm) wide recess:
u
Position the covers
Fig. 9 (6,7,60)
and snap into place.
For a 23-5/8 '' (600 mm) wide recess:
u
Position the covers
Fig. 9 (5,6,7)
and snap into place.
For appliances without a stop mechanism, adjust the
opening resilience:
The opening resilience of the
door can be adjusted if
necessary using the Allen
wrench supplied:*
u
For more spring force: Turn
clockwise.*
u
For less spring force (factory
setting): Turn
counterclockwise.*
u
Attach the remaining covers to
the hinges.*
*
Check the following points to ensure that the appliance has
been installed correctly. Incorrect installation can cause
icing up, the formation of condensate, and malfunctions:
w
The door must close properly.
w
The door of the unit must not touch the body of the unit.
w
The seal at the top edge on the handle side must fit tightly.
To verify this, darken the room, place a flashlight inside
the appliance near the top, and close the door. If you see
light shining through, check the assembly.
Installation
12