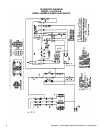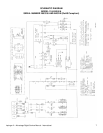
Impinger II – Advantage Digital Service Manual - International
10
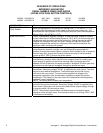
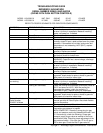
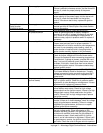
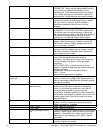
Power supply Set the temperature to the lowest temperature setting.
If there is sufficient microamp current, but the flame will
not stay lit, check for proper polarity of the power
supply.
Ignition control If there is sufficient microamp current, and there is
proper polarity of the power supply, but the burner will
not stay lit, check the reset button on the ignition
control. If the above test is okay, replace the ignition
control.
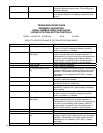
Oven will not heat
Serial Number
2045408 & Above
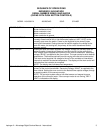
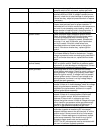
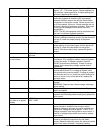
Gas supply Check for adequate gas supply and be sure that the
manual gas shut off valve is open. Also check flexible
gas line connection.
Main fan If not operating, refer to “Oven fan will not run”.
Air pressure switch Check air switch terminals for supply voltage to
terminals C and NO. If voltage is present on one side
only, check for air tube blockage or misalignment. If
these are okay, adjust air pressure switch or replace if
necessary.
Oven cavity hi-limit thermostat
Terminals are normally closed, opens at 350°C (660°F).
If open, reset and test oven for proper operation. If
thermostat will not hold for maximum oven temperature,
and oven is not exceeding control setting, check for
proper location of capillary bulb in its spring holder. If
above checks are okay, replace hi-limit thermostat.
Ignition control Check for proper supply voltage to ignition control.
Check for proper voltage to the burner blower motor.
This can be checked at motor connecting plug terminal
5 and Neutral. If voltage is present, proceed with next
step, if not, wait 30 seconds, push reset button and try
to restart. If this fails, check wires from burner blower
motor to the ignition control. If the above checks okay,
replace ignition control.
Burner blower motor Check for supply voltage to motor. WITH POWER OFF:
Turn blower wheel to check for locked rotor. If supply
voltage is present at motor connecting plug terminal 5
and Neutral, and motor does not run, replace burner
blower motor.
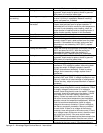
Air pressure switch
(burner blower)
Check for proper supply voltage switching from “NC” to
“NO” on ignition control. Check for air pressure switch
adjustment, air tube blockage or misalignment. If these
adjustments fail, replace air pressure switch.
Ignition control A pre-purge time of 30 to 60 seconds occurs after
burner blower motor starts. Check for high voltage
spark output from the ignition control. If there is no high
voltage spark output, check reset button for ignition
control. If there is still no high voltage output, replace
the ignition control.
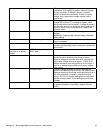
Igniter/sensor assembly Check this assembly for visible damage. Replace as
needed. If there is no visible damage, check for voltage
supply to igniter/sensor assembly. If there is voltage
supplied to the igniter/sensor, but there is no spark,
replace igniter/sensor assembly.
Gas valve Gas valve should open as the ignition control generates
the high voltage spark. Place manometer on the
pressure tap fitting (located in the gas piping just prior
to the burner manifold) and check for gas pressure. If
valve does not open, check reset button on ignition
control, and all connections for tightness. If there is still
no gas pressure, remove the ignition control from the
gas valve. Check the coils of the gas valve for opens or


