Impinger I – Adv Digital – Gas Service Manual – International
16
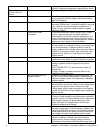
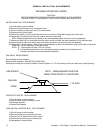
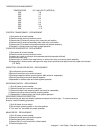
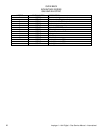
THERMOCOUPLE MEASURMENT
TEMPERATURE D.C. MILLVOLTS (APPROX.)
200° 2.8
250° 4.0
300° 5.1
350° 6.0
400° 7.1
450° 8.2
500° 9.3
550° 10.4
600° 11.5
CONTROL TRANSFORMER - REPLACEMENT
1. Shut power off at main breaker.
2. Remove control panel top and front cover.
3. Remove two (2) wires on primary side, note color and location.
4. Remove two (2) wires on secondary side, note color and location.
5. Remove two (2) screws from transformer base and replace assembly.
6. Reinstall in reverse order and check system operation.
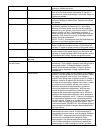
CONVEYOR DRIVE MOTOR - REPLACEMENT
1. Shut power off at main breaker.
2. Remove control panel top and front cover.
3. Loosen set screw on conveyor drive sprocket and slide sprocket off shaft.
4. Disconnect motor plug.
5. Remove four (4) screws from motor frame, on control box side, and remove motor assembly.
6. Reassemble in reverse order making sure to align chain sprockets and adjust motor for proper chain tension
(1/2" SAG).
CAPACITOR, CONVEYOR MOTOR – REPLACEMENT
1.Shut off power at main breaker.
2.Remove control box cover and front panel.
3.Discharge capacitor before removing wires. Mark wires for reassembly.
4.Remove mounting screw and remove capacitor.
5.eassemble in reverse order and check system operation.
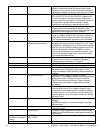
REVERSING SWITCH – REPLACEMENT
1. Shut off power at main breaker.
2. Remove control box cover and front panel.
3. Disconnect wires from reversing switch and mark for reassembly.
4. Remove mounting nut and remove reversing switch.
5. Reassemble in reverse order and check system operation.
REVERSING CONVEYOR DIRECTION
All ovens leaving our plant are wired to operate conveyors from left to right. To reverse conveyor
direction, use the following procedure.
1. Shut off power at oven switch.
2. Set conveyor reversing switch in the other position.
3. Turn oven “on” and check for proper operation.
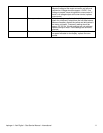
MAIN ORIFICE - REPLACEMENT
1. Shut off power at main breaker.
2. Remove control panel top and front panel.
3. Remove gas control valve assy.
4. Remove two (2) nuts from burner orifice bracket.
5. Disconnect pipe union.


