


8
3. Ensure that the filter basket is properly seated and place the filter into the
filter basket.
4. Add coffee ground into the filter. Gently tap the filter basket to distribute the
ground coffee evenly.
5. Close the lid and place the carafe on the warming plate.
6. Plug the power cord and press the “ON/OFF” button once. The “RUN”
indicator will be illuminated in blue and the appliance will begin the brewing
cycle.
NOTE: This product has pause ‘n serve feature. The user may take out the
carafe at any time during brewing to stop dripping automatically. However,
the time cannot exceed 30 seconds and it is recommended to place the
carafe back in position after serving.
7. Do not open the water tank lid while the coffee maker is operating. The flow
back of hot water will damage the appliance.
8. When coffee stops dripping, the brewing cycle is complete. Carefully remove
the filter basket and discard the used ground coffee. Rinse the filter basket
and replace.
NOTE: The amount of coffee brewed will be little less than the amount of
water put into the tank as some water will be absorbed by the coffee
ground.
9. To keep the coffee warm, return the carafe to the warning place after pouring
the coffee.
10. Press the “ON/OFF” button twice to turn the appliance off. The “RUN”
indicator will be extinguished. Unplug the power cord from the outlet when
the appliance is not in use, left unattended, or when the carafe is empty.
TIMER PROGRAMMING
The programming feature allows the users to pre-set the time that the coffee
maker will start brewing. A user may set up the programming at night time for a
coffee maker to start brewing at certain time in the morning.
1. Follow the instruction #1 ~ 5 from above.
2. Press the “ON/OFF” button twice and the “AUTO” indicator
will illuminate in green.
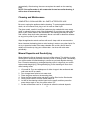
3. Press the “PROG” button and the LCD will display
“CLOCK”.
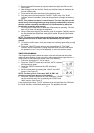
4. Set the current time by pressing the “HOUR” and “MIN”
buttons. (See Figure 2)
NOTE: The time cycle is 12 hrs and “AM” & “PM” will
transform once it goes beyond 12 hrs setting.
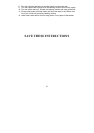
5. Press the “PROG” button and the LCD will display “TIMER”.
Set the automatic start time by pressing the “HOUR” and
“MIN” buttons. (See Figure 3)
From the example shown, “AUTO” indicator will be extinguished at 8:15PM and
the “RUN” indicator will be illuminated in blue. The appliance will start