


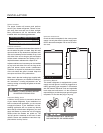


Step 3:
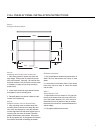
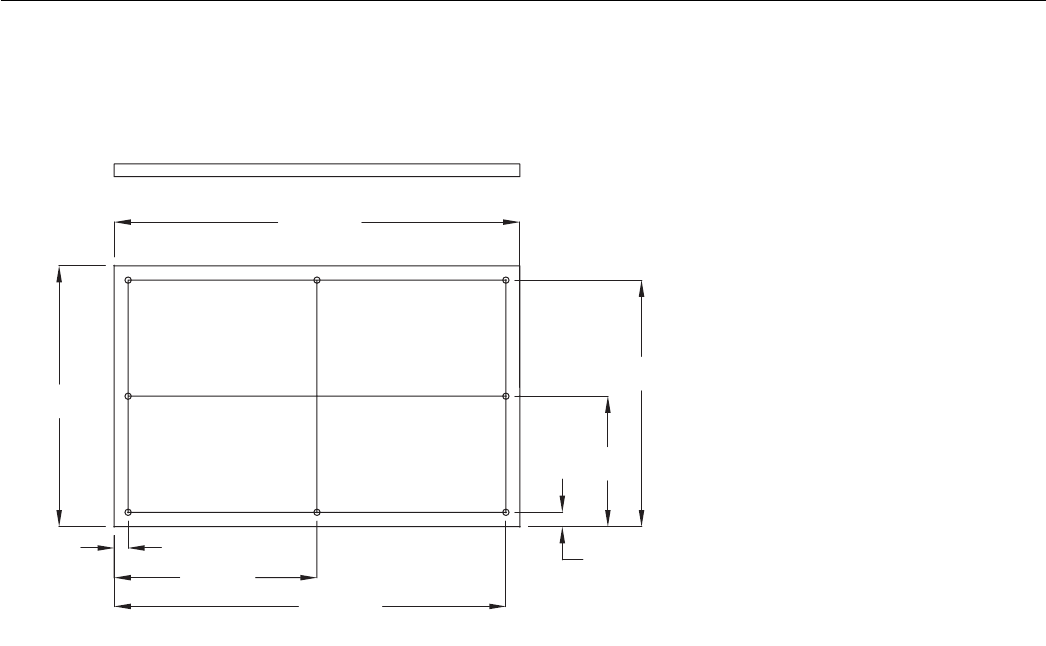
Sizing the Overlay Panel
Step 4:
Attaching the Overlay Panel to the Door
1. Set overlay panel on drawer front face and
align edges. Clamp panel in position and mark
pilot hole locations. See step 3 for nominal size
and hole locations. Drill pilot holes (remove panel
if necessary, re-align and re-clamp overlay to
drawer face).
2. Insert wood screws through clearance holes
and tighten to secure overlay panel.
3. Reinstall gasket into channel. Make sure the
corners are inserted fully.
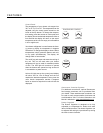
Step 5:
Reattach Drawer Front to Drawer Body
1. Align mounting holes on drawer body with
mounting holes on drawer front. Align the door
liner to the front flanges by using the erasable
marker alignment lines that were applied prior to
removing the door from the drawer. Reinstall
phillips head screws and washers. Snug down,
but do not tighten fully, final adjustment of drawer
front will be done after reinstalling the drawer.
Step 6:
Reinstall the Drawer
1. Fully extend drawer slides and place drawer on
slides. Be sure that drawer sits evenly on both
slides.
2. Lock drawers into drawer slides. Push drawer
locks down and then back to relock the drawer
into the slide.
Step 7:
Adjust Drawer Front
1. Adjust drawer front to achieve a 1/8" gap from
the top of the drawer front to the top of the cabi-
net or (for bottom drawers) 1/8" from the top of
the drawer front to the bottom of the top drawer,
the drawer front should be centered between the
cabinet edges.
2. Fully tighten phillips head screws.
FULL OVERLAY PANEL INSTALLATION INSTRUCTIONS
11.81
23.06
.56
.56
7.59
14.63
15.19
23.63
7