


12
FULL OVERLAY PANEL INSTALLATION INSTRUCTIONS
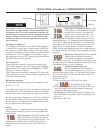
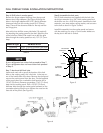
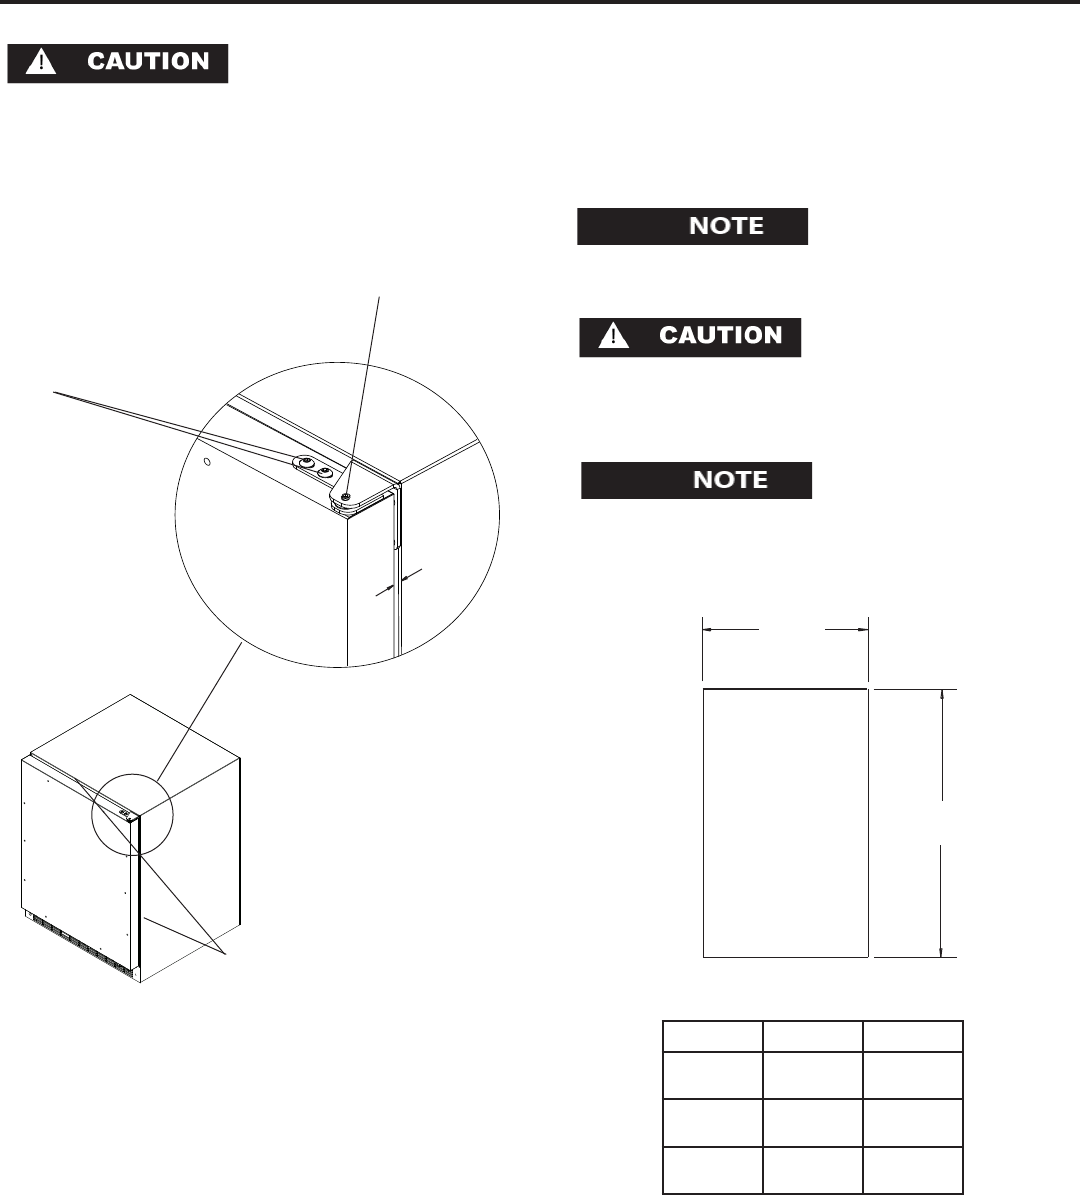
Step 1: Verify door alignment
The door should be parallel to the sides and top of the
refrigerator. If alignment is necessary the door may be
adjusted by loosening the 2 screws which secure the
hinge adapter brackets to the door and adjusting the
door side to side. Use a 5/32” allen wrench for this pro-
cedure. (See Figure 3 below).
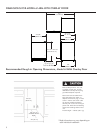
Figure 3
Hinge adapter screws loos-
en these to adjust door, on
the top and bottom of the
door
Top hinge pin
remove to remove
the door.
Door must be
parallel to top
and sides of
refrigerator
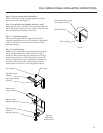
Step 2: Remove door
Remove the top hinge pin from the hinge with an 1/8”
allen wrench. Remove the door by angling the top of the
door outward and lifting the door off the bottom hinge.
(See detail in Figure 3).
Step 3: Remove gasket
Lay the door on its front being careful not to scratch it.
Remove the door gasket by peeling up and out of the
channel.
Step 5: Clamp panel to door
Set the overlay panel on the door front, align the edges,
and clamp together. Clamp the panel firmly but be care-
ful not to crush the foam in the door or scratch the door.
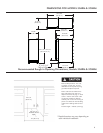
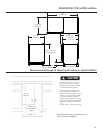
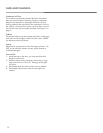
Step 4: Cut overlay panel
Depending on the refrigerator model cut the overlay
panel to the dimensions shown in Figure 4 and Table A
below.
H
W
Front of
overlay
panel
Figure 4
Model W H
30ARM
14-5/8”
(37.13cm)
30-5/16”
(76.99cm)
61ARM
23-5/8”
(59.99cm)
30-5/16”
(76.99cm)
6ADAM
23-5/8”
(59.99cm)
27-11/16”
(70.33cm)
Table A
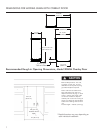
For overlay with lock option panel thickness to be
3/4” (19mm) maximum to 5/8” (16mm) miniumum.
Weight of the overlay panel should not exceed 20 pounds
(9.1 kilograms).
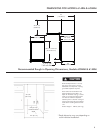
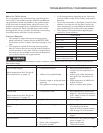
For the door closer to work properly it is necessary to
maintain a minimum space of 9/32” (7mm) between the
door and cabinet flange as shown . This space can be
adjusted by adjusting the top and bottom hinge adapters.
9/32”
(7mm)