


9
6
HOW TO CLEAN UNIT
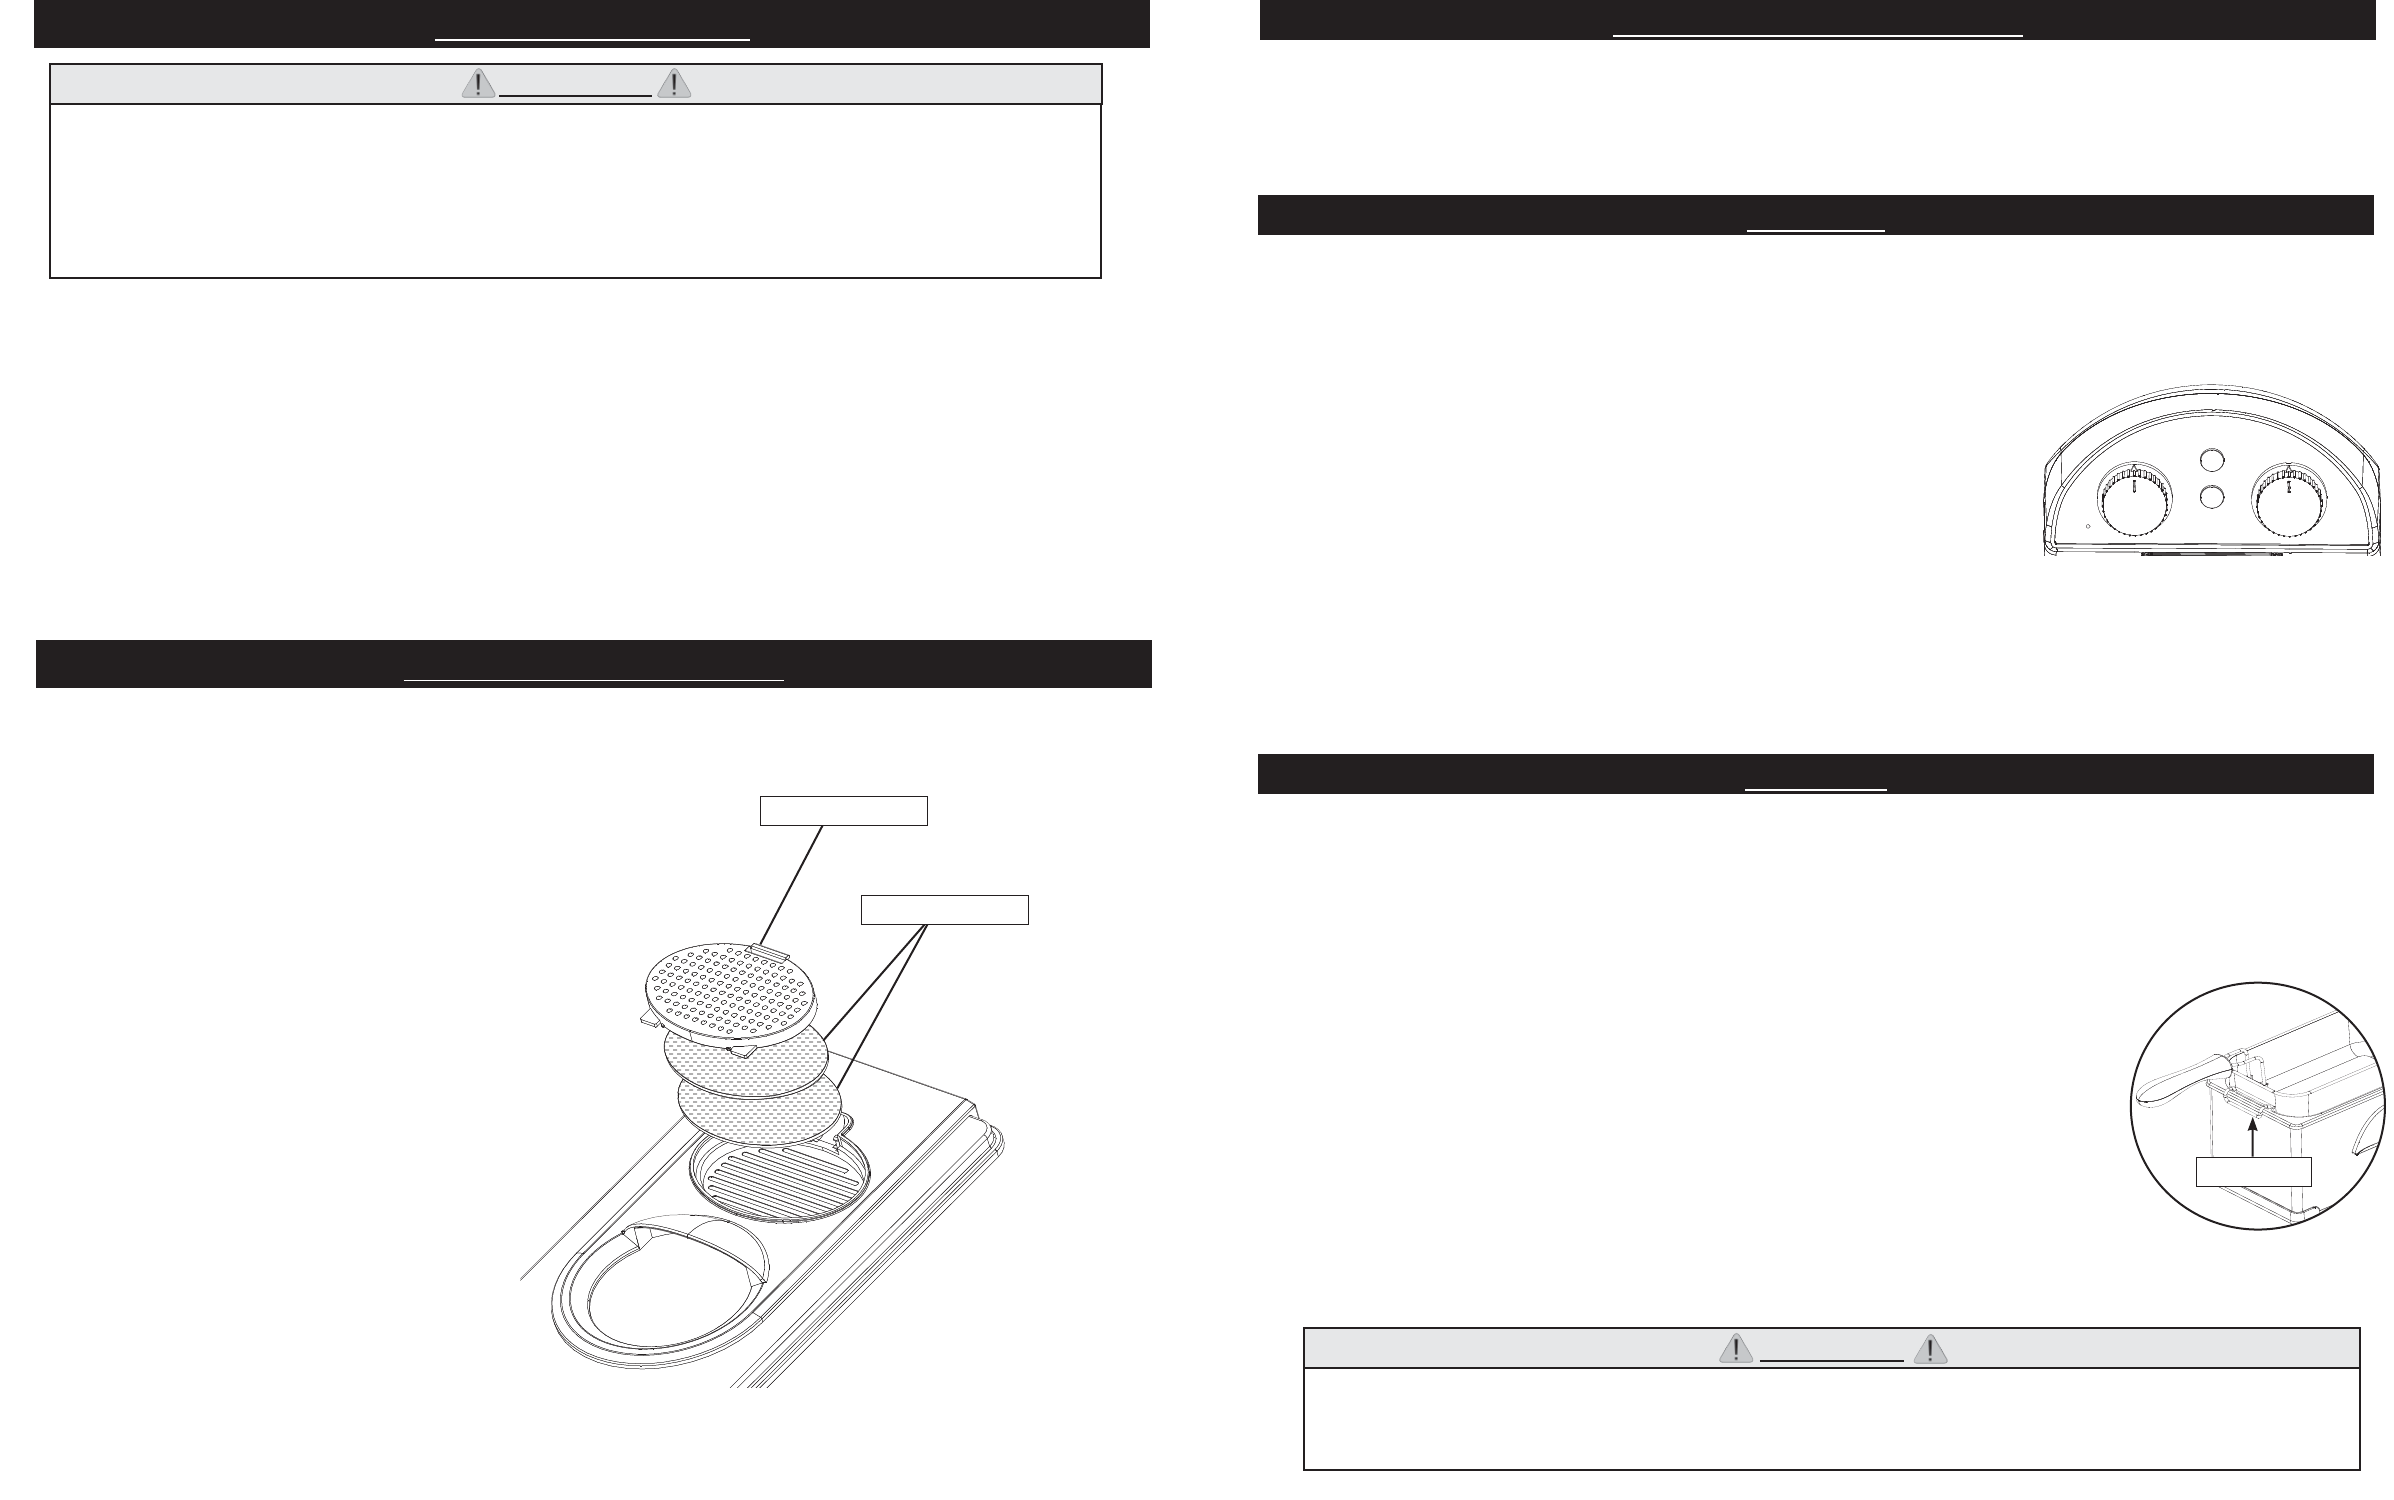
HOW TO REPLACE FILTER
• Masterbuilt recommends cleaning unit prior to and after each use.
• Turn appliance off, unplug and let cool for 2 hours before cleaning and storing.
• Clean lid, inner pot, and basket with a damp cloth or sponge using a mild detergent. Rinse and dry
thoroughly. Only these parts may also be cleaned in a dishwasher.
• Clean outer shell, cord, control panel and element with a damp cloth or sponge using a mild
detergent. Dry thoroughly. NEVER put these parts in a dishwasher or submerge in water.
WARNING
• Do not place control panel under running water. Immersing control panel and cord in
water can cause electrocution.
• Disconnect electric cord from outlet, before cleaning, servicing, and/or removing
heating element. Electrical shock can result in personal injury or death.
• Do not pour used oil in sink. Drain it back into oil containers.
OPERATING INSTRUCTIONS
PREHEAT
COOKING
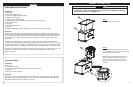
BEFORE FIRST TIME USE:
• Remove all printed documents and any other packaging materials.
• Pull out all removable parts and wash gently with hot water. Do not immerse the power cord, control
panel or heating element into any liquid.
• Dry all parts thoroughly before assembling.
• Always fi ll to the MIN or MAX fi ll line. Do not fi ll over the MAX marking or lower than the MIN marking.
• Peanut oil is recommended because of the great taste and higher smoke point but any common
cooking oil may be used. Do not mix different types of oil for frying.
• Replace the oil after each 10-15 uses; or earlier if the oil becomes brown and thick.
• When you fry several different kinds of food, always fry the food that uses the lowest temperature
setting fi rst.
1. Fill oil to MIN or MAX fi ll line.
2. Wipe the inside viewing window on lid with a little oil to prevent
condensation.
3. Plug the breakaway cord into the outlet. The Power indicator light
will turn on.
4. Set the desired temperature and set the timer to fi ve minutes.* The Heat indicator light will turn on.
5. While the oil is preheating, take time to prepare the food that is going to be cooked.
6. When the oil has reached the set temperature, the Heat indicator light will turn off.
7. Reset the timer to the desired frying time.
Note: The Heat indicator light will periodically go on and off to maintain the set temperature.
*Depending on the set temperature and the amount of oil, the pre-heating time will vary.
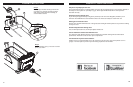
1. Fill basket with food. Do not overfi ll the basket. When placing food into the basket, make sure it is
as dry as possible. Remove any ice crystals or water from food to reduce hot oil splatter.
2. Lower basket of food into hot oil.
3. Cover with lid.
4. Timer will sound when desired cooking time has been reached. The unit will
shut off when timer reaches the 0 position. Turn the Temperature control
knob to 0 position and unplug the unit.
5. Carefully remove the lid. Removing the lid will release hot steam. Take
extreme care when handling. Keep face and hands clear of steam release.
6. Lift the basket up slowly out of the hot oil and use the drain clip on the back of
the basket to drain excess oil.
7. Use handle to remove basket from unit and transfer food to plate lined with paper towels to absorb
remaining oil.
• Do not touch the control panel during the frying process. Hot steam may be released and could cause
injury.
• If you are frying more than one load, ensure the oil re-heats to the required temperature.
• Do not move unit while in use. Wait until deep fryer has completely cooled to move.
CAUTION
• Place unit on level and stable surface to prevent tipping.
• Hot when in use.
• Never melt fat or lard in this unit.
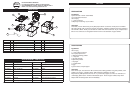
DRAIN CLIP
POWER
HEAT
TIMER
TEMP F
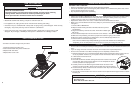
Your fi lters should be changed every 6 months.
1. Unclip and remove the fi lter cover.
2. Take out both black fi lter pieces and discard.
3. Replace with new fi lters.
4. Replace fi lter cover to lid.
FILTER COVER
FILTERS