


18
INTRODUCTION
To get the best out of your new cooker hood, please read
this user guide carefully before using it for the first time. Take
particular note of the safety precautions. We also recommend
that you keep the instructions for future reference.
IMPORTANT SAFETY PRECAUTIONS
General
• For connection to 230 V, 50 Hz only.
• May only be used for its original purpose. For indoor
installation and use only.
• Not for use over charcoal and wood-burning ovens.
• Do not immerse appliance, cable or plug in water or other
liquids (e.g. when installing or cleaning).
• Never try to repair the appliance yourself.
• Do not use the appliance if the cable or plug are da
-
maged, if it is not functioning properly, or if it has been
damaged by a heavy impact or similar.
• If the appliance, cable or plug need to be repaired, con
-
tact an authorised service centre. Unauthorised repairs or
modifications to the appliance will invalidate the gua
-
rantee. Please contact the store where you bought the
appliance for repairs under guarantee.
Positioning and use
• The appliance must be installed in accordance with the
installation guide before use.
• Do not block or cover ventilation openings on upper part
of chimney.
• The appliance should be connected to a suitable ventila
-
tion conduit or damper leading out to the open air. Do not
connect to chimneys, ventilation pipes, air conditioning
or the like. If not connected to a conduit or damper, the
motor must be fitted with an active carbon filter (available
from distributor).
• If mounted over a gas hob, do not switch cooker hood on
unless there is a pan, pot or the like on the burner in use,
as the gas flames can be sucked into the hood and cause
fire.
• Always switch appliance off before cleaning or removing
filter panel. Do not use if filter panel not fitted.
• Bulbs in lights can become very hot when in use.
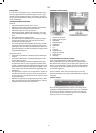
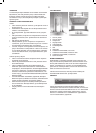
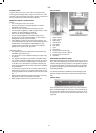
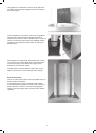
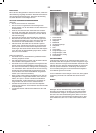
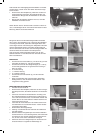
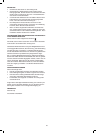
KEY TO PARTS
1. Upper chimney
2. Lower chimney
3. Glass panel
4. Control panel
5. Lock button
6. Filter panel
7. Light
a. Light switch
b. Suction power control, high
c. Suction power control, medium
d. Suction power control, low
e. Off switch
PREPARING FOR INSTALLATION
Each individual appliance is checked at the factory, but for sa
-
fety’s sake, after unpacking you should check carefully it has
not been damaged during transport. If the appliance appears
to have been damaged, contact the shop where you bought
it, and do not install or use it until it has been checked by an
authorised specialist.
You should check before installation that all packaging and
transport materials have been removed both inside and out
-
side.
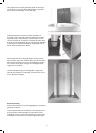
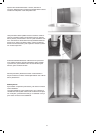
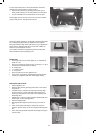
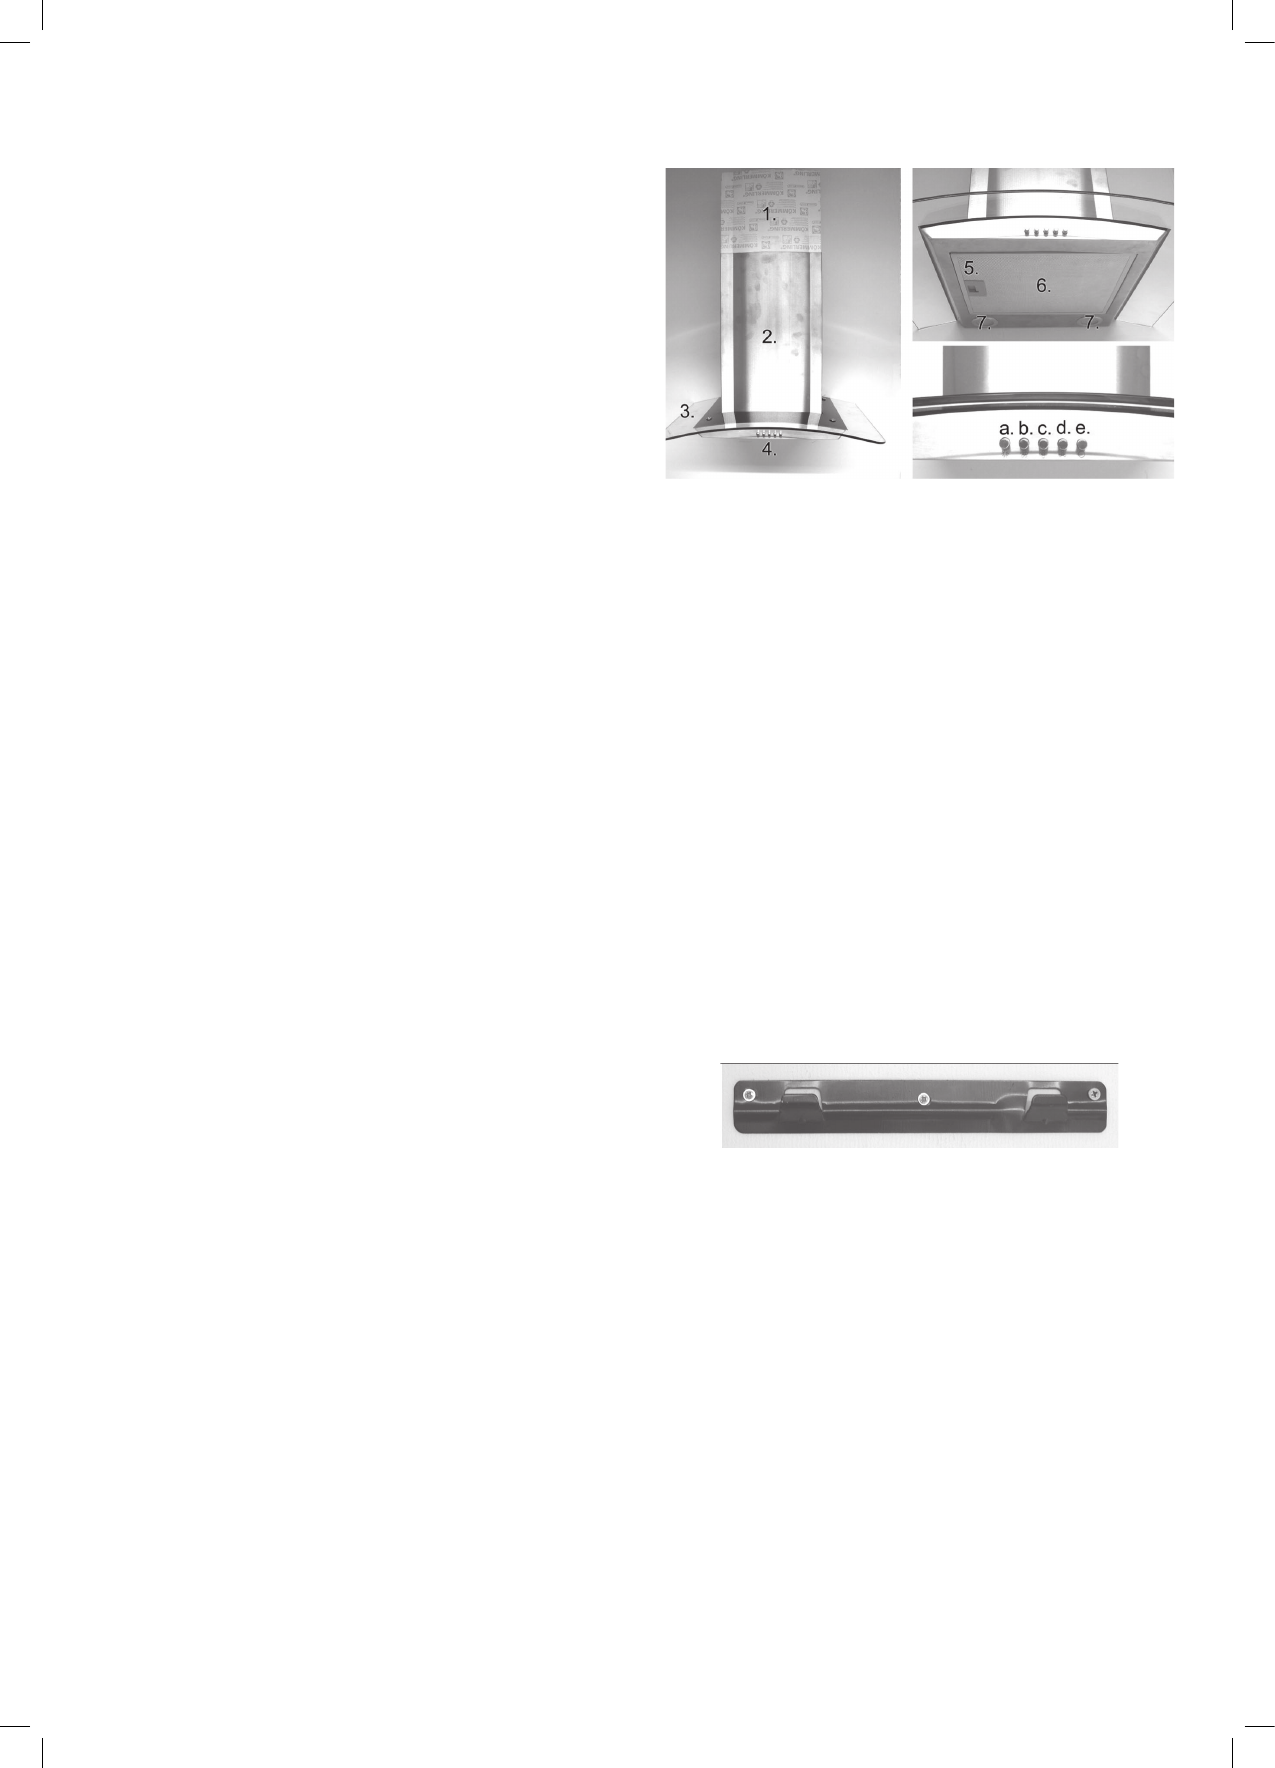
INSTALLATION
Screw wall bracket to wall using the 2 long screws and rawl
-
plugs. Installation height can vary, but we recommend 65-75
cm over the hob. Bracket can therefore be mounted so its lo
-
wer edge is min. 95 cm over an electric hob and 100 cm over
a gas hob.
UK