


10
11
INTRODUCTION
To get the best out of your new apparatus, please read this user guide carefully
before using it for the rst time. We also recommend that you keep the instructions
for future reference, so that you can remind yourself of the functions of your
apparatus.
SAFETY MEASURES
Normal use of the apparatus
• For domestic use only. Not for outdoor or commercial use.
• Use for its intended purpose only. The manufacturer is not responsible for any
injury or damage resulting from incorrect use or handling (see also Guarantee
Terms).
• For connection to 230 V, 50 Hz only.
• Do not submerge in water or any other liquid.
• Avoid touching with wet or damp hands.
• Do not spray water or other forms of liquid onto the apparatus whilst in use. The
apparatus can short-circuit and cold water can damage the glass in the lid when
hot.
• Do not switch apparatus on if the lid is open, or if the hotplate is not tted and in
place.
• The apparatus will get very hot during use. Do not touch any parts other than
the handle before they have cooled down completely!
• Steam can form under the lid during heating and cooling. Exercise care when
opening.
• Never leave unattended when in use, and keep an eye on children.
• Check that the vent holes are not covered. If they are covered while the
apparatus is in use, there is a risk of it overheating.
Positioning the apparatus
• Always place the apparatus on a level, dry, stable and heat-resistant surface.
• Always place the apparatus at the back of a kitchen counter and at a safe
distance from ammable objects such as curtains, tablecloths or similar.
• The apparatus must not be placed or stored near other sources of heat.
• Do not cover.
Cord, plug and mains socket
• Do not allow the cord to hang over the edge of a table/counter, and keep it away
from hot objects and naked ames.
• Check regularly that neither cord nor plug is damaged and do not use if they are,
or if the apparatus has been dropped or damaged in any other way.
• If the apparatus or plug is damaged, it must be inspected and if necessary,
repaired by an authorised repair engineer, otherwise there is a risk of electric
shock. Never try to repair the apparatus yourself (see also Guarantee Terms).
• Remove the plug from the socket after use and before cleaning.
• Avoid pulling the cord when removing the plug from the socket. Instead, hold
the plug.
Fire hazard!
To reduce the risk of re occurring in the oven compartment, please note the
following points:
• The apparatus should be regularly emptied of crumbs, as these could cause a
re.
• Do not use for pizzas over 30 cm in diameter, or that touch the upper heating
elements. Not suitable for Calzone (pizza pies)
• Remove all ammable materials (e.g. cardboard, plastic lm, paper) before
baking pizzas.
• Do not bake pizzas at excessively high temperatures or over recommended
baking time. Do not leave unattended if baking pizzas wrapped in aluminium foil.
• If materials in the apparatus catch re, leave the lid closed. Switch off
immediately, and remove the plug from the wall socket.
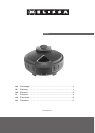
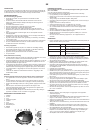
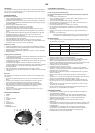
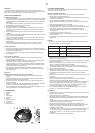
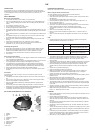
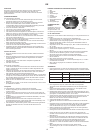
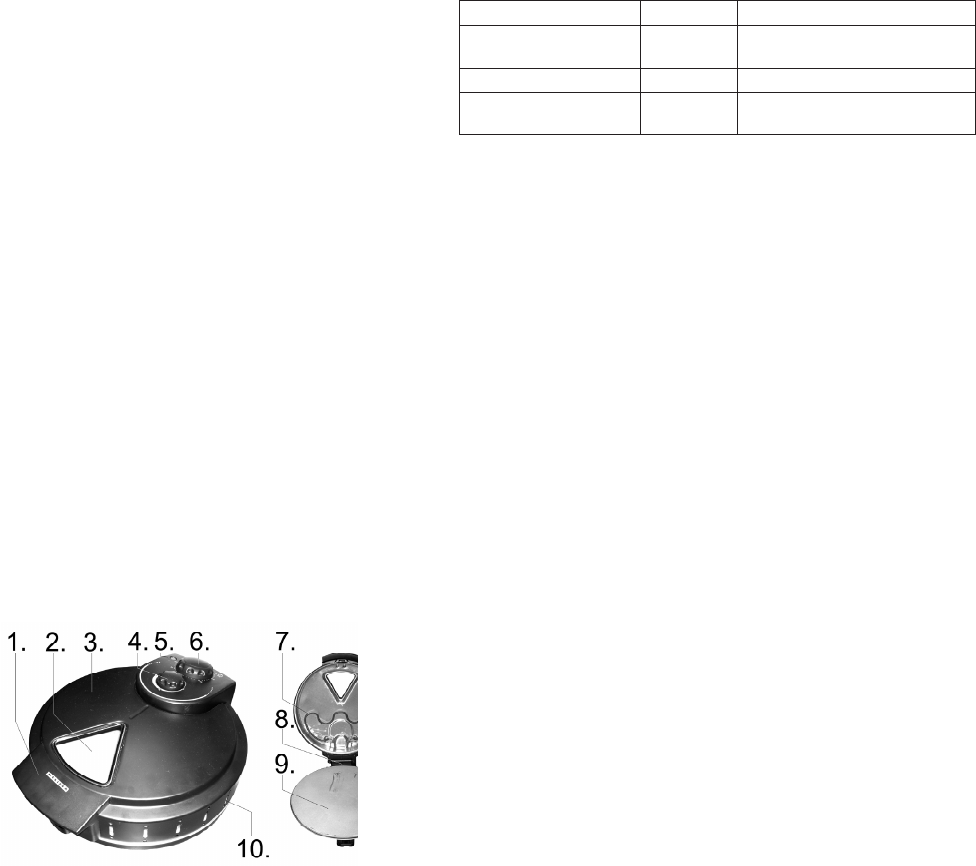
KEY TO MAIN COMPONENTS OF THE APPARATUS
1. Handle
2. Window
3. Lid
4. Temperature regulator
5. Indicator
6. Timer
7. Heating element
8. Safety cutout
9. Baking tray
10. Air vents
PREPARING THE APPARATUS
Before use, check that you have removed all packaging inside and out.
Before using the device for the rst time
To avoid unpleasant odours, follow these instructions before use:
• Lift lid (3) and remove baking tray (9).
• Clean all surfaces inside and out with a well-wrung cloth using hot water and a
little detergent.
• Dry thoroughly and replace baking tray. Close the lid.
• Check temperature regulator (4) is set to "MIN" and the timer (6) is set to "0".
• Plug in and switch power on.
• Turn temperature regulator to "2" and timer to 10 minutes.
o If less than 15 minutes is required, turn timer past the 15 minute mark and then
back to required number of minutes. This allows precise timing.
• The apparatus will switch on, heat up and switch off automatically after 10
minutes.
o When the time has expired, a bell will ring.
• Switch on again with the temperature regulator set to "3" and timer set to 5
minutes.
• When 5 minutes have expired, the apparatus will switch off. It is now ready for
use.
USE
• Preheat the apparatus by turning the temperature regulator to the required
position (see below) and set timer to 15 minutes.
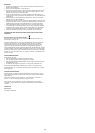
Temperature setting Heat Use
1 Low For reheating pre-baked pizzas,
and keeping baked pizzas warm
2 Medium For most types of pizza
3 High For pizzas with a lot of lling.
Will also give a crisper base
• The indicator light (5) will be on while the apparatus is heating up to the set
temperature. The apparatus is ready for use when the indicator lamp goes out.
• Lift the lid carefully using the handle (1). Use of oven gloves or cloth is
recommended.
o The baking tray will revolve slowly while the apparatus is switched on. If the lid is
opened during baking, the safety cutout (8) will activate and the tray will stop.
• Check all packaging is removed from the pizza and place it carefully in the
middle of the tray. Check the pizza’s edges do not hang over the edge of the
tray.
o Caution! Do not grease the baking tray.
• Close the lid and set the timer for 20 minutes.
o Baking time will depend on the thickness of the base, amount of lling and
personal preferences. Just have a go! ALWAYS keep an eye on the pizza
through the window (2) in the window to avoid it burning.
o Steam can rise from the ventilation openings (10) in the lid during baking. This is
perfectly normal.
• Warning! Beware of hot steam when lifting the lid!
• Remove pizza from the apparatus when baked. Use a plastic or wooden
implement to loosen the pizza from the baking tray. Do not use metal.
o The apparatus will be very hot after baking! Always use an oven glove or similar
when removing the pizza and do not place it on a surface that may be damaged
by the heat.
• If serving more than one pizza, follow the same procedure as above. Reheat the
apparatus if it has been allowed to cool.
• When nished using the apparatus, set the temperature regulator to "Min" and
timer to "0". Disconnect from the mains.
CLEANING
• Switch off the apparatus, remove the plug from the wall socket and allow to cool
down before cleaning.
• Remove baking tray before cleaning.
• Never use scouring powder, steel scourers or other strong cleaning agents to
clean the interior or exterior surfaces of the apparatus, as they may scratch the
surfaces.
• Use a well-wrung cloth dampened with hot water, and add washing-up liquid if
the apparatus is very dirty.
• Remember to wipe the heating elements (7). The lower elements are under the
baking tray).
• The tray can be cleaned by soaking in hot water and scraping any burnt-on food
with a wooden spatula. Do NOT use detergent of metal implements to clean the
tray.
o If the baking tray is heavily soiled, it can be cleaned using a mix of 75 g baking
powder and 3 tablespoonfuls of water applied to the baked-on areas. Leave to
work for 15-20 minutes, scrape clean and rinse thoroughly.
• Allow the tray to dry completely and replace it.
UK