10
Hints For Best Results
• A clean Coffee Maker is essential for making great tasting coffee.
Regular cleaning, as specified in the USER MAINTENANCE
INSTRUCTIONS, is highly recommended.
• Always use fresh, cold water in your Coffee Maker.
• Do not add less than 4 cups (20 ounces) of water to the Water
Reservoir.
• Do not add more than 8 scoops of whole bean coffee to the Mill &
Brew™ Basket.
• The Coffee Mill is intended for COFFEE ONLY. Never grind any
other food products or spices in the Coffee Mill.
• Store coffee in a cool, dry place. Once coffee has been opened,
keep it tightly sealed in the refrigerator to maintain freshness.
• Do not re-use coffee grounds.
• Reheating coffee is not recommended. Coffee is at its peak flavor
immediately after brewing.
5
Before Brewing for the First Time
CAUTION: To protect against electric shock, do not immerse the
Coffee Maker or allow AC cord to come into contact with water or other
liquids.
1. Carefully unpack your Coffee Maker. Remove any labels from the outer
surfaces.
2. Clean the Carafe, Carafe Lid, Mill & Brew™ Basket and Mill & Brew™
Basket Lid in warm, soapy water. Rinse thoroughly and dry.
3. Fill the Water Reservoir to the 10-cup mark with cold water. Place
Carafe onto the Warming Plate.
4. Insert the Mill & Brew™ Basket and Mill & Brew™ Basket Lid into the
Coffee Maker, taking care to replace it properly. DO NOT USE COF-
FEE WHEN CLEANING. USE WATER ONLY. Close the Mill &
Brew™ Assembly Lid.
NOTE: The Mill & Brew™ Lid must be closed securely in order for the brew
cycle to begin.
5. Plug the Coffee Maker into a 120V AC electrical outlet.
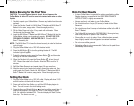
6. Press the Mill Button, , to turn the grinding blades off. The Mill
Indicator Light will appear.
7. To start the cleaning cycle, press the Power Button, , and the water
will begin to flow the Coffee Maker.
8. When the Carafe is full, press the Power Button, , to turn the unit
OFF. Discard the water in the Carafe. Allow the unit to cool for 15
minutes.
9. Refill the Water Reservoir and repeat steps 6-8 one more time.
10. After the second pot of water has cooled, discard the water and thor-
oughly wash the Carafe, Carafe Lid, Mill & Brew™ Basket and Mill &
Brew™ Basket Lid in warm, soapy water. Rinse thoroughly and dry.
Setting the Clock
1. Plug the Coffee Maker into a 120V AC outlet. Display will show 12:00
and will continue to flash until the time is set.
2. Press and hold the Hour Button, , until the LED Display begins to
flash. The unit is now in the clock-setting mode.
3. Press the Hour and Minute Buttons, and , to set the correct time. A
small dot will appear in the upper left corner of the display to signify
A.M. No visible dot indicates P.M. The clock display will flash 5 times,
then stop. The time is now set.
Melitta_MEMB1B_W_IB_31-3-07 4/3/07 2:34 PM Page 11


