Page 7
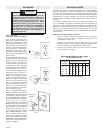
Illuminated Eye Shields (Fig. 1)
(Standard Equipment for Cat. Nos. 4931, 4991, 5051 and 5091)
Illuminated eye shields are furnished with a 12 volt automotive bulb to
light both sides and the face of the grinding wheel. The light socket and
bulb are held in place, under each eye shield, by a bolt and a nut that
passes through a slot in the rear edge of the eye shield, to clamp the
socket assembly in place. Two separate eye shields (one for each
wheel) are supplied and must be used when operating the grinder.
Installing Eye Shields
The clamping assemblies for the eye shields are factory installed.
1. To install the eye shields, loosen the wing nut.
2. Insert the rod portion of the shield assembly between the wheel
guard and the notched area of the clamp.
3. Adjust the eye shield assembly to the proper height. Tighten the
wing nut.
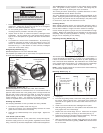
1H.P. Grinder (Cat. No. 5091)
It is recommended that a No. 14 wire, fused with a 15 amp time lag fuse,
be used to supply power to all 1H.P. grinders, regardless of their electric
rating. This hook up should be independent of other electrical equipment.
The
MILWAUKEE
1H.P. Bench Grinder is dual voltage rated at 115/230
Volts. The grinder is factory wired for 115 Volts. The voltage may be
changed to 230 Volts, by rewiring the motor connections.
The rewiring should be performed by a qualified electrician or Autho-
rized
MILWAUKEE
Service Station Personnel.
The wiring diagrams and connections are inside the baseplate of the
grinder. Unplug the grinder before removing the baseplate. When chang-
ing to 230 volts, the cord set must be wired directly to the power source
or wired with a proper 230 volt attachment cord set.
Grinding Wheels
When selecting abrasive wheels, only high quality aluminum oxide or
silicon carbide wheels should be used. Aluminum oxide, although not as
hard as silicon carbide, is tougher and more resistant to breakage.
Coarse wheels (36 grains of grit per inch) are recommended for rough
grinding. Medium grit wheels (60 grit) are excellent for the jobs such as
smoothing welds or preparing surfaces for finishing. Fine grit wheels
(80 grit) are for sharpening or fine finishing.
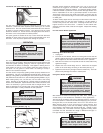
Inspecting Grinding Wheels (Fig. 2)
Properly
Mounted
Wheel
Wrong Right
No Wheel Blotter
Flange Not Recessed
Inner Flange Not
Keyed To Spindle
Wrong
End Nut
Too Tight
Fig. 3
1. Examine a new unit carefully for signs of shipping damage (wheels,
guards etc.). Make sure all parts are tight but do not overtighten
wheel nut. See “Mounting Wheels”, Fig. 3.
2. Do not operate grinder unless it is securely bolted in place. Two
mounting holes are provided in the base of the grinder.
3. Inspect wheel for flaws or cracks and replace a damaged wheel
immediately. Use only wheels with a safe speed rating at least as
high as the no load speed of the grinder and follow the instructions
in Fig. 2.
4. It is possible for a wheel to have concealed flaws. To prevent injury
or damage, stand clear of wheel on start up and allow to run for one
minute. If vibration and/or noise are present, dress the wheel as
instructed in Fig. 5. If the vibration or noise continues, investigate
cause and correct before using.
Plexiglass Eye Shields (Fig. 1)
(Standard Equipment for Cat. Nos. 4935 and 4995)
Two separate eye shields (one for each wheel) are supplied and must
be used when operating the grinder.
To reduce the risk of personal injury and
damage to the tool, use ONLY accessories
rated at or above the RPM listed on the tool's
nameplate.
TOOL ASSEMBLY
WARNING!
Test wheels before mounting by tapping it lightly with a nonmetallic tool
such as the handle of a screwdriver. If it rings, it is in good condition. If
it does not, discard the wheel. Wheel must be dry when applying this
test or the sound will be deadened. Tap wheels about 45° on either side
of the vertical center line and about 1 or 2 inches from the outside edge
as indicated in Fig. 2. Rotate the wheel 45° and repeat the test.
NOTE: Organic bonded wheels do not emit the same clear metallic ring
as verified and silicated wheels.
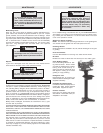
Mounting Wheels (Fig. 3)
1. Unplug tool.
2. To mount the grinding wheels, remove the wheel guard covers from
the guards. Remove the hex nuts - the threads on the spindle are
such that the nut tightens as the wheel rotates when the tool is in
operation.
3. Check to be sure that blotters are undamaged and in place.
4. Slide the grinding wheels on to the spindle so that the blotter rests
firmly against the inner wheel flange.
5. Replace the outer wheel flange and nut. Make sure the cupped
portion of the outer flange is resting on the wheel (See Fig. 3).
6. Tighten the end nuts only enough to hold the wheel firmly. Too much
pressure may damage the wheel or related parts.
7. After the wheel has been mounted, stand aside and run the wheel
for at least one minute before grinding. NOTE: Never stand in direct
line of the wheel.
Fig. 2
Eye Shield
Notched
Area
Rod
Wing
Nut
Clamp
Eye Shield
Wheel Guard
12 Volt Automotive
Light Bulb
Fig. 1


