


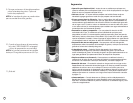

Cleaning the Hot Water Tank
To access the Hot Water Tank, press the Water Marking Button and the Water Fill
Lid will pop open. Inspect the Hot Water Tank area and clean with a damp lint free
cloth as necessary. Close the Water Fill Lid when finished.
Emptying the Hot Water Tank
1. Ensure that the Water Fill Lid is closed.
2. Place a cup on the Drip Plate then press and hold the BREW Button until all
the water has been dispensed. Note, there will be a delay of 4-5 seconds
until water starts to dispense.
Storage
Empty the Hot Water Tank before storing and take care to ensure that you store
your Brewer in a safe and frost free environment. It is suggested to store your
Brewer in the upright position. If you store the Brewer in a cold environment,
you run the risk of condensation freezing inside the Brewer and causing damage.
When you prepare to use it after storage, we recommend wiping the Hot Water
Tank with a damp lint-free cloth and running three cleansing brews without a
K-Cup.
If your Brewer has been in an environment below freezing, please be sure to let it
warm to room temperature for 2 hours before using.
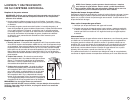
De-Scaling Your Brewer
Mineral content in bottled or filtered water varies. Depending on the mineral
content of the water, calcium deposits or scale may build up in your Brewer. Scale
is non-toxic but left unattended, it can hinder Brewer performance. Descaling
your Brewer helps maintain the heating element, and other internal parts of the
Brewer that come in contact with water.
The Brewer should be de-scaled every 3-6 months to ensure optimal performance
or when there are white deposits in the Hot Water Tank. It is possible for calcium
deposits to build up faster, making it necessary to de-scale more often.
Step 1: Make sure you have at least 8 ounces of undiluted white vinegar on hand.
You will also need a 10 oz ceramic cup (do not use a paper cup) and
access to a sink.
Step 2: Fill Hot Water Tank with 8 ounces of undiluted white vinegar up to the FILL
LEVEL mark, place a ceramic cup on the Drip Tray Plate.
Step 3: Close the lid, and perform a brew into the ceramic cup without adding
a K-Cup.
Step 4: Pour the contents of the ceramic cup into the Hot Water Tank, careful the
liquid will be hot, close the lid. Start a brew but power off the Brewer just
after it starts to dispense and then allow it to sit for at least 30 minutes.
Step 5: After the prescribed period of time, perform a brew without adding a
K-Cup. Empty the contents of the ceramic cup into the sink, be careful as
contents may be hot.
Step 6: Fill the Hot Water Tank with 8 ounces of bottled water, close the water fill
lid, place a cup on the Drip Tray Plate and perform a brew.
Step 7: Repeat Step 6 three times using bottled water (with no K-Cup in place)
to cleanse the Brewer plumbing and get rid of any residual taste from the
vinegar. The Brewer is now ready for normal use again.
10 11
CLEANING AND MAINTAINING
YOUR SINGLE SERVE BREWER
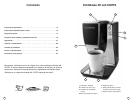
Cleaning External Parts
IMPORTANT: Make sure the Brewer is unplugged before cleaning Regular
cleaning of the Brewer’s external components is recommended.
1. Never immerse the Brewer in water or other liquids. The Housing and other
external components may be cleaned with a soapy, damp, non-abrasive
cloth.
2. The Drip Tray can accumulate liquids. The Drip Tray and Drip Tray Plate should
be periodically inspected and cleaned with a damp soapy nonabrasive
lint free cloth. The Drip Tray and Drip Tray Plate should not be put into the
dishwasher. To remove the Drip Tray Assembly, simply slide it toward you,
keeping it level at all times to avoid spilling.
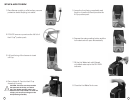
Cleaning the K-Cup Holder Assembly
1. Cleaning the Parts – The K-Cup Holder Assembly can be placed onto the top
shelf of a dishwasher. NOTE: Use low temperature cycles in the dishwasher. To
remove from the Brewer, lift the front face of the Brewer. Grasp the top of the
K-Cup Holder with one hand while pushing up on the bottom of the K-Cup
Holder from underneath with the other until it releases. After cleaning, align
the K-Cup Holder with the opening using the two front
ribs as a guide, and snap into place from the top.
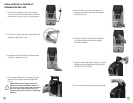
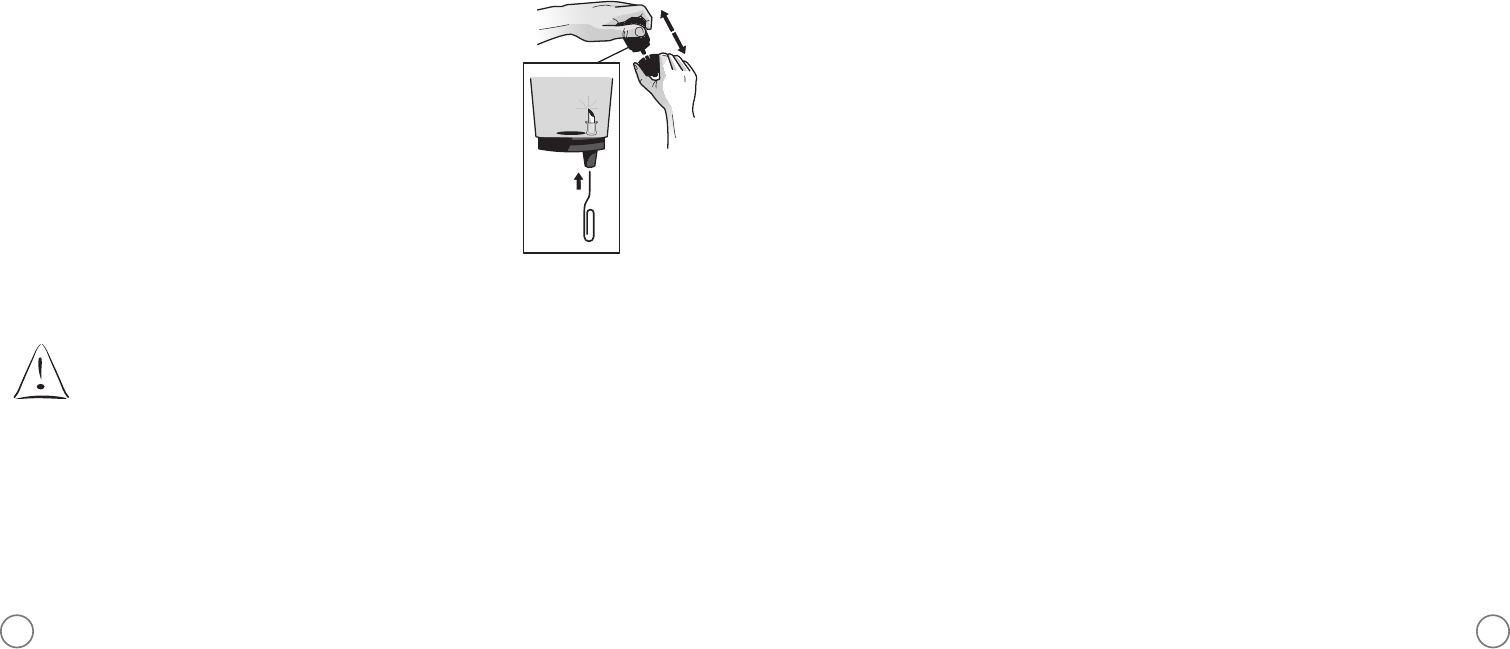
2. Cleaning the Funnel – The Funnel can be removed
from the K-Cup Holder by pulling on it until it snaps off
(fig. 1). The Funnel is dishwasher safe. To replace it,
just snap it back onto the K-Cup Holder Assembly.
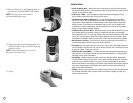
3 Cleaning the Exit Needle – The Exit Needle is located
on the inside bottom of the K-Cup Holder Assembly.
Should a clog arise due to coffee grinds, it can be
cleaned using a paper clip or similar tool. Remove
K-Cup Holder assembly and detach Funnel. Insert
the paper clip (as shown in fig. 1) into the Needle to
loosen the clog and push it out. The K-Cup Holder is
dishwasher safe.
CAUTION: There are sharp needles that puncture the
K-Cup above the K-Cup Holder and in the bottom of the K-Cup Holder. To avoid
risk of injury, do not put your fingers in the K-Cup Assembly Housing.
NOTE: Over time, discoloration, spotting or staining may appear in the Hot
Water Tank. This is normal and will vary depending on the mineral content
of the bottled or filtered water used in the Brewer and will not affect the
operation of the Brewer.
!
FIGURE 1