


1312
Programmable Features
(Models ESX39 & ESX40 Only)
Brewing 1 – 4 Cups
I
f you want to brew 4 cups or less, the 1 – 4 Cup mode will slow the brewing cycle
to ensure optimal saturation of the ground coffee. Note:
If this mode is selected
when brewing more than 4 cups, it will produce stronger, darker coffee.
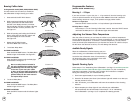
To Brew 1-4 Cups Now:
Press the SELECT button until the 1-4 Cup indicator light is illuminated.
To Delay Brew 1-4 Cups:
Follow steps 1-4 in the “Brewing Coffee Later” section. Press the SELECT button
until both the Delay and 1-4 Cup indicator lights are illuminated.
Adjusting the Warmer Plate Temperature
After the coffee is brewed, you can keep the coffee at your preferred
temperature.
Turn the Warmer Temp knob clockwise to increase the temperature,
or turn counterclockwise
to decrease the temperature. To maintain a constant temperature, you may need to
lower the warmer plate temperature as you decrease the amount of coffee in the pot.
DO NOT allow the decanter to boil dry. This will damage the decanter.
Audible Ready Signals
When the coffeemaker is finished brewing and your
coffee is ready, your coffeemaker will beep five times.
Just before the coffeemaker shuts off automatically, it
will beep three times. Upon completion of the clean
cycle, the coffeemaker will beep once.
Special Cleaning Cycle
Follow steps 1-3 in “Maintaining Your Coffeemaker” (on Page 14) and then press the
Select Button until the Clean indicator light is illuminated. For your convenience,
everything is automatic. The entire cycle will take 45-60 minutes to complete.
During the Cleaning Cycle your coffeemaker will:
1. Slow brew approximately 3 cups of cleaning solution.
2. Pause for 30 minutes (the Clean Cycle indicator light will remain on to alert you
that the process is active).
3. After 30 minutes, your coffeemaker will brew the remainder of the cleaning
solution.
4. When complete, the Clean light will turn off and your coffeemaker
will automatically shut off and beep. Follow Steps 7-12 in “Maintaining
Your Coffeemaker” (on Page 14) to complete the cleaning process.
clean
Brewing Coffee Later
For Programmable Models (ESX20, ESX23, ESX39 & ESX40):
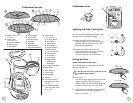
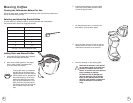
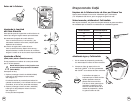
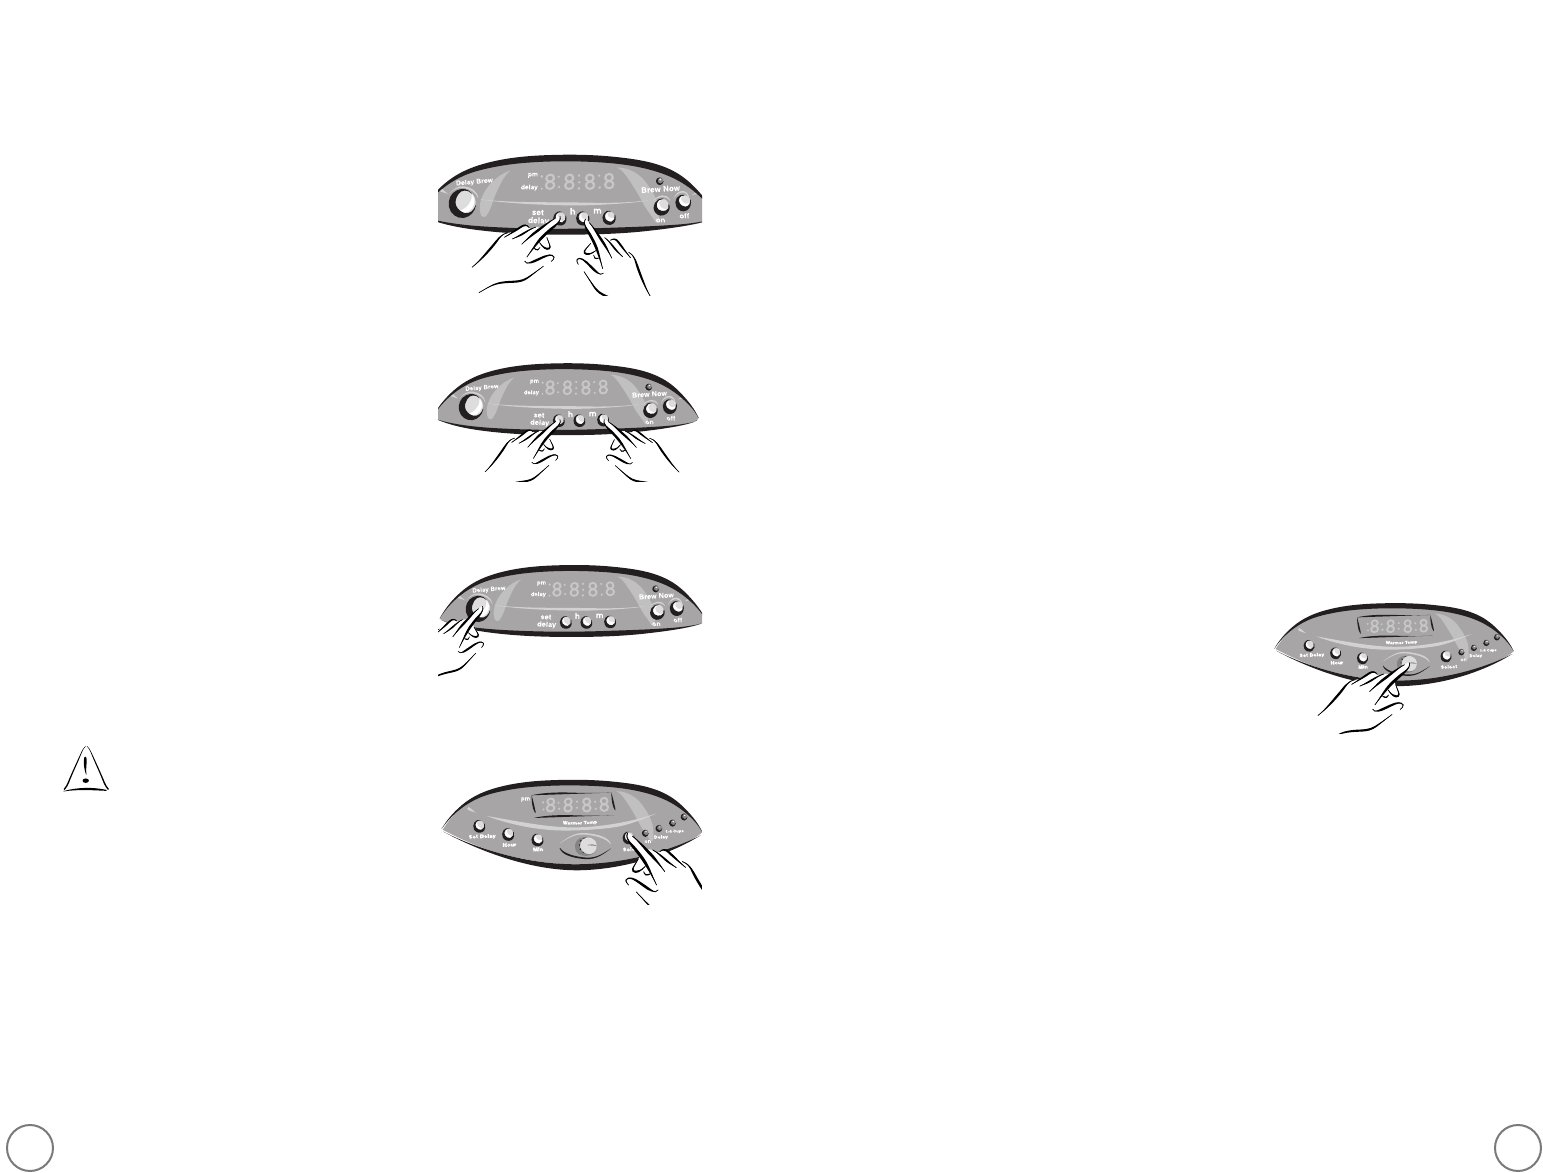
You must set the time for when you would like
the coffeemaker to begin brewing your coffee.
1. Press and hold the SET DELAY button.
2. While pressing and holding the SET DELAY
button, press and hold the HOUR button
until the clock displays the hour you desire.
The PM indicator will light to indicate a PM time;
if the PM indicator is not lit, the time is AM.
See Figure A-1.
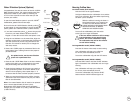
3. While still pressing and holding the SET DELAY
button, press and hold the MIN. button until
the clock displays the correct minute.
See Figure A-2.
4. Release the SET DELAY button.
The DELAY BREW time is now set.
5.
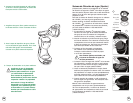
To activate Delay Brew:
For ESX20 and ESX23:
Press the DELAY BREW button. The Delay Brew
indicator light will illuminate.
See Figure B-1.
For ESX39 and ESX40:
Press the SELECT button until the Delay light
is illuminated.
See Figure C-1.
Due to a safety feature included in
this unit, the Delay Brew mode will not
automatically brew the next day after
its last use.
If you want your coffee
to brew at the same time the following
day, simply add the desired amount of
ground coffee, fill the water reservoir
and repeat Step 5 above.
6.
To cancel Delay Brew:
For ESX20 and ESX23:
Press the DELAY BREW button. The Delay Brew
indicator light will turn off.
For ESX39 and ESX40:
Press the SELECT button until all indicator lights
are off.
F
IGURE
A-1
F
IGURE
B-1
F
IGURE
A-2
F
IGURE
C-1
clean