


www.ninjakitchen.com
8 9
TOLL FREE: 1-800-798-7398
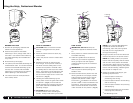
Using the Ninja
™
Professional Blender
Shaft
BEFORE FIRST USE
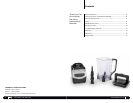
1 Remove all packaging material and
labels from the appliance.
2 Wash the lid, pitcher and blade
assembly in warm, soapy water with a
soft cloth. Use caution when washing
the blade assembly as the blades are
very sharp.
3 Rinse and dry thoroughly.
4 The pitcher, lid and blade assembly are
all dishwasher safe. It is recommended
that the lid and blade assembly go on
the top rack. Ensure that the blade
assembly is removed from the pitcher
before placing in the dishwasher.
5 The motor base can be wiped clean
with a damp cloth.
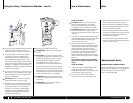
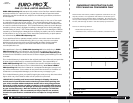
HOW TO ASSEMBLE
CAUTION: Make sure that the motor
base is unplugged from the power
source.
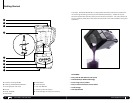
1 Place the motor base on a clean, dry,
level surface.
2 Lower the pitcher onto the motor base.
(Fig. 1)
3 Rotate the pitcher to the left as far
as it will go. As the pitcher rotates, it
will lower and the safety tabs on the
bottom of the pitcher will slide under
the safety tabs on the top of the motor
base. The pitcher can be placed on the
motor base two ways; the handle can
be on the front right corner or the front
left corner. (Fig. 2)
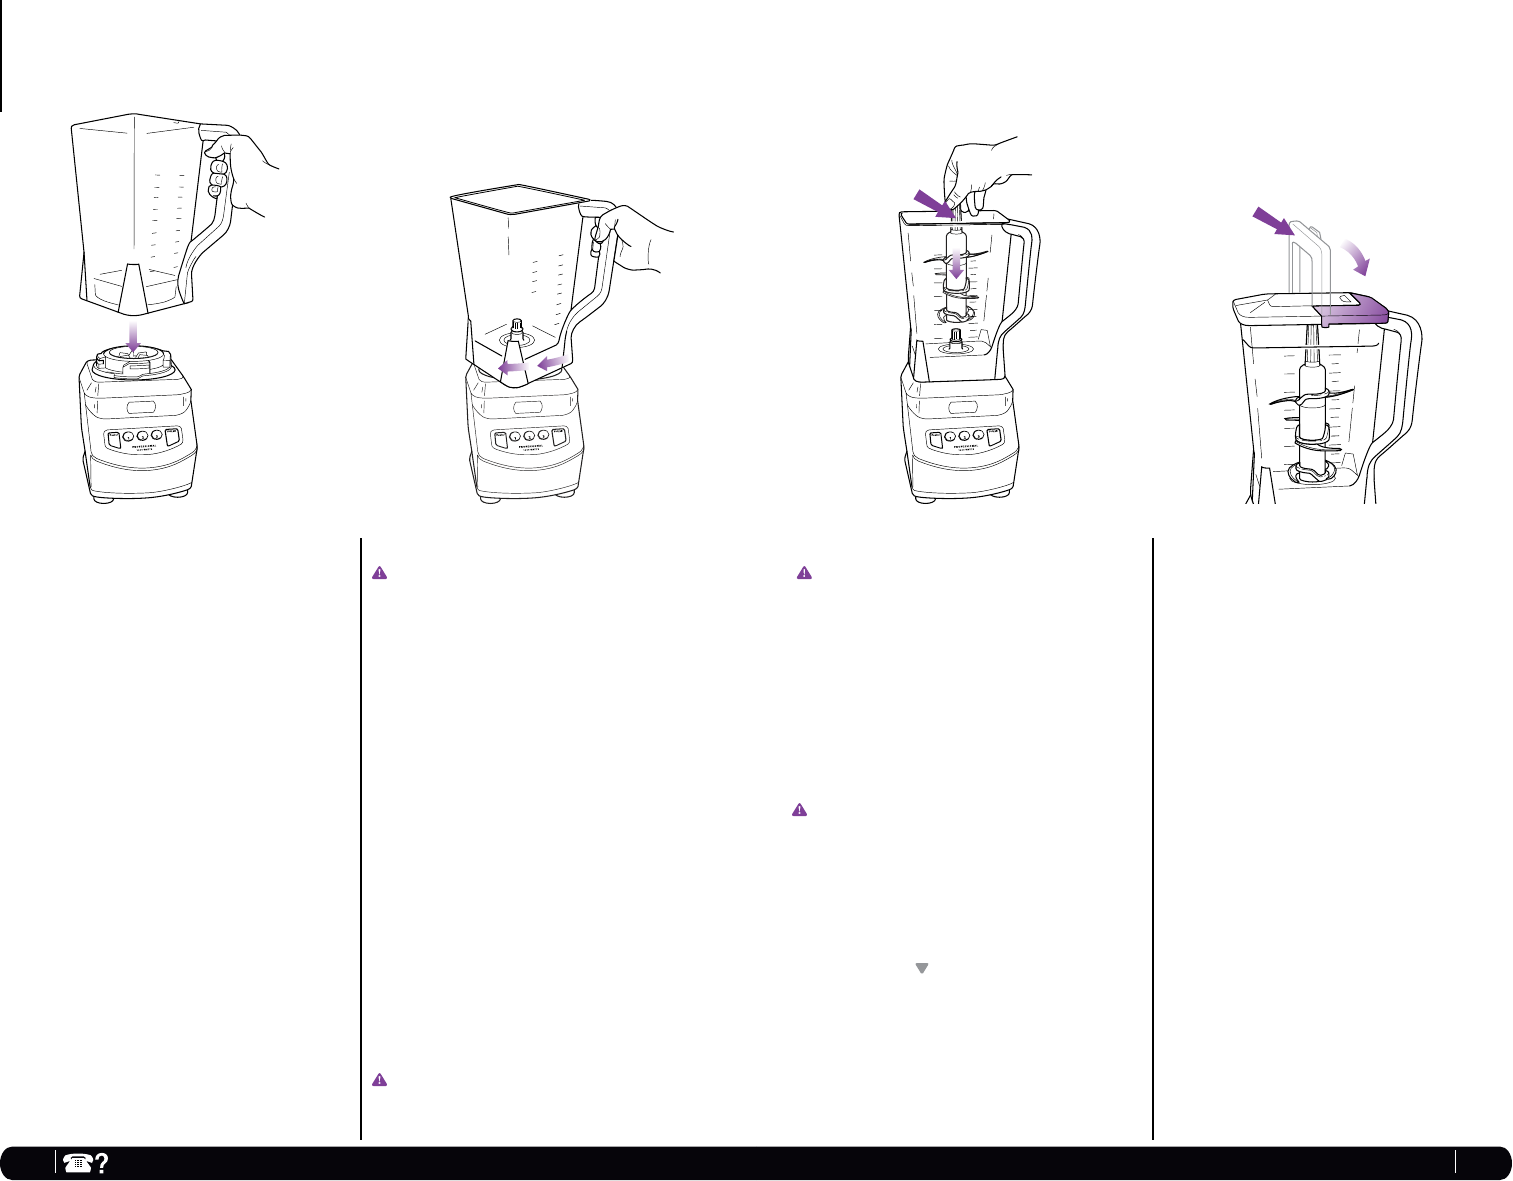
4 Holding the blade assembly by the
shaft, place it onto the gear shaft inside
the pitcher. (Fig. 3) Ensure that the
blade assembly fits snuggly around the
gear shaft and that the blade shaft is
standing straight.
CAUTION: Blades are sharp! Use
extreme caution when handling the
blades. Always hold them by the shaft.
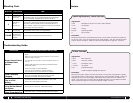
HOW TO USE
IMPORTANT: DO NOT attempt to
operate the appliance without the lid
on.
1 Place pitcher on motor base and insert
the blade assembly.
2 Add the ingredients to the pitcher.
Make sure your total of ingredients
don't go higher than the highest
measured marking line on the side of
the pitcher.
IMPORTANT: Never add ingredients
into the pitcher before placing the
blades in first.
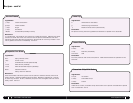
3 Place the lid onto the pitcher with the
locking handle in the upright position
and the pouring spout on the corner
opposite the pitcher handle. Align
the arrows (
) located on the lid and
pitcher handle. Press the lid down into
the pitcher. Press the locking handle
down so that the latches on the lid fit
under the tabs on the pitcher. (Fig. 4)
NOTE: If you need to add additional
ingredients while the blender is
processing, open the pouring spout
cap and pour the ingredients in
through the opening.
4 Plug the power cord into the electrical
outlet and press on the power button.
NOTE: As a safety feature, the power
button will blink quickly and the motor
will not work if the pitcher and lid are
not secured in place When the pitcher
and lid are installed properly, the power
button will blink slowly, indicating that
the blender is ready for use.
5 Select the speed according to your
blending requirements:
• Use the speed 1 button for
processing and mixing.
• Use the speed 2 button for blending
and ice crushing.
• Use the speed 3 button for pureeing
and liquifying.
• Use the pulse button for controlled
chopping and processing.
*
See Blending Chart.
Locking
Handle
Fig. 1 Fig. 2 Fig. 3 Fig. 4