


Page 4
MODELS QTXEN050 • QTXEN080 •
QTXEN110 • QTXEN150
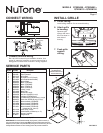
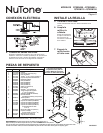
SERVICE PARTS
99043850A
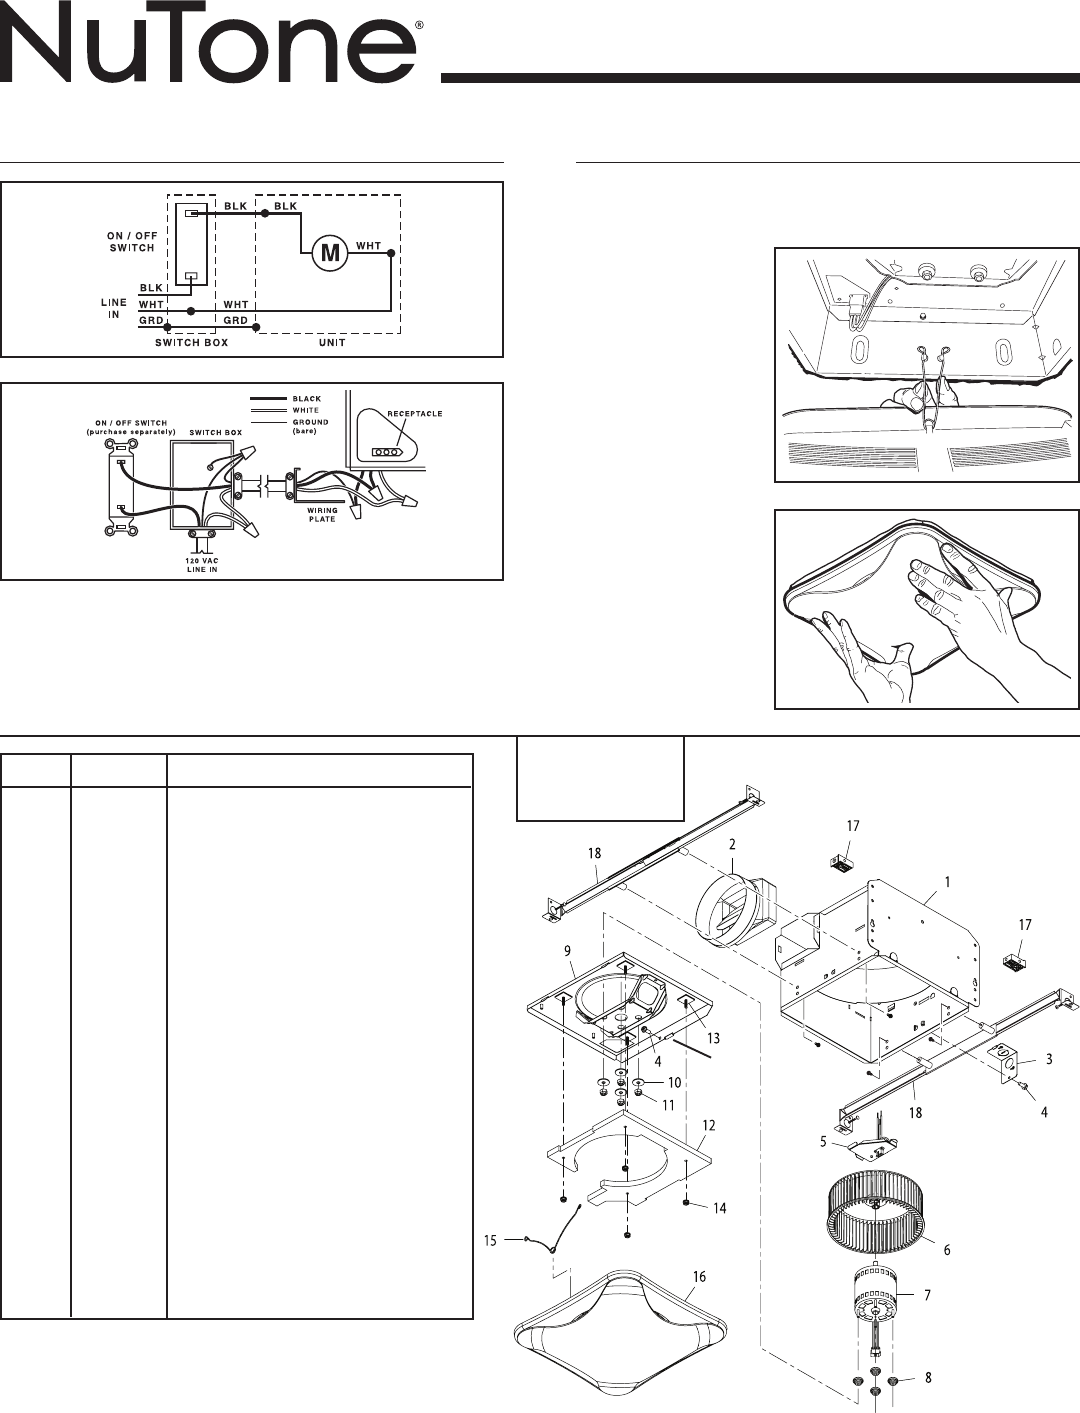
Key No. Part No. Description
1 97016466 Housing
2 97016450 Duct Connector-6"
3 98010102 Wiring Plate
4 99170245 Screw, #8-18 X .375 (2 req’d)
5 97016932 Wire Panel/Harness Assembly
6 99020284 Blower Wheel
7 99080560 Motor (QTXEN050)
99080562 Motor (QTXEN080)
99080580 Motor (QTXEN110)
99080565 Motor (QTXEN150)
8 99100491 Isolator (4 req’d)
9 97016468 Motor Plate
10 99250959 Washer #8 (4 req’d)
11 99260558 Nut, Hex Lock #8-32 (4 req’d)
12 99500397 Insulation (QTXEN150 only)
13 99420648 Threaded Stud (QTXEN150 only) (4 req’d)
14 99260570 Plastic Nut (QTXEN150 only) (4 req’d)
* 97016587 Blower Assembly (QTXEN050)
* 97016588 Blower Assembly (QTXEN080)
* 97016738 Blower Assembly (QTXEN110)
* 97016591 Blower Assembly (QTXEN150)
(includes key nos. 6 thru 14)
15 99140199 Grille Spring (2 req’d)
16 97016460 Grille Assembly (includes key no. 13)
17 99111293 Spacer (2 supplied)
18 QTNHB1 Hanger Bar Kit
TAB
Order service parts by “Part No.” - not by “Key No.”
SERVICE NOTE To remove Blower Assembly: Unplug motor (7). Remove screw (4)
from motor plate (9) flange. Find the single TAB on the motor plate (located next to the
receptacle). Push up near motor plate tab while pushing out on side of housing. Or insert
a straight-blade screwdriver into slot in housing (next to tab) and twist screwdriver.
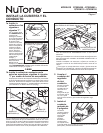
INSTALL GRILLE
6. Attach grille
to housing.
Squeeze grille
springs and insert
them into slots on
each side of
housing.
7. Push grille
against
ceiling.
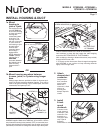
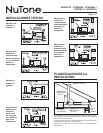
5. Finish ceiling.
Install ceiling material. Cut out around housing.
4. Connect electrical wiring.
Run 120 VAC house wiring to installation location. Use
proper UL approved connector to secure house wiring to
wiring plate. Connect wires as shown in wiring diagrams.
CONNECT WIRING
Replacement parts can
be ordered on our
website. Please visit us
at www.nutone.com