


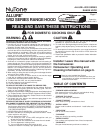


Page 3
ALLURE
®
WS2 SERIES
RANGE HOOD
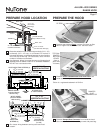
PREPARE THE HOOD
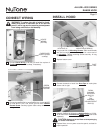
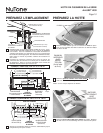
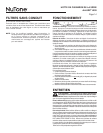
4 Remove either top or back wiring knockout and install
approved
Electrical Cable Clamp.
ELECTRICAL
CABLE CLAMP
Ducted Installation - Skip to Step 11
.
The following Steps (5 thru 10) are for
NON-DUCTED INSTALLATION ONLY.
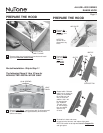
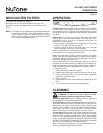
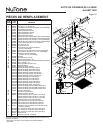
PREPARE THE HOOD
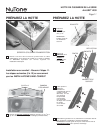
6 Remove Air
Chute - held in
place with one
(1) screw.
NOTE: Be
careful not to
disconnect any
wires.
AIR CHUTE
5 Remove Light Panel - held in place with (3) #8 screws and
(2) #8 screws. Disconnect light assembly wire harness
(white connector).
(3) #8 SCREWS
LIGHT
PANEL
(2) #8 SCREWS
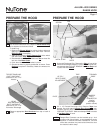
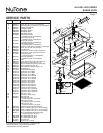
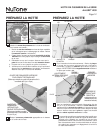
8 Rotate baffle. Reinsert
baffle into air chute (as
shown) so that baffle
fits all the way into
into air chute. An
audible “click” will
be heard when
fully installed.
This will direct
air flow through
the non-ducted
slots on top
of hood.
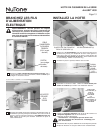
9 Re-install air chute and screw,
re-connect wire harness, and replace light panel.
NOTE: Be careful not to trap wires between Support Fin
and light panel.
SLOTS
7 Remove Baffle
from air chute.
Tabs will
disengage
from
Slots.
SUPPORT FIN
TABS
BAFFLE