


H O W T O C L E A N A N D C A R E F O R Y O U R O M E G A J U I C E R
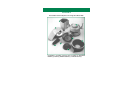
STEP 1 Follow disassembling instructions as explained previously.
STEP 2
Wash parts in Hot water. No detergent required, but mild detergent
may be used if desired. Bowl, plunger, cover and clutch nut require only
light rinsing.
STEP 3 Wash cutter blade and strainer basket under running water.
Stiff brush may be used to loosen any food residue.
STEP 4 If desired, all stainless steel parts may be cleaned in the dishwasher.
The top, bowl or plunger should be placed on the top rack only.
STEP 5 To remove pulp debris from the strainer basket, simply scrape
out by hand or with a spoon. The more pulp removed before adding water
will aid in cleaning. Use a plastic brush to scrub while placing the strainer
basket under running water.
STEP 6 Towel dry all parts before assembling again.
STEP 7 After repeated use, mineral stains may begin to appear on the
juicer parts that come in contact with juice. Immerse all removable parts
and completely submerge in water overnight with a solution of eight table-
spoons of Cascade or similar dishwasher detergent per gallon of water.
(Re m e m b e r, don’t immerse the motor base housing).
STEP 8 If juicing daily, it is recommended to soak parts overnight as
mentioned above, on a weekly basis. If this precaution is not taken the
openings in the mesh screen of the basket will start to get smaller and
make the juicer less efficient.
STEP 9 Your Omega Juicer never needs lubrication of any kind.
SPECIAL NOTE: Should your Omega Juicer stop running or not
start when you turn the machine on, it is most likely due to the fact
that the electrical overload switch has been tripped. The reset switch
is located on the bottom of the juicer. Simply push the switch to
reset the machine and the machine should now function normally.
HELPFUL HINTS
• Make sure the machine is running at full speed before beginning to juice.
• Do not force feed the juicer. For most fruits and vegetables a slow, steady
push down the chute will work best.
• T h e re is no need to cut into sections a fruit or vegetable that will fit
whole into the feeder chute. If it must be cut, cut only into large pieces
that easily fit down the feeder chute.
• When making a drink that uses a combination of more than one fruit
or vegetable, we suggest alternating the various fruits or vegetables when
placing them in the machine. For example: Carrot Apple Juice — place
one or two pieces of carrot in feeder chute, then a piece or two of apple.
Keep alternating in this manner.
•
When juicing leafy greens we suggest that you twist and roll the green
into a ball the size of a golf ball. Always place the greens into the juicer
first, followed by crisper vegetables such as carrots, celery, etc.
•
When juicing any very soft fruits and vegetables, such as tomatoes,
grapes and peaches, we suggest that you alternate with firmer fruits
and vegetables.
•
Cleaning The Fruits and Vegetables: Before you begin juicing,
thoroughly wash all dirt and sprays from the fruits and vegetables.
A vegetable brush can be used to clean carrots, celery, etc. Cut away
any decaying or diseased portions of the fruits or vegetables.
•
Preparing The Fruits and Vegetables: It is not necessary to peel
your fruits and vegetables as many of the valuable food elements are
under the surface near the skin. The only exceptions are cucumbers,
pineapples, oranges and grapefruit. These should be peeled.