


2 PELCO Manual C1433M (6/95)
3.0 TI57 THERMAL INSULATION
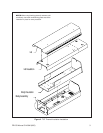
NOTE: The camera mounting sled must be
removed for proper installation of the thermal
insulation, therefore, it should be done prior to
the enclosure installation. (- 1, -2, -3; heater/
blower/wiper kits must be removed prior to ther-
mal insulation installation.)
The TI57 thermal insulation sheets are designed to be
used with both 23-inch and 29-inch EH5700 and
EH5700L Series enclosures. If insulation is required
for an 23-inch enclosure, the excess insulation must be
removed along the factory-marked perforation. For 29-
inch installations, no trimming is necessary. To install
the thermal insulation, perform the following steps:
3.1 BODY INSULATION INSTALLATION
1. Remove the necessary punch-out cable-feed pieces
from the insulation pad depending on the type of en-
closure (EH5700 or EH5700L series) being used. Re-
move the vent area pieces for (-1, -2, -3) ventilation
through the enclosure. (See Figures 1 and 2.)
2. To adjust the length of the insulation pad, tear the
insulation along the perforations from the end of the
pad to fit either the 23-inch standard or Legacy
®
ver-
sion of the enclosure.
3. Position the pad around the press nuts in the center
of the body by folding the pad along its length. Posi-
tion the insulation punch-out(s) to closely match the
position of the press nuts.
4. Remove the adhesive backing, and carefully lay the
insulation in the body of the enclosure, pressing
firmly, taking care not to crease the insulation.
5. The insulation is very soft and will conform as needed
during the installation of the camera and lens.
3.2 LID INSULATION INSTALLATION
1. Unlatch the enclosure lid and raise.
2. Pop the gas spring off of the lid at the ball-joint con-
nection. Make sure the lid is supported and not al-
lowed to lay completely open - doing so will dam-
age the lid hinge.
3. Remove the punch-out pieces from the insulation pad
that accommodate the sun shroud screws and the lid
arm on the inside of the enclosure lid.
4. Adjust the necessary length of the pad according to
the length of the enclosure.
5. Remove the adhesive backing, and carefully lay the
insulation in the lid of the enclosure, pressing firmly,
taking care not to crease the insulation.
6. Position the insulation around the sun shroud fas-
teners on the inside of the lid. It may help to hold the
insulation in a folded manner while positioning.
7. Snap the gas spring ball joint to the lid, close the
enclosure.
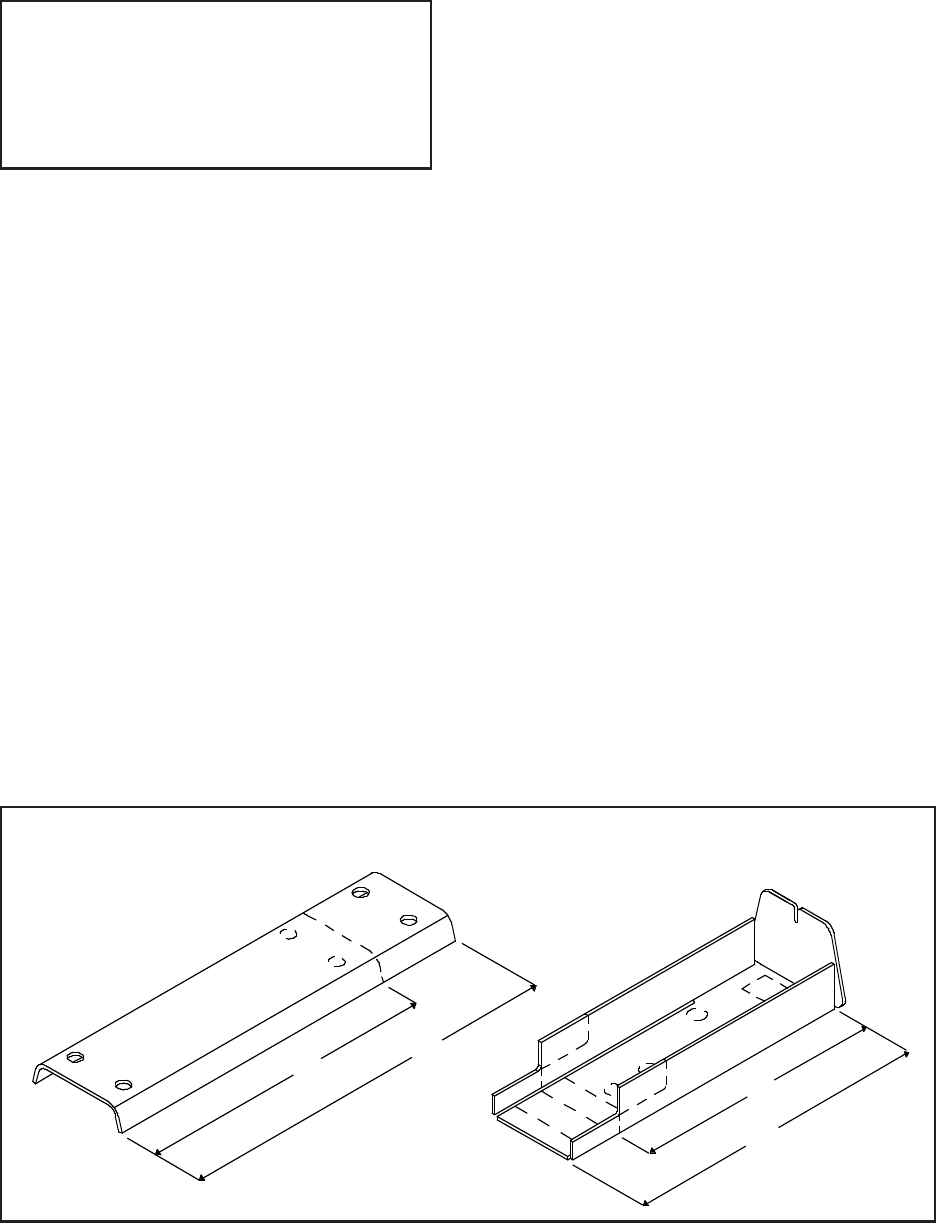
Figure 1. Lid and Body Insulation Sheets
23-inch
29-inch
23-inch
29-inch