


5
INSTALLATION
Installation of filter should only be done by qualified, li-
censed personnel.
Filter Assembly
Filter mount must:
• Be solid, level, rigid, vibration free, and provide for ad-
equate drainage.
• Be as close to pool as possible to reduce pressure loss
from pipe friction.
• Provide weather and freezing protection.
• Provide adequate ventilation to prevent motor from
overheating.
• Provide space and lighting for easy access for servicing
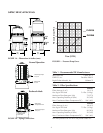
pump and piping (See Figure 1, Page 4, for space
requirements).
Piping (See Figure 1B for correct connections):
NOTICE: Make sure that the filter and all piping can be
drained for winterizing. See “Winterizing”, Page 9.
• Piping must conform to local/state plumbing and sani-
tary codes.
• Use teflon tape, Plasto-Joint Stik
®1
, or Silastic RTV
#732
®
on all male connections of plastic pipe and fit-
tings. DO NOT use pipe compounds on plastic pipe; it
will cause the pipe to crack. Do not use sealant on
unions – assemble them dry and hand tight.
• Support pipe independently to prevent strains on filter.
• Fittings restrict flow; for best efficiency use fewest pos-
sible fittings.
• For ease of maintenance, Sta-Rite union couplings are
provided to connect the piping to the filter inlet and
outlet ports.
• Keep piping tight and free of leaks: pump suction line
leaks may cause trapped air in filter tank or loss of
prime at pump; pump discharge line leaks may show
up as dampness or jets of water.
• NOTICE: Overtightening can crack filter ports.
Valves:
• A check valve installed ahead of filter inlet will prevent
contaminants from draining back into pool.
• A check valve installed between filter and heater will
prevent hot water from backing up into filter and de-
forming internal components.
• For installation allowing backwashing, install Sta-Rite
Two Position Slide Valve or Multiport Selector Valve
with filter. See Table 3. If you intend to clean your filter
according to “Module Cleaning Procedure”, Page 7, no
slide or multi-port valve is required. See Figure 1B,
Page 4, for correct water flow when connecting pipe.
• Filter ports and valve ports are furnished with union
connections. DO NOT use pipe sealants on union col-
lar (nut).
1
Lake Chemical Co., Chicago, IL
• Use care before assembly not to damage union sealing
surfaces or O-Ring.
• To allow recirculation during precoat (if precoat pot is
used), install a recirculation line with shut-off between
pad return line and pump suction.
Electrical:
• BE SURE filter grounding and bonding meets local and
National Electrical Code standards. All wiring, ground-
ing and bonding of associated equipment must meet
local and National Electrical Code Standards.
INITIAL START-UP
Be sure pump is OFF
before starting procedure.
Do not operate these filters at more than 50 PSI
(345 kPa) under any circumstances!
To prevent serious damage to the element
fabric, NEVER run your DE filter without a
diatomaceous earth precoat!
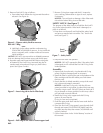
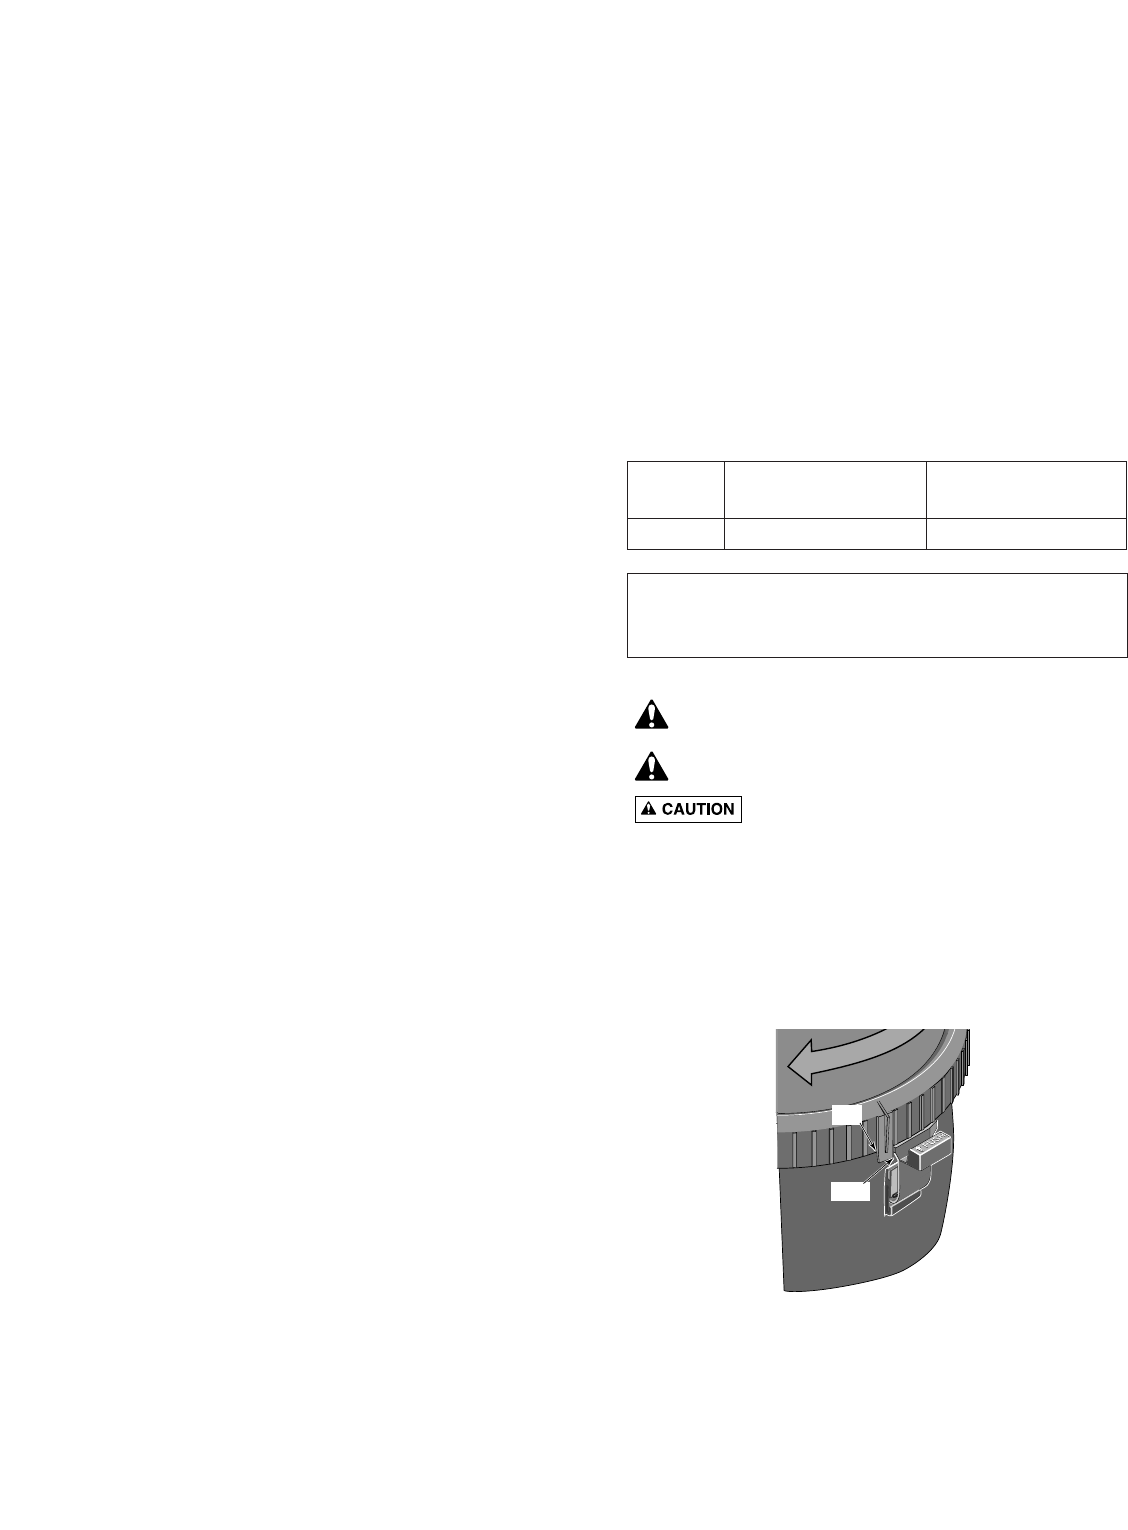
1. Securely lock Posi-Lok™ ring in place by rotating ring
CLOCKWISE until it “clicks” past the safety latch (see
Figure 3). Stop turning as soon as the ring clicks past the
latch. The ring may feel slightly loose, but it will tighten
up when pump is on and filter is under pressure.
2. Fill trap on pump with water.
3. Open air release valve on top of filter.
4. Open isolation valves.
5. Start pump to purge air from system.
6. When steady stream of water comes from air release
2149 1195
Latch
Tab
Figure 3 – Rotate Posi-Lok™ Ring until tab locks
behind the safety latch.
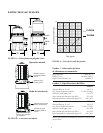
Port Multi-port Valve Plastic Slide Valve
Size Part Number Part Number
2" 18201-0300 14935-0300
TABLE 3 - Sta-Rite valves for use with Model PLDE36
and PLDE48 filters
NOTICE: Use of valves other than those listed above
could cause reversed water flow through filters and
damage to internal filter components.