


INSTALLATION/OPERATION
4
It is essential that the appliance be operated only when adequate ventilation is provided. Your ventilation hood
should be properly maintained. A qualified installation professional should ensure that the hood is operating
properly in conjunction with the appliance. Inadequate ventilation may not properly evacuate appliance all
emissions. Excessive or unbalanced ventilation may cause drafts, which could interfere with proper operation of
the pilot and burners. Leave at least 18 inches (46 cm) of open space between the flue of the appliance and the
intake of the exhaust hood.
CAUTION
Ensure that your ventilation system does not cause a down draft at the appliance’s flue
opening. A down draft will not allow the appliance to exhaust properly and will cause
overheating, which may cause permanent damage. Damage caused by down drafts will not
be covered by the warranty. NEVER allow anything to obstruct the flow of combustibles or
ventilation exiting the appliance. NEVER place anything on top of the flue area, or block
the flue in any way.
NOTICE
NEVER connect the ventilation blower or hood directly to the flue of this appliance. The
resulting increased flow of air through the combustion system will cause improper
operation, poor temperature recovery, poor ignition and could extinguish the pilot.
Initial Adjustments
After your appliance has been properly installed as described in the installation section of this manual, it will
need to be adjusted to ensure that it will perform as designed. These adjustments must be performed by a
qualified person. To perform these adjustments the following tools will be needed:
• Manometer • Digital Thermometer (Temperature Probe)
• DC Millivolt Meter
Before you begin filling and adjusting the appliance, perform the
following visual checks:
a. After the appliance is in its permanent location,
check the levelness. Any additional leveling that
is necessary can be performed as previously
described.
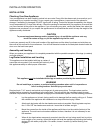
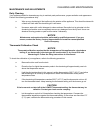
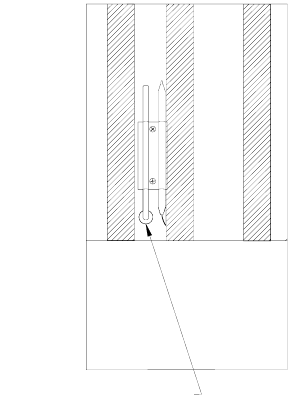
b. Check the temperature probe and high limit bulb
(in the tank) to ensure that the mounting screws
are tight.
c. Review the installation portion of this manual and
ensure that all steps have been followed and
executed properly.
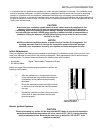
Burner Ignition Systems
CAUTION
Before proceeding any further, fill the tank with WATER. Water is used for the installation
adjustments because the temperature will never exceed 212°F (100°C), thereby allowing
plenty of adjustment time. Never let the water level go below the “OIL LEVEL” mark
stamped on the tank.
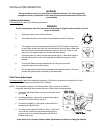
Ensure that these
Parts are not loose