


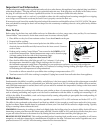
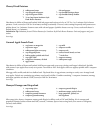

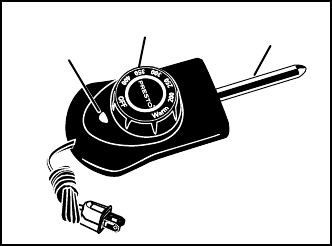
Heat Selector
Control Master
heat control
Pilot Light
Probe
Important Cord Information
Connect the power supply cord to a polarized outlet only. As a safety feature, this appliance has a polarized plug (one blade is
wider than the other). This plug will only fit in a polarized outlet one way. If the plug does not fit fully in the outlet, reverse
the plug. If it still does not fit, contact a qualified electrician. Do not attempt to defeat this safety feature.
A short power supply cord (or cord set) is provided to reduce the risk resulting from becoming entangled in or tripping
over a longer cord. Extension cords may be used if care is properly exercised in their use.
If an extension cord is used, the marked electrical rating of the extension cord should be at least 13A/125V/1625W. The exten-
sion cord should be arranged so that it will not drape over the countertop or tabletop where it can be pulled on by children
or tripped over.
How To Use
Before using for the first time, wash skillet and cover in dishwasher or in hot, soapy water, rinse, and dry. Do not immerse
Control Master
heat control or let the heat control come in contact with any liquid.
1. Place skillet on a dry, level, heat resistant surface. Cover should
not be on the pan.
2. Prepare food for cooking.
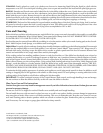
3. Insert the Control Master
heat control probe into the skillet so the two
electrical pins on the skillet are fully inserted into the heat control. Connect
cord to outlet.
4. Preheat pan by turning Control Master
heat control to the LOWER of 350˚
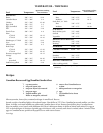
or the desired temperature. Desired temperature ranges can be found on page
4. Always preheat at the low side of the temperature range.
Note: Never preheat at a temperature that exceeds 350°.
5. Place food in skillet when pilot light goes off (3 to 5 minutes). Cook using
the temperature-timetable on page 4. Begin cooking at the low side of
the indicated temperature range shown. Depending on your preferences and tastes, you may wish to adjust the
temperature to the high side of the range after 3 to 5 minutes of cooking. During cooking, pilot light will go on and
off indicating desired temperature is being maintained.
Use wooden or silicone utensils in your skillet when cooking at temperatures above 375°.
6. Turn heat control to OFF when cooking is completed. Unplug heat control from wall outlet then from appliance.
Skillet Basics
Fundamental to the skillet’s versatility, portability, and efficiency is the heat control, which provides a thermostat-controlled
heating process similar to that of a conventional oven. With the control set at 350°, for example, the skillet will heat continu-
ously until that temperature is reached; then it will cycle on and off to maintain the temperature. Settings on the heat control
range from Warm to 400°.
The basic procedures for cooking in the skillet are quite similar to those of conventional cooking. Some cooking methods
such as steaming and baking may require a rack be used in combination with the skillet. A cooling rack measuring 8″ x 8″
will fit in the skillet. If unavailable, a rack can be improvised by turning a disposable pie pan upside down and punching 10
to 12 holes in the bottom.
PAN FRYING OR SAUTÉING: As a general rule, vegetables are sautéed at 225° to 250° and meats are fried at 325° to 375°.
The skillet is often preheated so that when oil and food are added, it is hot enough to evenly brown and seal in juices, assur-
ing the best flavor. Butter should always be preheated at Warm, even if the food will be cooked at a higher setting. Typically
frying or sautéing is done without the cover.
SIMMERING: Simmering is cooking at a heat level slightly below the boiling point. In an electric skillet, foods will heat to
simmering at some point between the Warm setting and 200°. Heat the skillet at 350° until the food boils; then place cover
on pan and reduce the heat to the simmer level by turning the heat control down until the pilot light goes out.
BRAISING OR POT ROASTING: This cooking method involves browning food, usually meat or vegetables in oil, butter,
margarine, etc. and then simmering in a small amount of liquid over low heat. To brown meat and/or vegetables use a tem-
perature between 325° and 350°. After browning, simmer food as instructed above.
2