


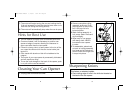

5
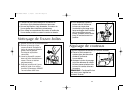
2. Remove complete cutting
assembly as shown. Push
piercing lever up and to the
left. It will pop out of a
locked position.
3. Wash cutting assembly in
hot, soapy water. Rinse and
dry thoroughly.
4. Wipe body of can opener
with damp cloth. NEVER
immerse the can opener
in water.
5. To reassemble, place knob
on back of cutting assembly
into large end of keyhole as
shown. Push to the right until
it snaps into place.
4
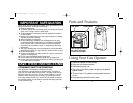
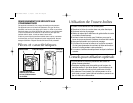
7. The motor will begin turning the can and cutting the lid.
(It is not necessary to hold the piercing lever down or to
hold the can during the cutting action.)
8. The motor will automatically stop when the can is open.
• The can opener will easily open all standard size cans.
• On some models it will be necessary to position can
opener at edge of counter, allowing for clearance to
open cans taller than the can opener.
• If there is a bump, dent, or heavy seam in the rim of the
can, open the other end of the can or start cutter just
beyond it.
• Cans made with aluminum lids will not adhere to the
magnet.
• The motor of your can opener is permanently lubricated
and will require no oiling.
• To use the cord storage on the back of the opener, push
in or pull out the cord as needed.
Hints for Best Use
1. Unplug cord from electrical outlet.
Cleaning Your Can Opener
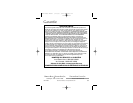
This feature on selected models.
1. Place cutting edge of knife in the knife slot located on
the back of the can opener.
Sharpening Knives
840112900 ENv01 3/18/03 3:21 PM Page 4