


9
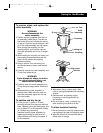
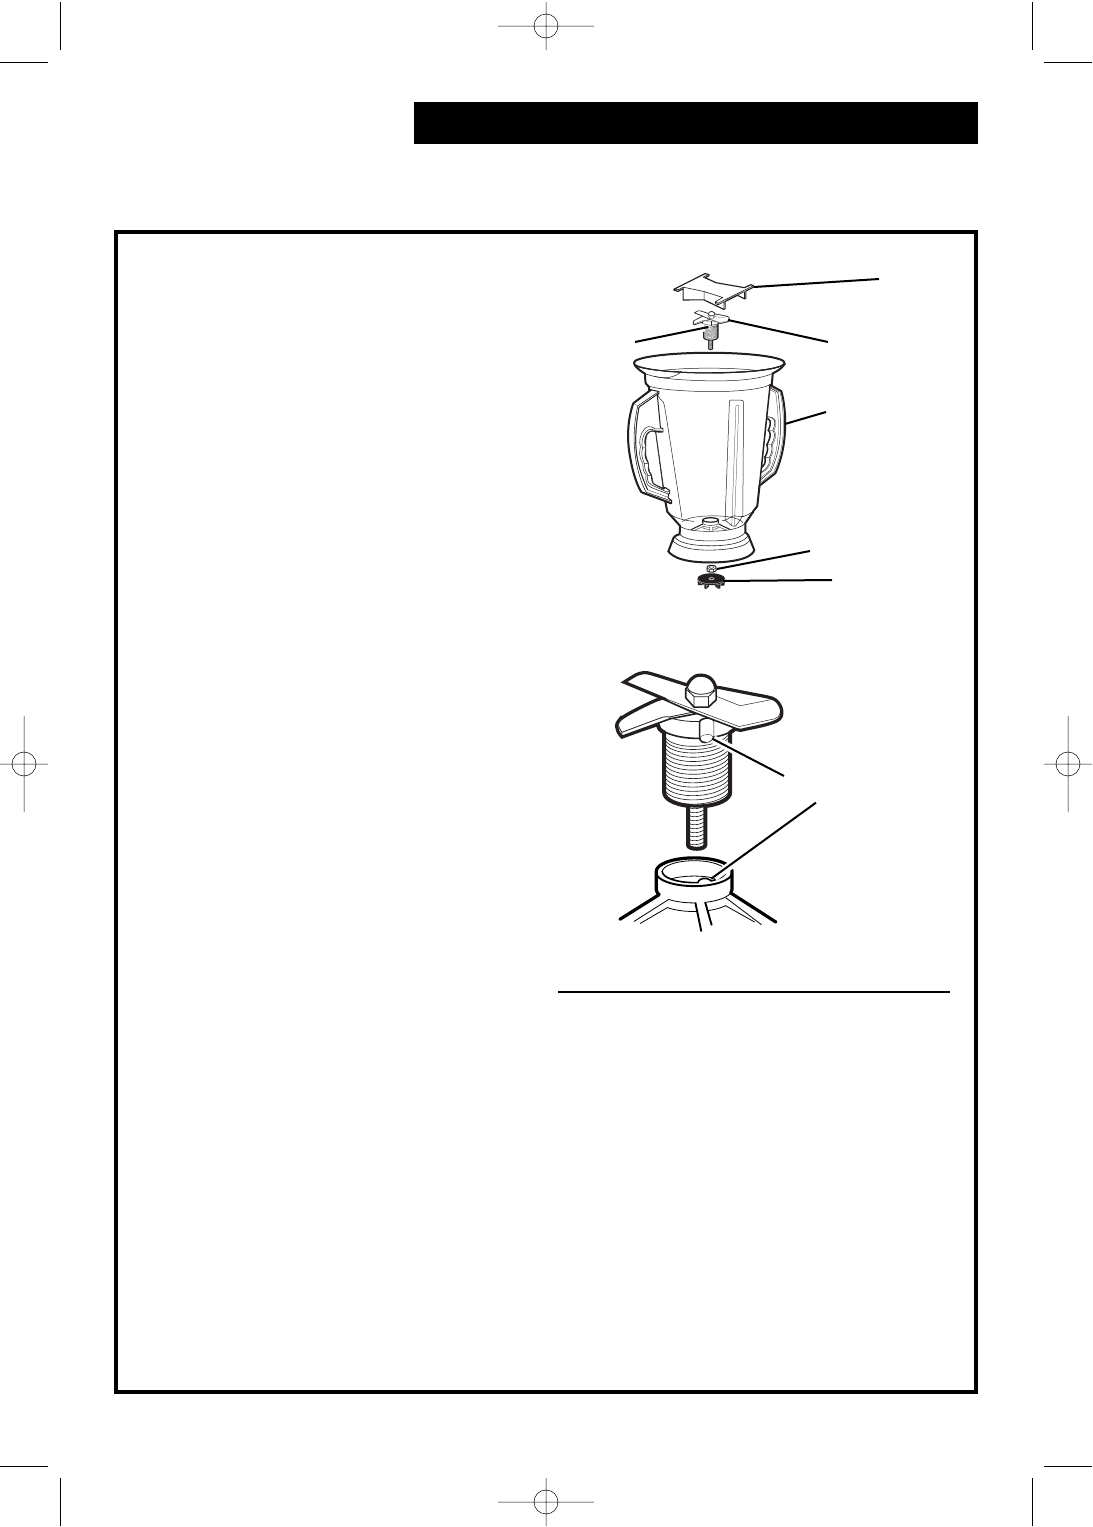
Caring for the Blender
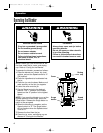
To remove, clean, and replace the
cutter assembly
WARNING:
Do not disassemble the
cutter assembly.
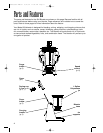
1. Position the tool (supplied) over the cut-
ter assembly inside the jar. The tabs on
both ends of the tool fit inside the vanes
on the jar. Push tool as far down as it will
go. If the cutter assembly can still rotate
when turning the coupling, turn the
coupling slightly until the tool seats on
the cutter assembly and it can no longer
move.
2. While holding the tool with one hand, turn
the coupling counterclockwise with the
other hand to loosen the coupling.
Remove coupling.
3. Using a wrench, turn the locking nut
counterclockwise to loosen and remove
the nut.
4. Carefully remove the cutter assembly and
O-ring from inside the jar.
WARNING:
Cutter blades are sharp; to reduce
the risk of personal injury, use
caution when handling.
5. Carefully clean the cutter assembly and
O-ring using hot soapy water. Rinse and
dry.
6. Reassemble the cutter assembly in
reverse order. Make sure the notch on
the cutter assembly aligns with the tab
in the jar bottom.
To sanitize and dry the jar
1. Fill the jar with
1
⁄2 gallon (1.9 liters)
sanitizing solution and place on machine
base. Replace cover and dosing cup, and
run on speed “5” for five seconds. Empty
jar. Remove any remaining
moisture from the cutter assembly by
replacing the empty jar and cover on
machine base and running on speed “5”
for five seconds.
2. Wipe down the jar exterior with a soft
cloth or sponge dampened with sanitizing
solution.
3. Sanitize cover and dosing cup by
immersing in sanitizing solution for
two minutes.
4. Do not rinse jar, cover, or dosing cup
after sanitizing, but allow to air dry.
To clean machine housing
1. Do not immerse or use high pressure hos-
ing equipment to clean the machine base.
2. Wipe the exterior of the machine with a
damp cloth or sponge.
Align notch
with tab
Tool
Knife
assembly
Container
Locking nut
Coupling
O-ring
840065000-1ENv01 9/27/04 11:26 AM Page 9